Content .. 2117 2118 2119 2120 ..
Chrysler 300/300 Touring/300C, Dodge Magnum. Manual - part 2119
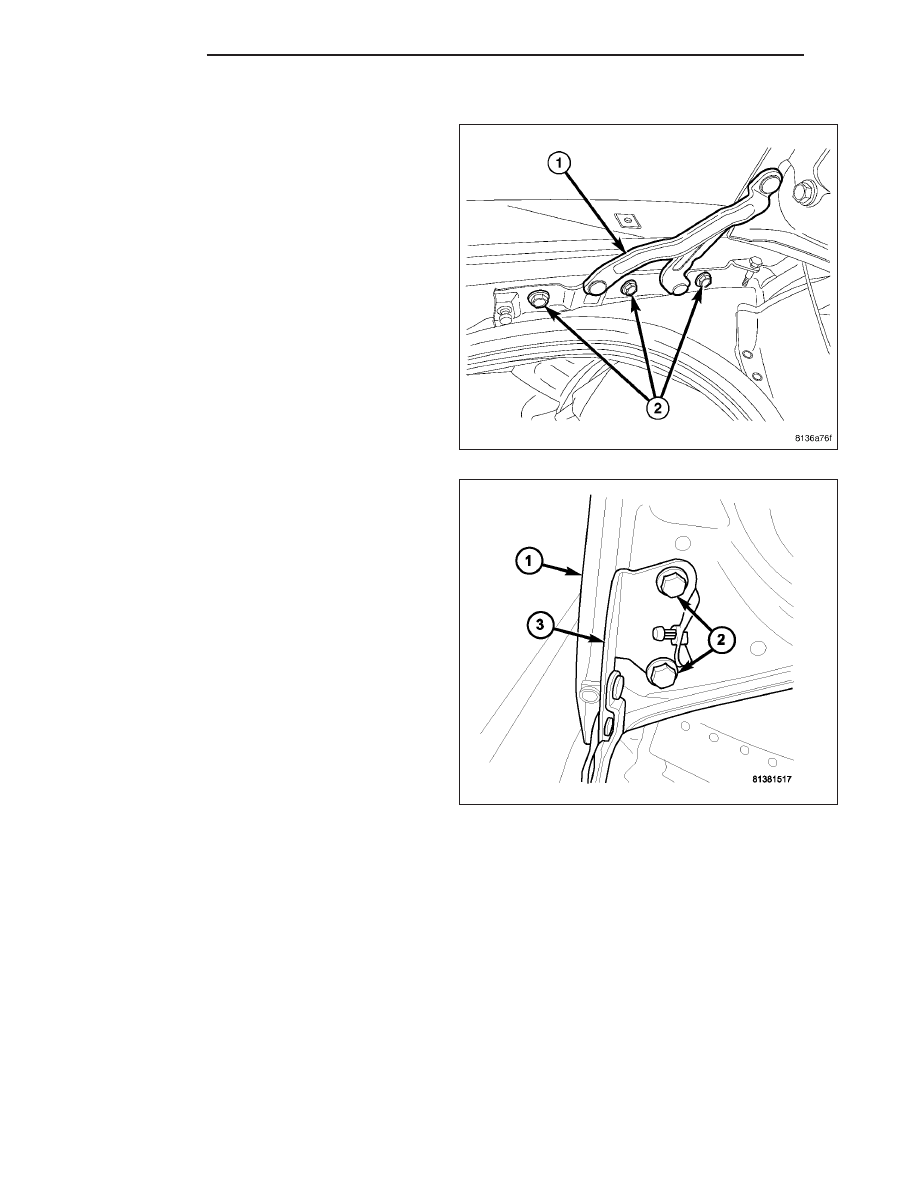
INSTALLATION
1. Position the lower bracket of the deck lid hinge (1)
to the drain trough on the vehicle.
2. Install and tighten the three screws (2) that secure
the hinge to the drain trough. Tighten the screws to
28 N·m (21 ft. lbs.).
3. Position the deck lid (1) to the upper hinge bracket
(3) on the vehicle.
4. Install and tighten the two screws (2) that secure
the hinge to the deck lid. Tighten the screws to 28
N·m (21 ft. lbs.).
5. Reinstall the support cylinder onto the deck lid
hinge. (Refer to 23 - BODY/DECKLID/CYLINDER -
DECKLID SUPPORT - INSTALLATION).
6. Remove the fixture being used to support the deck
lid for service and close the deck lid.
7. Adjust the deck lid hinge position as necessary to
achieve proper spacing and operation.
23 - 24
DECKLID
LX