Chrysler 300/300 Touring/300C, Dodge Magnum. Manual - part 149


  Index      Chrysler     Chrysler 300/300 Touring/300C, Dodge Magnum - service repair manual


Search            


Content   ..  147  148  149  150   ..


Chrysler 300/300 Touring/300C, Dodge Magnum. Manual - part 149


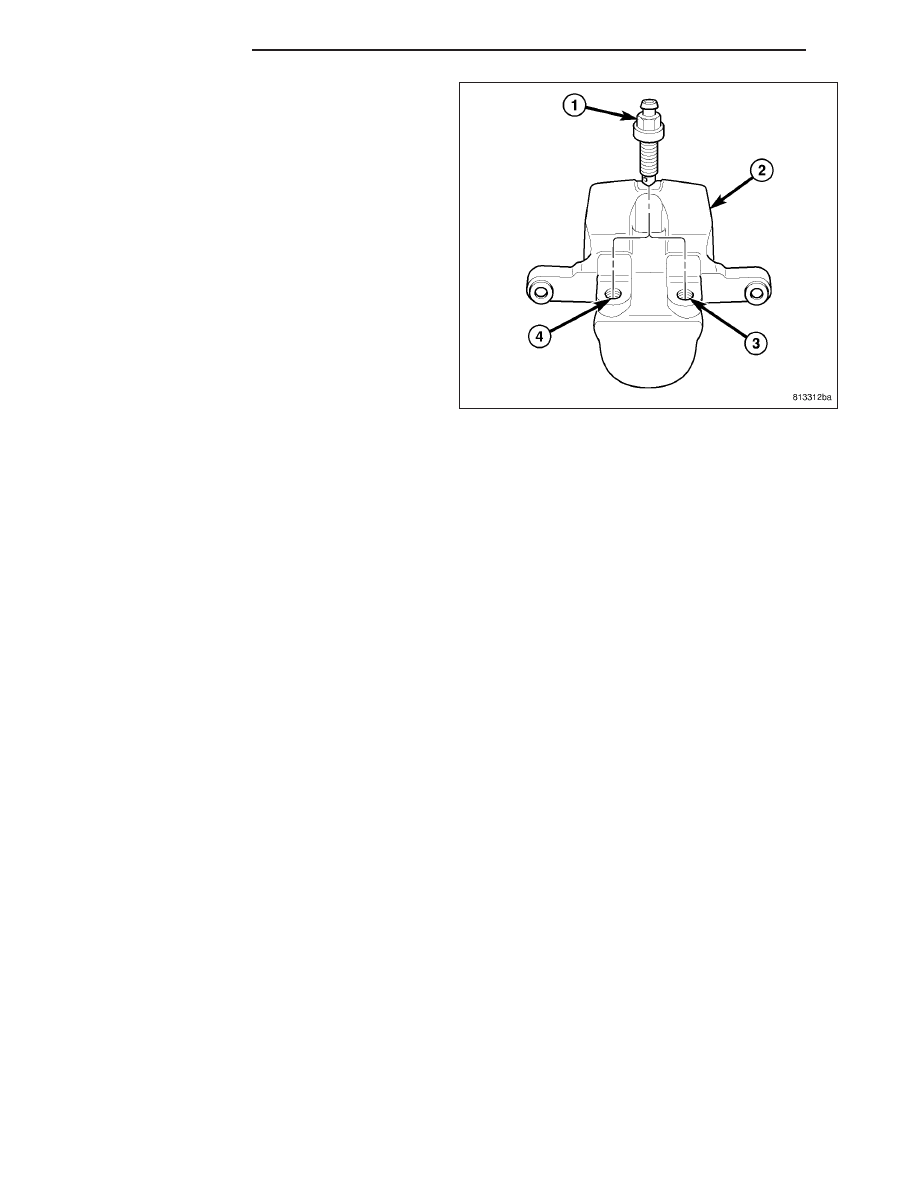
8. Remove caliper bleeder screw (1) from caliper

housing (2).

9. Clean piston bore and drilled passage ways with

alcohol or a suitable solvent. Wipe it dry using only
a lint-free cloth.

10. Inspect both piston and bore for scoring or pitting.

NOTE: It is not recommended to hone caliper
bore.

The

anodized

coating

would

be

compromised.

CLEANING

WARNING: Dust and dirt accumulating on brake parts during normal use may contain asbestos fibers from
production or aftermarket brake linings. Breathing excessive concentrations of asbestos fibers can cause
serious bodily harm. Exercise care when servicing brake parts. Do not sand or grind brake lining unless
equipment used is designed to contain the dust residue. Do not clean brake parts with compressed air or
by dry brushing. Cleaning should be done by dampening the brake components with a fine mist of water,
then wiping the brake components clean with a dampened cloth. Dispose of cloth and all residue containing
asbestos fibers in an impermeable container with the appropriate label. Follow practices prescribed by the
Occupational Safety And Health Administration (OSHA) and the Environmental Protection Agency (EPA) for
the handling, processing, and disposing of dust or debris that may contain asbestos fibers.

To clean or flush the internal passages of the brake caliper, use fresh brake fluid or Mopar

T

Non-Chlorinated Brake

Parts Cleaner. Never use gasoline, kerosene, alcohol, oil, transmission fluid or any fluid containing mineral oil to
clean the caliper. These fluids will damage rubber cups and seals.

INSPECTION

Inspect the disc brake caliper for the following:

Cracked or damaged housing

Brake fluid leaks in and around boot area

Ruptures, brittleness or damage to the piston dust boot

If caliper fails inspection, disassemble and recondition caliper, replacing the seals and dust boots or replace caliper.

ASSEMBLY

CAUTION: Dirt, oil, and solvents can damage caliper seals. Ensure assembly area is clean and dry.

NOTE: Always use new, clean Mopar

T

DOT 3 Motor Vehicle Brake Fluid or equivalent when assembling

brake caliper.

NOTE: Never use used or old piston seals or boots for reassembly.

5 - 38

BRAKES - BASE

LX

1. Lubricate caliper piston, piston seal (1) and piston

bore (2) with clean, fresh brake fluid.

2. Install NEW piston seal (1) in groove of caliper

bore (2). Seal should be started at one area of
groove and gently worked around and into the
groove using only your clean fingers to seat it.

3. Install NEW dust boot (1) on piston (2) and work

boot lip into groove at top of piston. Stretch boot
downward, straightening boot folds, then move
boot back upward as necessary until folds snap
uniformly into place.

4. Install piston (1) into caliper piston (2) bore, press-

ing piston down to bottom of bore using hand-pres-
sure. Using a piece of wood or wooden hammer
handle may also suffice as long as piston and boot
damage can be avoided. The dust boot will not
seat at this time. Refer to following step.

LX

BRAKES - BASE

5 - 39

5. Seat dust boot (3) in caliper counterbore using

Installer (2), Special Tool 9315, with Handle (1),
Special Tool C-4171. Install dust boot until it bot-
toms. Do not over-seat dust boot or damage will
occur.

6. Install bleeder screw in correct threaded hole. Cal-

iper housing is not side-specific, so it is important
to install bleeder screw in threaded hole that will be
uppermost once caliper is installed on vehicle.
Tighten bleeder screw to 15 N·m (125 in. lbs.)
torque.

7. Install caliper on vehicle. (Refer to 5 - BRAKES/HY-

DRAULIC/MECHANICAL/DISC BRAKE CALIPER -
INSTALLATION)

INSTALLATION

CAUTION: Always inspect brake pads before installing disc brake caliper and replace as necessary. (Refer
to 5 - BRAKES/HYDRAULIC/MECHANICAL/BRAKE PADS/SHOES - INSPECTION)

1. Completely retract caliper piston back into bore of caliper. Use hand pressure or a C-clamp may be used to

retract piston, first placing a wood block over piston before installing C-clamp to avoid damaging piston.

CAUTION: Use care when installing caliper onto disc brake adapter to avoid damaging boots on caliper
guide pins.

2. Push caliper guide pins into caliper adapter to clear caliper mounting bosses when installing.

5 - 40

BRAKES - BASE

LX

3. Slide caliper over brake pads and onto caliper

adapter (3).

CAUTION: Extreme caution should be taken not to
crossthread caliper guide pin bolts (2) when they
are installed.

4. Align caliper mounting holes with guide pins, then

install guide pin bolts (2). While holding guide pins
from turning, tighten bolts to 60 N·m (44 ft. lbs.)
torque.

5. Install banjo bolt (6) attaching brake hose (1) to

caliper (5). Install NEW washers (7) on each side
of hose fitting as banjo bolt is placed through fit-
ting. Thread banjo bolt into caliper and tighten to
50 N·m (37 ft. lbs.) torque.

6. Install tire and wheel assembly (1). Tighten wheel

mounting nuts (3) to 150 N·m (110 ft. lbs.) torque.
(Refer to 22 - TIRES/WHEELS - INSTALLATION)

7. Lower vehicle.

8. Remove brake pedal holding tool.

LX

BRAKES - BASE

5 - 41


Content   ..  147  148  149  150   ..