Chrysler 300/300 Touring/300C, Dodge Magnum. Manual - part 148


  Index      Chrysler     Chrysler 300/300 Touring/300C, Dodge Magnum - service repair manual


Search            


Content   ..  146  147  148  149   ..


Chrysler 300/300 Touring/300C, Dodge Magnum. Manual - part 148


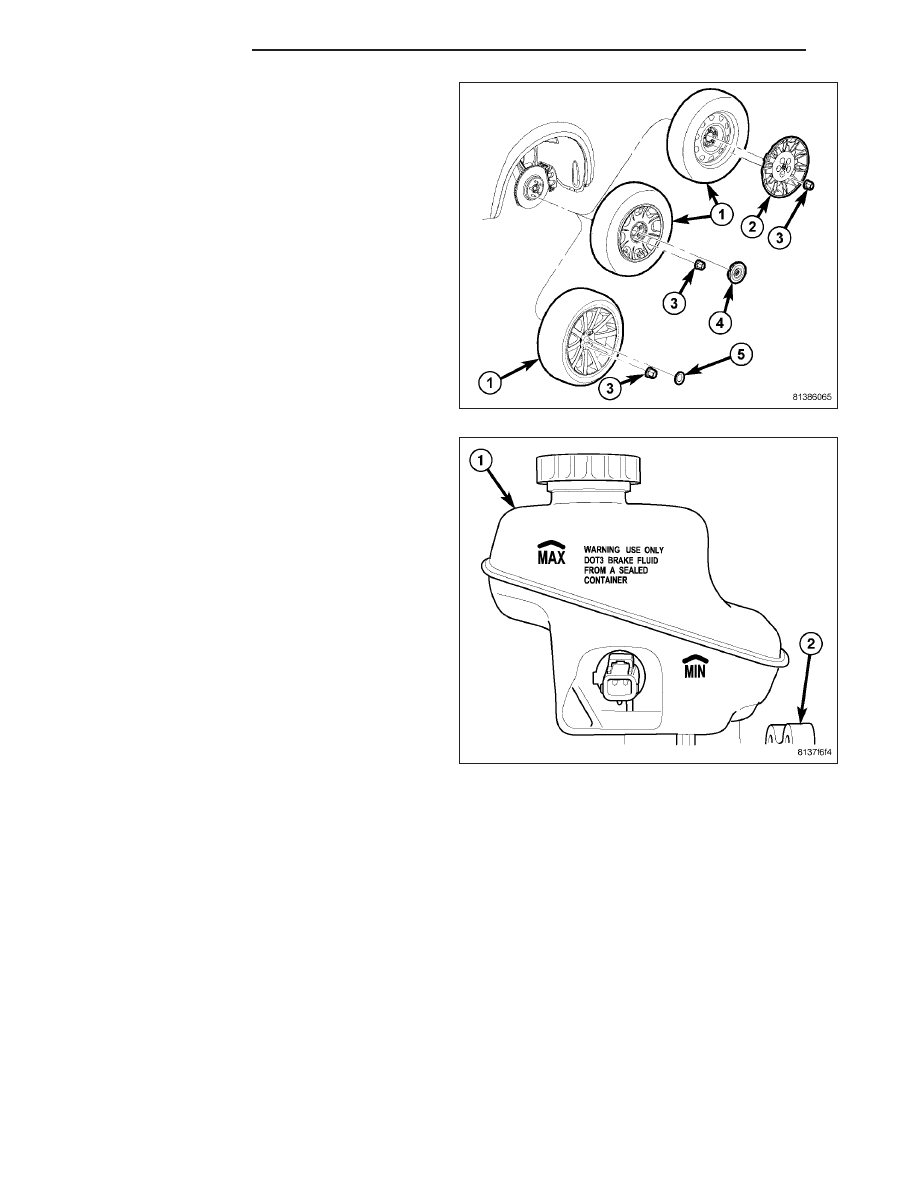
10. Install tire and wheel assembly (1). Tighten wheel

mounting nuts (3) to 150 N·m (110 ft. lbs.) torque.
(Refer to 22 - TIRES/WHEELS - INSTALLATION)

11. Lower vehicle.

12. Pump brake pedal several times to set pads to

caliper and brake rotor.

13. Check and adjust brake fluid level in reservoir (1).

(Refer to 5 - BRAKES/HYDRAULIC/MECHANI-
CAL/FLUID - STANDARD PROCEDURE)

CAUTION: When NEW brake pads have been installed, keep in mind that braking effectiveness might be
somewhat reduced during the first brake applications following installation.

NOTE: When NEW brake pads are installed, they must be burnished (seated) to the rotor. This must be done
to ensure the proper performance of the replacement brake pads.

14. Road test vehicle making several stops to wear off any foreign material on brakes and to seat brake pad lin-

ings. NEW brake pads need to be burnished properly. (Refer to 5 - BRAKES/HYDRAULIC/MECHANICAL/
BRAKE PADS/SHOES - STANDARD PROCEDURE)

5 - 34

BRAKES - BASE

LX

CALIPER - FRONT SINGLE PISTON DISC BRAKE

REMOVAL

NOTE: Before proceeding, (Refer to 5 - BRAKES - WARNING) (Refer to 5 - BRAKES - CAUTION).

1. Disconnect and isolate battery negative cable (2)

from battery post.

2. Using a brake pedal holding tool, depress brake

pedal past its first inch of travel and hold it in this
position. Holding pedal in this position will isolate
master cylinder from hydraulic brake system and
will not allow brake fluid to drain out of brake fluid
reservoir while brake lines are open.

3. Raise and support vehicle. (Refer to LUBRICATION

&

MAINTENANCE/HOISTING

-

STANDARD

PROCEDURE)

4. Remove wheel mounting nuts (3), then tire and

wheel assembly (1).

LX

BRAKES - BASE

5 - 35

5. Remove banjo bolt (6) connecting flexible brake

hose (1) to caliper (5). There are two sealing wash-
ers (7) (one one each side of hose fitting) that will
come off when bolt is removed. Discard these
washers; install NEW washers on installation.

6. While holding guide pins from turning, remove cal-

iper guide pin bolts (2).

7. Remove brake caliper (1) from brake adapter (3)

and pads.

DISASSEMBLY

NOTE: Before disassembling brake caliper, clean and inspect it. (Refer to 5 - BRAKES/HYDRAULIC/ME-
CHANICAL/DISC BRAKE CALIPER - CLEANING) (Refer to 5 - BRAKES/HYDRAULIC/MECHANICAL/DISC
BRAKE CALIPER - INSPECTION)

WARNING: Under no condition should high pressure air ever be used to remove a piston from a caliper
bore. Personal injury could result from such a practice.

CAUTION: Do not use excessive force when clamping caliper in vise. Excessive vise pressure will cause
bore distortion.

1. Drain brake fluid from caliper.

5 - 36

BRAKES - BASE

LX

2. Mount caliper in a vise equipped with protective

jaws.

3. Place a wooden block (2) (padded with approxi-

mately one-inch thickness of shop towels) in front
of caliper (1) piston as shown. Padded block
should be sized to allow piston to push out of bore
far enough to be removed by hand after being
loosened by air pressure, yet large enough to keep
piston from coming completely out. This will cush-
ion and protect caliper piston during removal.

WARNING: Do not place face or hands near caliper
and piston if using compressed air pressure to
remove piston. Do not use high pressure.

4. Apply low pressure compressed air to caliper fluid

inlet in short spurts to ease piston out of bore.

5. Remove piston from caliper (1).

CAUTION: When working on disc brake caliper,
always use care and suitable tools to avoid dam-
aging the aluminum housing.

6. Using a suitable tool (1), carefully remove dust

boot (2) and discard it.

CAUTION: Do not use a screw driver or other
metal tool for seal removal. Using such tools can
scratch bore or leave burrs on seal groove edges.

7. Using a soft tool such as a plastic trim stick (2),

work piston seal (1) out of its groove in caliper pis-
ton bore. Discard used seal.

LX

BRAKES - BASE

5 - 37


Content   ..  146  147  148  149   ..