Chevrolet Silverado / GMC Sierra. Manual - part 1306


  Index      Chevrolet     Chevrolet Silverado / GMC Sierra - service repair manual 2007-2009 year


Search            


Content   ..  1304  1305  1306  1307   ..


Chevrolet Silverado / GMC Sierra. Manual - part 1306


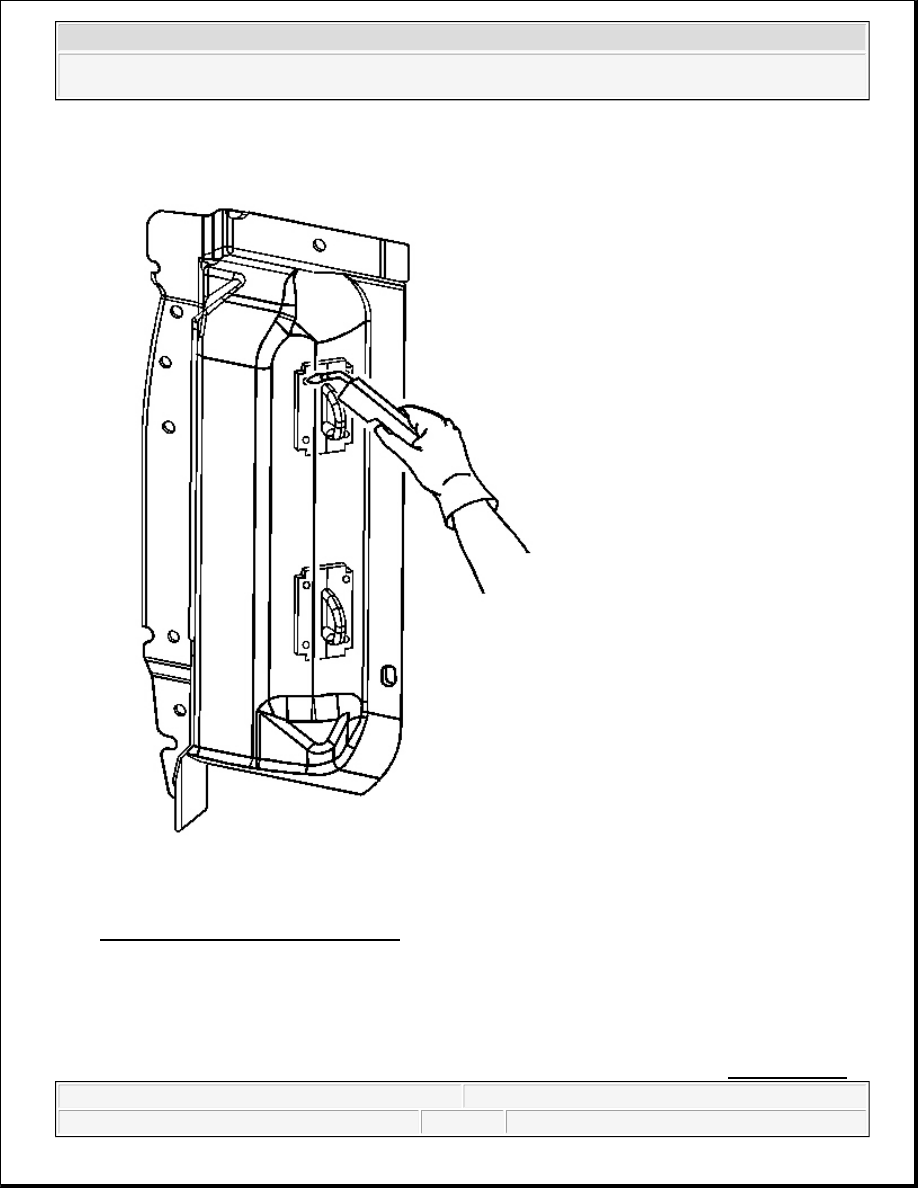
Fig. 138: Plug Welding Tie Down Loop 
Courtesy of GENERAL MOTORS CORP. 

3. Position the tie down loop.  

4. Plug weld accordingly.  

5. Clean and prepare all welded surfaces.  

6. Apply the sealers and anti-corrosion materials to the repair area, as necessary. Refer to Anti-Corrosion 


2008 Chevrolet Silverado 1500 

2008 ACCESSORIES & EQUIPMENT Collision Repair - - Cab & Chassis Sierra, Cab & Chassis Silverado, Sierra & 

Silverado


Microsoft 


Friday, August 21, 2009 2:21:01 PM

Page 150 

© 2005 Mitchell Repair Information Company, LLC. 

Treatment and Repair .  

7. Paint and repair the area. Refer to Basecoat/Clearcoat Paint Systems .  

RESISTANCE SPOT WELDED FULL PANEL REPLACEMENT 

Removal Procedure 

Fig. 139: Drilling Out Factory Welds

IMPORTANT: Use this procedure for all panels that are replaced at the factory seams, unless 

a specific procedure exists in the Collision Repair section of this vehicle's 
service information.

CAUTION: Refer to Approved Equipment for Collision Repair Caution .


2008 Chevrolet Silverado 1500 

2008 ACCESSORIES & EQUIPMENT Collision Repair - - Cab & Chassis Sierra, Cab & Chassis Silverado, Sierra & 

Silverado


Microsoft 


Friday, August 21, 2009 2:21:01 PM

Page 151 

© 2005 Mitchell Repair Information Company, LLC. 

Courtesy of GENERAL MOTORS CORP.

1. Disable the SIR system. Refer to SIR Disabling and Enabling .  

2. Disconnect the negative battery cable. Refer to Battery Negative Cable Disconnection and Connection 

(w/Single Battery) or Battery Negative Cable Disconnection and Connection (w/Auxiliary Battery) 
or Battery Negative Cable Disconnection and Connection (w/Dual Batteries) .  

3. Remove all related panels and components.  

4. Repair as much of the damage as possible to factory specifications. 

5. Note the location and remove the sealers and anti-corrosion materials from the repair area, as necessary. 

Refer to Anti-Corrosion Treatment and Repair . 

6. Locate and drill out all factory welds. Note the number and location of the welds for installation of the 

service part. 

CAUTION: Refer to Foam Sound Deadeners Caution .

IMPORTANT: Do not damage any inner panels or reinforcements.


2008 Chevrolet Silverado 1500 

2008 ACCESSORIES & EQUIPMENT Collision Repair - - Cab & Chassis Sierra, Cab & Chassis Silverado, Sierra & 

Silverado


Microsoft 


Friday, August 21, 2009 2:21:01 PM

Page 152 

© 2005 Mitchell Repair Information Company, LLC. 

Fig. 140: View Of Inner & Outer Panels 
Courtesy of GENERAL MOTORS CORP. 

7. Remove the damaged part.  

Installation Procedure 

1. Prepare all mating surfaces as necessary.  

2. Apply GM-approved Weld-Thru Coating or equivalent to all mating surfaces. Refer to Anti-Corrosion 

Treatment and Repair .  

3. Position the service part. Clamp in place. 

IMPORTANT: If the location of the original plug weld holes cannot be determined, space 

the plug weld holes every 40 mm (11/2 in) apart. Where structural 
adhesive was present, space the plug weld holes every 20 mm (3/4 in) 
apart.


2008 Chevrolet Silverado 1500 

2008 ACCESSORIES & EQUIPMENT Collision Repair - - Cab & Chassis Sierra, Cab & Chassis Silverado, Sierra & 

Silverado


Microsoft 


Friday, August 21, 2009 2:21:01 PM

Page 153 

© 2005 Mitchell Repair Information Company, LLC. 


Content   ..  1304  1305  1306  1307   ..