Chery Tiggo T11 LHD. Manual - part 89
T11 Service Manual Transmission
98
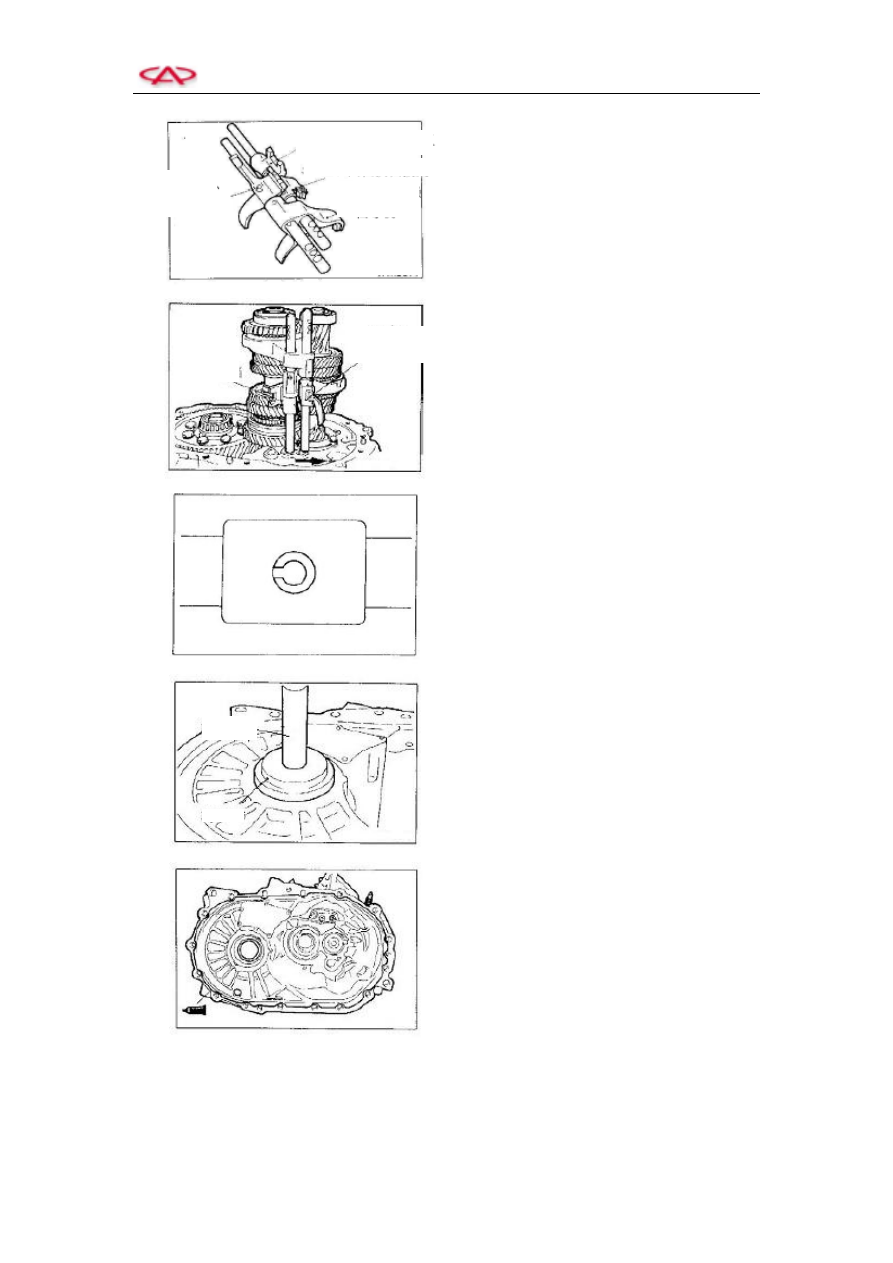
b. Install the 3
rd
-4
th
gear shifting fork and
its fork stalk and the 5
th
-reverse gear
shifting fork and its stalk.
c. Install all gear shifting fork into the
gear hub, and, at the same time, move
the fork stalks in the direction shown
in the left figure.
3) Installation of the locking pin
4) Installation of the outer race of bearing
5) Installation of the transmission housing
a. Apply the 1mm to 1.2 mm diameter
sealants on the specified position of
transmission housing, shown in left
figure
CAUTION:
The sealant line applied shall be uniform and
continuous, without break or over-paint.
After the completion of the housing installation,
screw up the bolts to the specified torque.
Fork stalk–
5
th
–reverse gear
Fork stalk–
3
rd
-4th gear
Fork stalk
–3
rd
-4
th
gear fork
3
rd
-4
th
gear shifting fork
5
th
–reverse gear
shifting rail
Fork stalk–
5
th
–reverse gear fork