Chery Tiggo. Manual - part 454


  Index      Chery     Chery Tiggo - service repair manual 2009 year


Search            


Content   ..  452  453  454  455   ..


Chery Tiggo. Manual - part 454


ON-VEHICLE SERVICE

Sunroof Glass

Removal & Installation

1. Operate the sunroof switch to lift the sunroof to the full tilt position.

2. Push the inner trim strip (side cover inner LH/RH) rearwards to remove.

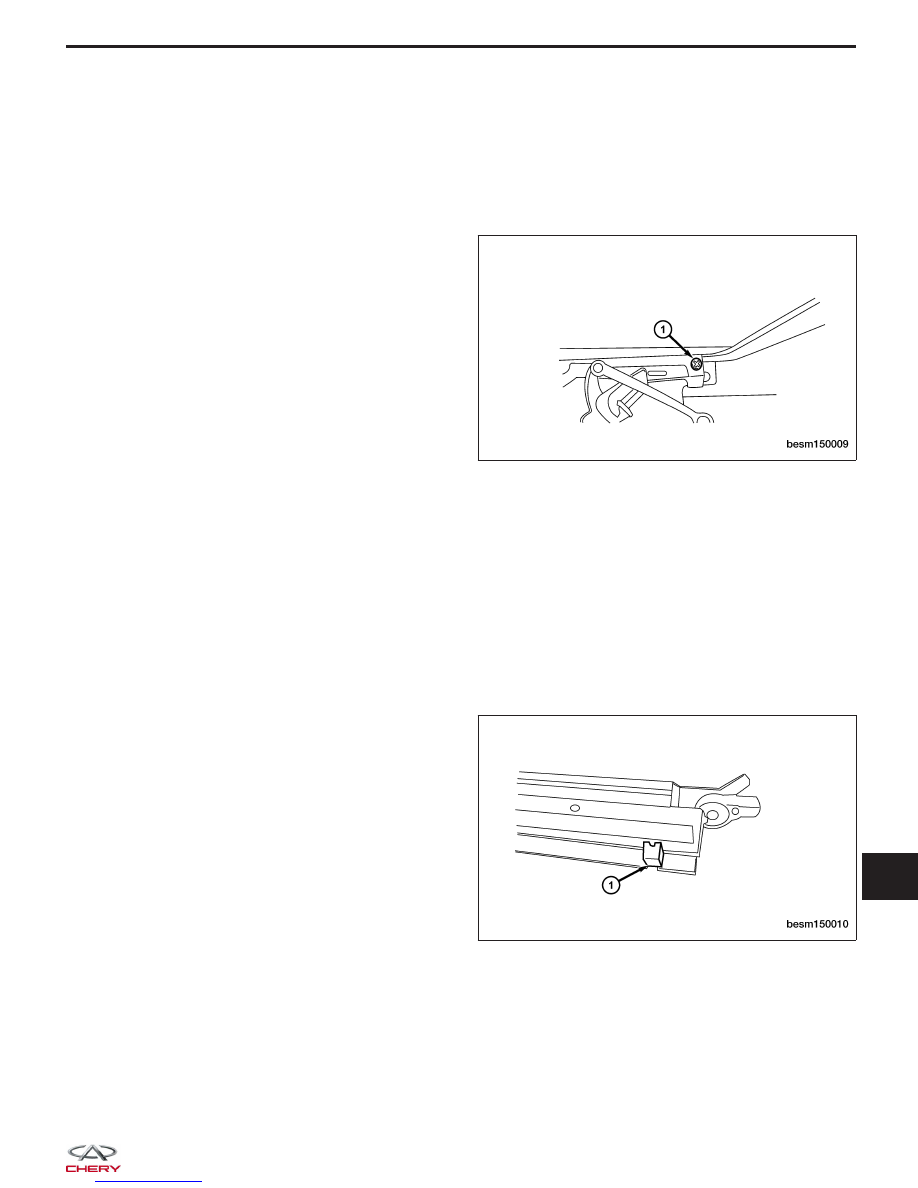
3. Slowly remove the four retaining bolts (1) and

remove the glass.

4. Remove the glass.

5. Installation is in the reverse order of removal.

Installation Notes:
• Operate the power switch to adjust the sliding

mechanism without the glass to the full open posi-
tion, and then place the glass in the middle of the
support bar of the sliding mechanism.

• Loosely install four bolts. Then pull the glass for-

ward slightly and tighten the other bolts slightly
from the middle one by one.

• Operate the sunroof to the full closed position.

• Begin to adjust the four glass retaining bolts while

pulling the glass slightly forward.

• Turn on the power switch and operate the sunroof to test the operation (check and adjust the height/start-up

noise/collision of the glass).

• Move the glass to the full open position again, and then stick the inner trim strip to the support bar of the slid-

ing mechanism.

• Test the on/off operation, starting and running operation as well as the noise of the sunroof after installation to

make sure that no abnormal conditions exist.

Sunroof Sun Visor

Removal & Installation

1. Remove the sunroof glass (See Sunroof Glass Removal & Installation in Section 15 Body & Accessories).

2. Remove the locating clamp (1) as shown in the fig-

ure (each at left and right).

3. Remove the sun visor rear ward.

4. Installation is in the reverse order of removal.

BESM150009

BESM150010

15


Sunroof Motor

Removal & Installation

1. Operate the sunroof to the full closed position before disassembling.

2. Remove the roof interior trim/ceiling light.

3. Disconnect the sunroof motor electrical connector and the wiring harness between the sunroof motor and the

sunroof control module, and then cut off the band retaining the motor electrical harness.

4. Remove the sunroof motor retaining bolts (1).

5. Remove the sunroof motor.

6. Installation is in the reverse order of removal.

Sunroof Control Module

Removal & Installation

1. Operate the sunroof to the full closed position before disassembling.

2. Remove the roof interior trim/ceiling light.

3. Disconnect the sunroof motor electrical connector and the wiring harness between the sunroof motor and the

sunroof control module.

4. Remove the retaining bolts that attach the sunroof control module to the roof.

5. Installation is in the reverse order of removal.

ON-VEHICLE SERVICE

BESM150011


WEATHERSTRIP

Front Door Weatherstrip

Removal & Installation

1. Remove the door trim panel (See Front Door Disassembly & Assembly in Section 15 Body & Accessories).

2. Remove the front door weatherstrip (1).

3. Installation is in the reverse order of removal.

Installation Notes:
• During the weatherstrip installation, every corner should be fitted in place with no folds. The joint of the weath-

erstrip should be placed in the lower middle of the door opening. The weatherstrip should have a proper rigidity
and should not interfere with the opening and closing of the door after the lock and hinge have been adjusted.
The surface of the assembled rubber strip should not have any defects such as deformation and warp.

LTSM150147

15


Rear Door Weatherstrip

Removal & Installation

1. Remove the rear door weatherstrip (1).

2. Installation is in the reverse order of removal.

Installation Notes:
• During the weatherstrip installation, every corner

should be fitted in place with no folds. The joint of
the weatherstrip should be placed in the lower mid-
dle of the door opening. The weatherstrip should
have a proper rigidity and should not interfere with
the opening and closing of the door after the lock
and hinge have been adjusted. The surface of the
assembled rubber strip should not have any defects
such as deformation and warp.

WEATHERSTRIP

LTSM150148


Content   ..  452  453  454  455   ..