Snowmobile Polaris High Performance (2001 year). Manual - part 39


  Index      Snowmobiles / ATV     Snowmobile Polaris High Performance - service manual 2001 year


Search            


Content   ..  37  38  39  40   ..


Snowmobile Polaris High Performance (2001 year). Manual - part 39


CARBURETION

3.31

Adjustments

Throttle Synchronization Procedure-
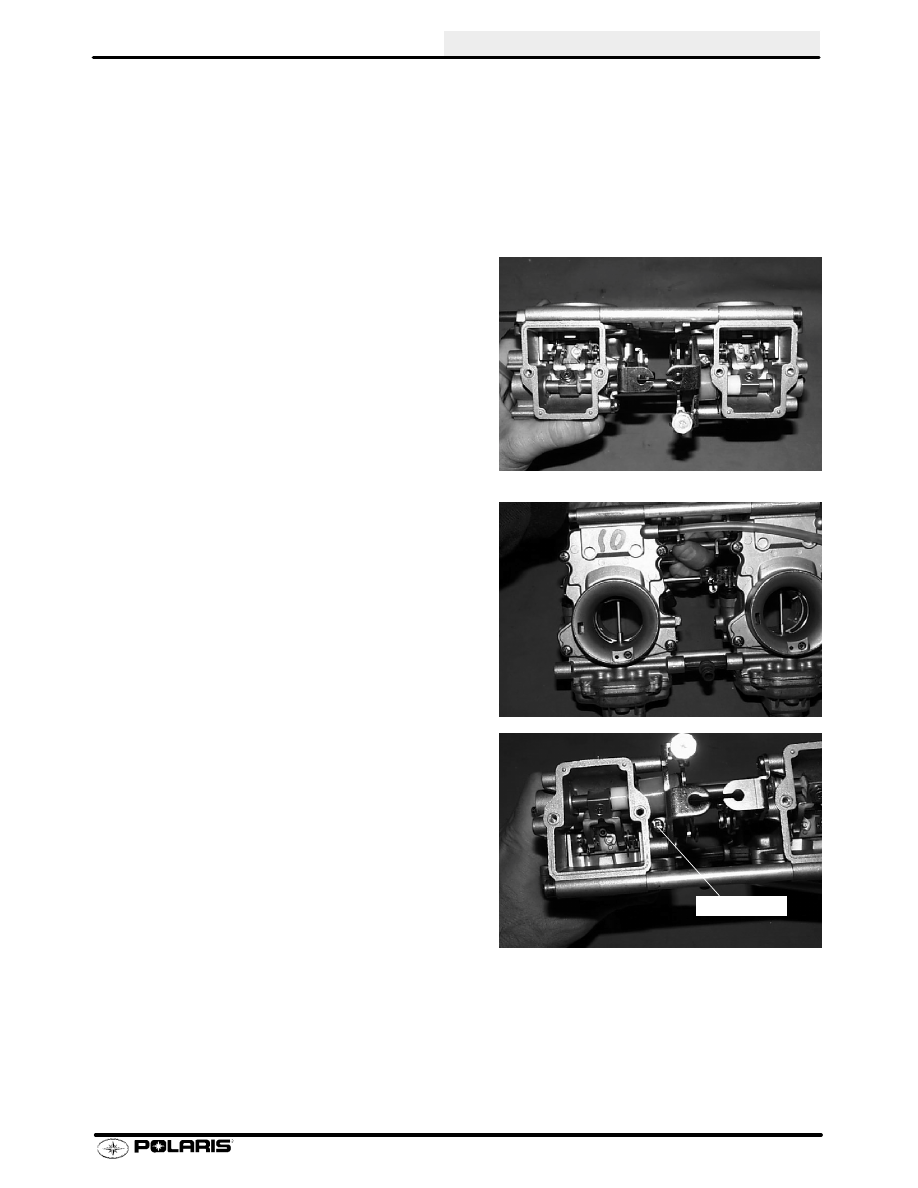
Mikuni TM-38 / TM-40Flatslide Carburetors

Mikuni TM-38 / TM-40 carburetors are synchronized at
wide open throttle without the engine running. The middle
carburetor on triples, and the PTO side carburetor on
twins have a non-adjustable set screw on the throttle
shaft. This carburetor is what the other carb(s) is synchro-
nized to.

1.

Remove airbox

2.

Remove top caps on all carburetors

3.

Hold throttle wide open and view position of
carburetor slide on base carburetor. (Middle carb on
triples, PTO carb on twins.)

4.

With throttle held wide open, turn the slide stop screw
with screwdriver until slide is flush with top of carb
opening.

Stop Screw

CARBURETION

3.32

Adjustments

Throttle Synchronization Procedure-
Mikuni TM-38 / TM-40 Flatslide Carburetors

5.

On remaining carb(s), loosen phillips head screw
inside the offset nut.

6.

When screw is loose, hold throttle to wide open. Turn
offset nut until throttle slide is in same position as
base carburetor.

7.

Tighten phillips head screw.

8.

Replace top caps.

CARBURETION

3.33

Mikuni TMX Carburetor Service

CAUTION:

Wear eye protection when using compressed air or cleaning
solvents. Review all fuel system warnings found on page
3.1 before proceeding.

Carburetor Removal, Disassembly, and Inspection (Typical VM Mikuni)

1.

Remove

carburetor

from

engine.

Before

disassembling, clean outside of carburetor thoroughly
with solvent.

CAUTION:

Do not use compressed air to dry at this time. The float
chamber could become pressurized resulting in damage to
the floats or inlet needle and seat..

2.

Remove slide valve. Inspect for nicks or burrs which
may cause sticking.

3.

Remove jet needle by compressing return spring
toward top cap and removing throttle plate which rests
on top of needle “E” clip. Note the “E” clip position and
inspect needle taper for wear. An indication of wear
would be an hourglass shape or polished spots
somewhere along the taper.

4.

Remove enricher (choke) plunger. Check condition of
seal on tip of plunger. Any nicks or cuts will cause
leakage and a rich fuel condition, usually most evident
at idle and low speeds. Inspect the plunger seat for
damage or foreign material.

5.

Check choke cable movement. Plungers and springs
should move back and forth freely, without binding.

6.

Check carb bore for nicks or foreign objects.

Plunger Seat

Spring

CARBURETION

3.34

Mikuni TMX Carburetor Service

Carburetor Disassembly and Inspection

1.

Remove water trap assembly from float bowl and inspect
O-ring, hose and clamp condition. Refer to exploded
view corresponding with carburetor being serviced.

2.

Inspect enricher (choke) fuel supply passage in bowl for
obstruction.

3.

Use an automatic center punch to remove float arm pin.
Remove inlet needle and seat assembly.

4.

Inspect needle for wear and replace sealing washers
upon reassembly.

CAUTION:

Do not bend float arm during disassembly. Support tower
casting when tapping pin out. Do not use excessive force to
remove float arm pin. The float pin tower castings are very
easily damaged and are not repairable.

5.

Remove main jet and washer (or spacer ring) and push
needle jet into the slide valve chamber to remove. Clean
air bleed hole in needle jet.

6.

Remove pilot jet.

CAUTION:

Wear eye protection when using compressed air or cleaning
solvents. Review all fuel system warnings found on page
3.1 before proceeding.

7.

Remove pilot air screw and clean all passages in the
carburetor body with carburetor cleaner.

Dry all

passages and jets with compressed air.

Replace

gaskets and any parts which show wear or damage.

8.

Reassemble carburetor, adjusting float level before
installing float bowl.


Content   ..  37  38  39  40   ..