SINUMERIK 840D sl. Service - Functions. Manual (2018-2020) - page 26
Cross-channel axis interchange
8.11 Geometry axis in rotated frame and axis replacement
After traversing functions 1. to 3. have been completed, the axis automatically goes back into
the "neutral axis" state.
8.11
Geometry axis in rotated frame and axis replacement
Replacement expansion via Frame with Rotation
In the JOG mode, a geometry axis with rotated WCS can be traversed as PLC axis or as a command
axis via static synchronized actions. For this purpose, the following machine data must be set:
MD32074 $MA_FRAME_OR_CORRPOS_NOTALLOWED, bit 10 == 1
Note
Changing the operating mode in the JOG mode
Before changing the operating mode from JOG into another mode, all traversing motion of all
PLC and command axes, which have been linked as geometry axes in the rotated WCS, must
have been concluded. These axes must at least have become neutral axes again, otherwise
alarm 16908 will be output when the operating mode is changed. This alarm is also displayed
when only a single geometry axis is traversed as a PLC or command axis in the rotated coordinate
system.
Such an axis can only become a PLC or command axis within the channel. An axis replacement
in another channel is not permissible.
Prerequisite for changing from JOG to AUTOMATIC
When changing from the JOG to the AUTOMATIC mode, in the "Program interrupted" state, the
end point of geometry axis motion is only accepted if the following machine data is set:
MD 32074: FRAME_OR_CORRPOS_NOTALLOWED, bit 11 == 1
This positions the PLC or command axes in relation to the rotation of the frame.
All axes influenced by a rotating frame are considered as geometry axes grouping and are
handled collectively. In this way, all axes of the
• assigned to the NC program or
• all axes are neutral or
• all axes are active as main run axes (PLC, command, or oscillation axis).
For example, if one axis is programmed with a WAITP, the system waits for all further axes of the
geometry axis grouping, so that these axes can collectively become neutral axes. If one of the
axes becomes a PLC axis in the main run, then all other axes of this grouping become neutral
axes.
Basic functions
Function Manual, 10/2020, 6FC5397-2GP40-0BA1
551
Cross-channel axis interchange
8.12 Axis replacement from synchronized actions
Supplementary conditions
If MD32074 $MA_FRAME_OR_CORRPOS_NOTALLOWED, bit 10 == 0 and ROT Z45 is
programmed in the NC program, then for the X and Y axes no axis interchange is possible. This
is also analogously valid for the Z axis for e.g. ROT X45 or ROT Y45 - and also in the JOG
operating mode - if a block was interrupted with this type of programming. Although in this case
the NC/PLC interface signals "Axis replacement possible" (DB31, ...DBX68.5) are set for the X and
Y axes, these are however reset.
Only if MD32074 $MA_FRAME_OR_CORRPOS_NOTALLOWED, Bit 10 == 1 and no block with this
programming is being currently traversed, then in the JOG mode, these types of axes can be
interchanged.
8.12
Axis replacement from synchronized actions
Function
As action of a synchronized action, an axis can be requested for the channel (GET(<axis>)) or
released for axis replacement (RELEASE(<axis>)).
Note
The axis must be assigned as a channel axis via machine data.
An axis can be transferred directly between channels to a certain channel with command
AXTOCHAN via synchronized actions or in the part program. This axis does not have to be the
same channel and it is not necessary that this channel be in possession of the current
interpolation right for the axis.
Current state and interpolation right of the axis
With which axis type and interpolation right a possible axis replacement is to be performed, can
be read from the following system variable:
<Value> = $AA_AXCHANGE_TYP[<axis>]
<Val-
Meaning
ue>
0
The axis is assigned to the NC program
1
Axis assigned to PLC or active as command axis or oscillating axis
2
Another channel has the interpolation right.
3
Axis is neutral axis.
4
Neutral axis is controlled by the PLC.
5
Another channel has the interpolation right, axis is requested for NC program.
6
Another channel has the interpolation right, axis is requested as neutral axis.
7
Axis is PLC axis or active as a command axis/oscillating axis; the axis is requested for the NC
program.
8
Axis is PLC axis or active as a command axis/oscillating axis; the axis is requested as neutral axis.
Basic functions
552
Function Manual, 10/2020, 6FC5397-2GP40-0BA1

Cross-channel axis interchange
8.12 Axis replacement from synchronized actions
<Val-
Meaning
ue>
9
Permanently assigned PLC axis, in the neutral axis state.
10
Permanently assigned PLC axis, controlled by PLC, in the neutral axis state.
A "permanently assigned PLC axis in the neutral axis state" (9) and a "permanently assigned PLC
axis controlled from the PLC in the neutral axis state" (10) is independent of GET and RELEASE
permanently assigned to the PLC. Whether the axis can also be replaced is displayed in system
variable $AA_AXCHANGE_STAT[axis].
Basic functions
Function Manual, 10/2020, 6FC5397-2GP40-0BA1
553
Cross-channel axis interchange
8.12 Axis replacement from synchronized actions
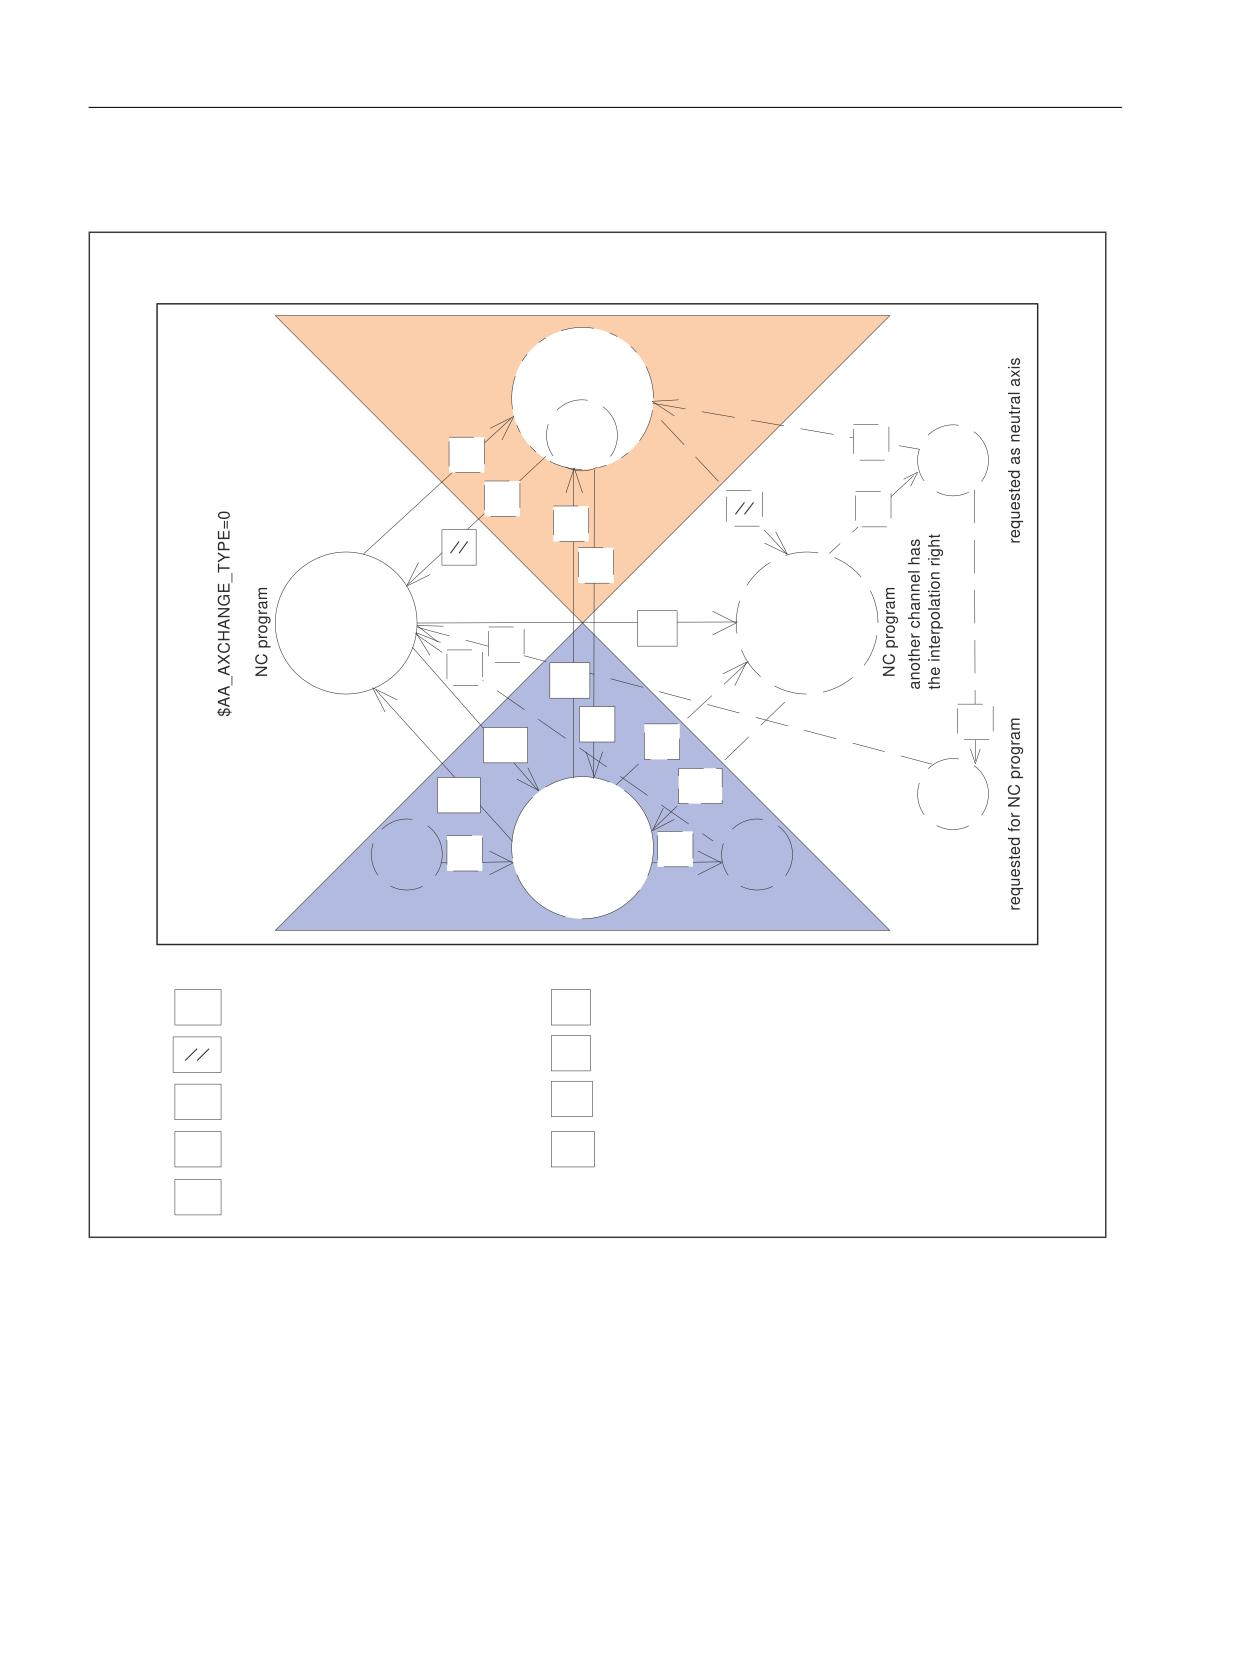
State transitions GET, RELEASE from synchronous actions and when GET is completed
$AA_AXCHANGE_TYP=3
$AA_AXCHANGE_TYP=4
Neutral axis
neutral axis is
Axis (spindle)
controlled by PLC
=3
$AA_AXCHANGE_TYP=
=4
GSf
RSy
Channel
Chan-
=6
1
nel 2
GSy
GSy
GSf
GSy
Axis (spindle)
Axis (spindle)
GD
After power ON
GSf
=2
GSf
R0
BP
GSy
Rn
BP
BP
Rn
=5
PLC axis
(spindle)
PLC
PLC
$AA_AXCHANGE_TYP=
=8
GSy
GSy
=1
=7
requested as
neutral axis
PLC
PLC assigned or
active as HL axis
requested for NC program
RELEASE(AX ...) from synchronous actions
GET (AX ...) from synchronous actions
RSy
GSy
$AA_AXCHANGE_TYP=0
$AA_AXCHANGE_TYP=n
RESET key
GSf
GET if fulfilled in synchronous actions
R0
Release in neutral state via PLC
BP
GET via PLC
Rn
Release to a spec. channel via PLC
GD
GET directly from NC program
PLC axis: PLC assigned or
PLC
active as HL axis
Figure 8-3
Transitions from synchronized actions
Further information
Function Manual Synchronized Actions; Actions in synchronized actions
Basic functions
554
Function Manual, 10/2020, 6FC5397-2GP40-0BA1
Cross-channel axis interchange
8.14 State diagram
8.13
Axis interchange for leading axes (gantry)
Function
A closed gantry grouping is treated regarding its axes always as a unit regarding axis
interchange. This is the reason why for an axis interchange of the leading axis, an axis
interchange is simultaneously made for all synchronous axes of the gantry grouping. In addition
to the preconditions for the leading axis described in the previous chapters, the appropriate
preconditions must also be fulfilled for all synchronous axes of the gantry grouping.
Axial machine data
For an axis interchange, the following axial machine data must be set the same for all axes of a
closed gantry group:
• MD30460 $MA_BASE_FUNCTION_MASK, Bit 4 (control executing components)
• MD30460 $MA_BASE_FUNCTION_MASK, Bit 5 (assignment to components)
Axial NC/PLC interface signals
Within the scope of the axis interchange function, the following axial NC/PLC interface signals
always have the same values for all axes of a closed gantry grouping:
• DB31, ... DBX63.0 (reset executed)
• DB31, ... DBX63.1 (PLC controlled axis)
• DB31, ... DBX63.2 (axis stop active)
Axial system variable
Within the scope of the axis interchange function, the following axial system variables always
have the same values for all axes of a closed gantry group:
• $AA_AXCHANGE_TYP (axis type regarding axis interchange)
• $AA_AXCHANGE_STAT (axis status regarding axis interchange)
• $AA_SNGLAX_STAT (axis type of the individual axis)
8.14
State diagram
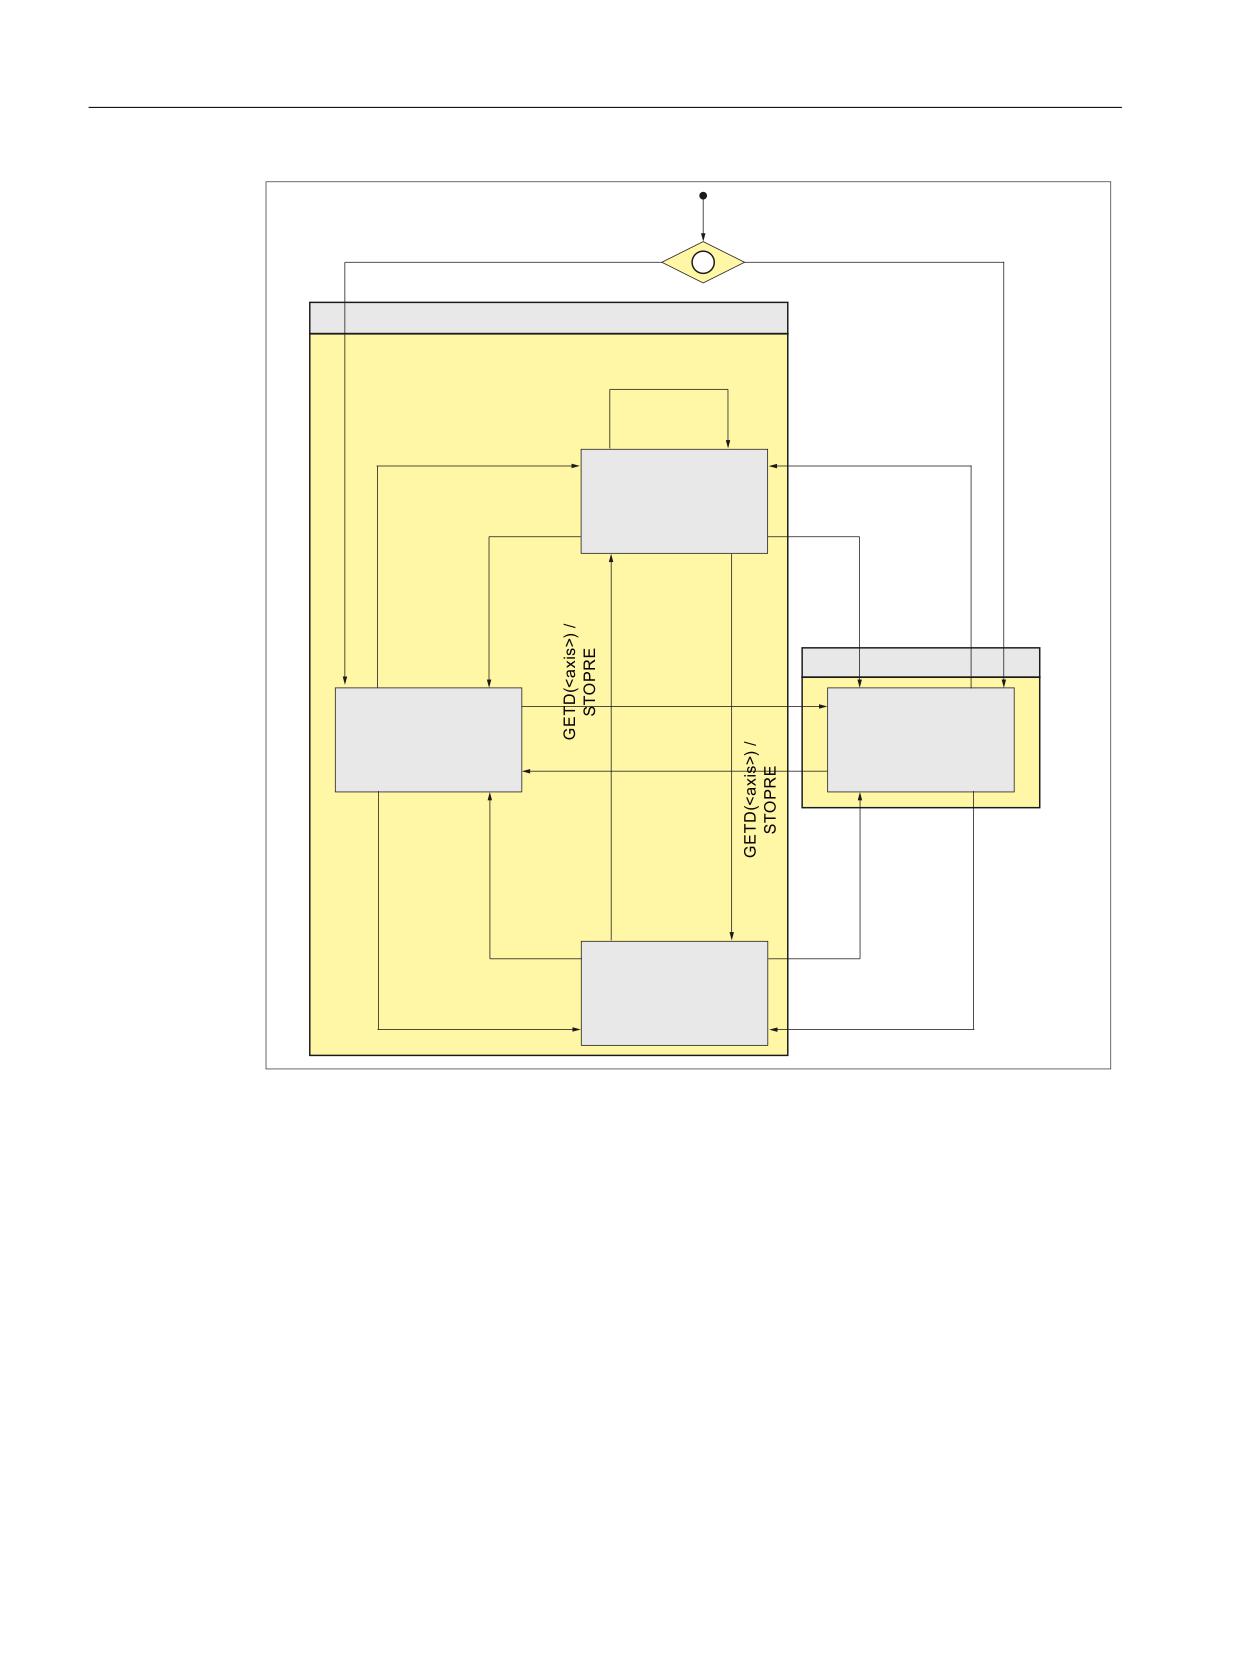
The following figure shows the states, events, actions, and state transitions for an axis for
channel 1 in relation to the "axis replacement" function.
For channel 2, the sub-states "neutral axis" and "PLC axis" are not shown for clarity's sake.
Assumption: The axis is assigned to channel 1 by default:
MD30550 $MA_AXCONF_ASSIGN_MASTER_CHAN[<axis>] = 1
Basic functions
Function Manual, 10/2020, 6FC5397-2GP40-0BA1
555
Cross-channel axis interchange
8.15 Boundary conditions
3RZH
U 2Q
&KDQQHO
:$,73
$1'
$[LV LV QRW V\QFKURQL]HG
$1'
$[LV QRW PDLQ UXQ D
[LV
67235(
5(/($6(
5(/($6(
25
25
:$,73
:$,73
1HXWUDO D[LV
*(7
*(7
25
2
5
&KDQQH
O UHVHW
&KDQQHO UHVHW
67235(
672
35(
5HTXHVW E\ 3/&
&KDQQHO
&KDQQHO D[LV
&KDQQHO D[LV
5HTXHVW E\ 3/&
5HTXHV
W E\ 3/&
5HOLQTXLVKP
HQW E\ 3/&
QHX
WUDO
5HOLQTXLVKP
HQW E\ 3/&
5HOLQTXLVKPHQW E\ 3/&
WR FKDQ
QHO
WR FKDQQHO
67235(
67235(
3/& D[LV
① MD30550 $MA_AXCONF_ASSIGN_MASTER_CHAN[<axis>]
Figure 8-4
State diagram: Axis replacement
8.15
Boundary conditions
On the transition of an axis from "PLC axis," "neutral axis," or "axis in another channel" status to
"channel axis" status, synchronization with preprocessing stop and synchronization in the
fetching channel are performed. This involves:
• Axis: Accept the actual axis position
• Spindle: Accepting the current speed and current gearbox stage
Basic functions
556
Function Manual, 10/2020, 6FC5397-2GP40-0BA1
Cross-channel axis interchange
8.16 Example
8.15.1
Axis replacement by PLC
If the part program of the channel is in one of the following sections at the time the axis
replacement (PLC → channel or channel → PLC) is requested by the PLC, axis replacement will
only be performed after this machining section has been exited:
• Continuous-path mode (G64/G640)
• Thread cutting/tapping (G33/G331/G332)
8.15.2
Block search with calculation
On a block search with calculation, only the commands GET, GETD, and RELEASE, which do not
cancel each other out, are output in the action block.
Example
Block search with calculation to target block N700:
Program code
Comment
N100 RELEASE(AX1)
; RELEASE(AX1) is collected
N110 GET(AX2)
; GET(AX2) is collected
N400 GET(AX1)
; GET(AX1) cancels RELEASE(AX1) =>
; RELEASE(AX1) and GET(AX1) are not saved
N700 ...
; Target block ⇒ output: GET(AX2)
N710 RELEASE(AX2)
Further information
You will find more information under Block search, types 1, 2, and 4: (Page 117).
8.16
Example
Assumptions
• Channel 1: The following axes are channel axes: 1, 2, 3, 4
• Channel 2: The following axes are channel axes: 4, 5, 6
• Default assignment: Axis 4 (AX4) is assigned to channel 1 by default
Basic functions
Function Manual, 10/2020, 6FC5397-2GP40-0BA1
557
Cross-channel axis interchange
8.16 Example
Parameter assignment
Channel 1
Axis names in the channel: MD20080
• $MC_AXCONF_CHANAX_NAME_TAB[<channel 1>][ 0 ] = "X" ; 1st channel axis
• $MC_AXCONF_CHANAX_NAME_TAB[<channel 1>][ 1 ] = "Y" ; 1st channel axis
• $MC_AXCONF_CHANAX_NAME_TAB[<channel 1>][ 2 ] = "Z" ; 1st channel axis
• $MC_AXCONF_CHANAX_NAME_TAB[<channel 1>][ 3 ] = "U" ; 1st channel axis
Machine axes used: MD20070
• $MC_AXCONF_MACHAX_USED[<channel 1>][ 0 ] = 1 ; 1st channel axis → axis 1
• $MC_AXCONF_MACHAX_USED[<channel 1>][ 1 ] = 2 ; 2nd channel axis → axis 2
• $MC_AXCONF_MACHAX_USED[<channel 1>][ 2 ] = 3 ; 3rd channel axis → axis 3
• $MC_AXCONF_MACHAX_USED[<channel 1>][ 3 ] = 4 ; 4th channel axis → axis 4
Channel 2
Axis names in the channel: MD20080
• $MC_AXCONF_CHANAX_NAME_TAB[<channel 2>][ 0 ] = "X" ; 1st channel axis
• $MC_AXCONF_CHANAX_NAME_TAB[<channel 2>][ 1 ] = "Y" ; 1st channel axis
• $MC_AXCONF_CHANAX_NAME_TAB[<channel 2>][ 2 ] = "U" ; 1st channel axis
Machine axes used: MD20070
• $MC_AXCONF_MACHAX_USED[<channel 2>][ 0 ] = 5 ; 1st channel axis → axis 5
• $MC_AXCONF_MACHAX_USED[<channel 2>][ 1 ] = 6 ; 2nd channel axis → axis 6
• $MC_AXCONF_MACHAX_USED[<channel 2>][ 2 ] = 4 ; 3rd channel axis → axis 4
Default assignment
Master channel of axis 4 (AX4) → channel 1
AX4 is the standard name of the 4th machine axis according to MD10000
$MN_AXCONF_MACHAX_NAME_TAB[ 3 ]
• MD30550 $MA_AXCONF_ASSIGN_MASTER_CHAN[ AX4 ] = 1
Program example
Program in channel 1
Program in channel 2
; Traversing axis 4 (AX4)
; Synchronization point with channel 1
G01 F1000 U100
; WAITM(1,1,2)
; Release of AX4
; Request for AX4
RELEASE(AX4)
GET(AX4)
Basic functions
558
Function Manual, 10/2020, 6FC5397-2GP40-0BA1

Cross-channel axis interchange
8.17 Data lists
Program in channel 1
Program in channel 2
; Selection of program TAUSH2 in channel
; Traversing axis 4 (AX4)
2:
G0 U0
INIT (2,"_N_MPF_DIR\_N_TAUSH2_MPF","S")
; Start program TAUSH2 in channel 2
START(2)
; Synchronization point with channel 2
; Release of AX4
WAITM (1,1,2)
RELEASE(AX4)
M30
M30
8.17
Data lists
8.17.1
Machine data
8.17.1.1
General machine data
Number
Identifier: $MN_
Description
10010
ASSIGN_CHAN_TO_MODE_GROUP[n]
Channel valid in mode group [Channel No.]: 0, 1
10722
AXCHANGE_MASK
Parameterization of the axis replacement response
8.17.1.2
Channel-specific machine data
Basic machine data of channel
Number
Identifier: $MC_
Description
20000
CHAN_NAME
Channel name
20050
AXCONF_GEOAX_ASSIGN_TAB[n]
Assignment of geometry axis to channel axis
[GEOAxisNo.]: 0...2
20060
AXCONF_GEOAX_NAME_TAB[n]
Geometry axis name in the channel
[GEOAxisNo.]: 0...2
20070
AXCONF_MACHAX_USED[n]
Machine axis number valid in channel
[Channel axis No.]: 0...7
20080
AXCONF_CHANAX_NAME_TAB[n]
Channel axis name in the channel
[Channel axis No.]: 0...7
20090
SPIND_DEF_MASTER_SPIND
Initial setting of master spindle in channel
20100
DIAMETER_AX_DEF
Geometry axis with transverse axis function
20110
RESET_MODE_MASK
Determination of basic control settings after Reset/TP End
20112
START_MODE_MASK
Determination of basic control settings for NC start
Basic functions
Function Manual, 10/2020, 6FC5397-2GP40-0BA1
559

Cross-channel axis interchange
8.17 Data lists
Number
Identifier: $MC_
Description
20150
GCODE_RESET_VALUES[n]
Initial setting of the G groups
[G group No.]: 0...59
20160
CUBIC_SPLINE_BLOCKS
Number of blocks for C spline
20170
COMPRESS_BLOCK_PATH_LIMIT
Maximum traversing length of NC block for compression
20200
CHFRND_MAXNUM_DUMMY_BLOCKS
Empty blocks with phase/radii
20210
CUTCOM_CORNER_LIMIT
Max. angle for compensation blocks for tool radius com-
pensation
20220
CUTCOM_MAX_DISC
Maximum value for DISC
20230
CUTCOM_CURVE_INSERT_LIMIT
Maximum angle for intersection calculation with tool ra-
dius compensation
20240
CUTCOM_MAXNUM_CHECK_BLOCKS
Blocks for predictive contour calculation with tool radius
compensation
20250
CUTCOM_MAXNUM_DUMMY_BLOCKS
Number of blocks without traversing motion for tool ra-
dius compensation
20270
CUTTING_EDGE_DEFAULT
Initial state of tool cutting edge without programming
20400
LOOKAH_USE_VELO_NEXT_BLOCK
Look Ahead to programmed following block velocity
20430
LOOKAH_NUM_OVR_POINTS
Number of override switch corner values for Look Ahead
20440
LOOKAH_OVR_POINTS[n]
Override switch corner values for Look Ahead
[Corner value No.]: 0...1
20500
CONST_VELO_MIN_TIME
Minimum time with constant velocity
20600
MAX_PATH_JERK
Pathrelated maximum jerk
20610
ADD_MOVE_ACCEL_RESERVE
Acceleration reserve for overlaid motion
20650
THREAD_START_IS_HARD
Acceleration behavior of axis when thread cutting
20700
REFP_NC_START_LOCK
NC start inhibit without reference point
20750
ALLOW_GO_IN_G96
G0 logic in G96
20800
SPF_END_TO_VDI
Subprogram end to PLC
21000
CIRCLE_ERROR_CONST
Circle end point monitoring constant
21010
CIRCLE_ERROR_FACTOR
Circle end point monitoring factor
21100
ORIENTATION_IS_EULER
Angle definition for orientation programming
21110
X_AXIS_IN_OLD_X_Z_PLANE
Coordinate system for automatic frame definition
21200
LIFTFAST_DIST
Traversing path for fast retraction from the contour
21250
START_INDEX_R_PARAM
Number of first channel-specific R parameter
Auxiliary function settings of the channel
Number
Identifier: $MC_
Description
22000
AUXFU_ASSIGN_GROUP[n]
Auxiliary function group
[aux. func. no. in channel]: 0...49
22010
AUXFU_ASSIGN_TYPE[n]
Auxiliary function type
[aux. func. no. in channel]: 0...49
22020
AUXFU_ASSIGN_EXTENSION[n]
Auxiliary function extension
[aux. func. no. in channel]: 0...49
Basic functions
560
Function Manual, 10/2020, 6FC5397-2GP40-0BA1

Cross-channel axis interchange
8.17 Data lists
Number
Identifier: $MC_
Description
22030
AUXFU_ASSIGN_VALUE[n]
Auxiliary function value
[aux. func. no. in channel]: 0...49
22200
AUXFU_M_SYNC_TYPE
Output timing of M functions
22210
AUXFU_S_SYNC_TYPE
Output timing of S functions
22220
AUXFU_T_SYNC_TYPE
Output timing of T functions
22230
AUXFU_H_SYNC_TYPE
Output timing of H functions
22240
AUXFU_F_SYNC_TYPE
Output timing of F functions
22250
AUXFU_D_SYNC_TYPE
Output timing of D functions
22260
AUXFU_E_SYNC_TYPE (available soon)
Output timing of E functions
22400
S_VALUES_ACTIVE_AFTER_RESET
S function active after RESET
22410
F_VALUES_ACTIVE_AFTER_RESET
F function active after reset
22500
GCODE_OUTPUT_TO_PLC
G commands to PLC
22550
TOOL_CHANGE_MODE
New tool offset for M function
22560
TOOL_CHANGE_M_CODE
M function for tool change
Channel-specific memory settings
Number
Identifier: $MC_
Description
25000
REORG_LOG_LIMIT
Percentage of IPO buffer for log file enable
28000
MM_REORG_LOG_FILE_MEM
Memory size for REORG (DRAM)
28010
MM_NUM_REORG_LUD_MODULES
Number of blocks for local user variables for REORG (DRAM)
28020
MM_NUM_LUD_NAMES_TOTAL
Number of local user variables (DRAM)
28030
MM_NUM_LUD_NAMES_PER_PROG
Number of local user variables per program (DRAM)
28040
MM_LUD_VALUES_MEM
Memory size for local user variables (DRAM)
28050
MM_NUM_R_PARAM
Number of channelspecific R parameters (SRAM)
28060
MM_IPO_BUFFER_SIZE
Number of NC blocks in IPO buffer (DRAM)
28070
MM_NUM_BLOCKS_IN_PREP
Number of blocks for block preparation (DRAM)
28080
MM_NUM_USER_FRAMES
Number of settable Frames (SRAM)
28090
MM_NUM_CC_BLOCK_ELEMENTS
Number of block elements for compile cycles (DRAM)
28100
MM_NUM_CC_BLOCK_USER_MEM
Size of block memory for compile cycles (DRAM)
28500
MM_PREP_TASK_STACK_SIZE
Stack size of preparation task (DRAM)
28510
MM_IPO_TASK_STACK_SIZE
Stack size of IPO task (DRAM)
8.17.1.3
Axis/spindlespecific machine data
Number Identifier: $MA_
Description
30460
BASE_FUNCTION_MASK
Axis functions
30550
AXCONF_ASSIGN_MASTER_CHAN
Reset position of channel for axis change
30552
AUTO_GET_TYPE
Definition of automatic GET
30600
FIX_POINT_POS
Fixed value positions of axes with G75
Basic functions
Function Manual, 10/2020, 6FC5397-2GP40-0BA1
561

Cross-channel axis interchange
8.17 Data lists
Number Identifier: $MA_
Description
32074
FRAME_OR_CORRPOS_NOTALLOWED
Frame or HL offset are not allowed
33100
COMPRESS_POS_TOL
Maximum deviation with compensation
8.17.2
Setting data
8.17.2.1
Channelspecific setting data
Number
Identifier: $SC_
Description
42000
THREAD_START_ANGLE
Start angle for thread
42100
DRY_RUN_FEED
Dry run feedrate
Basic functions
562
Function Manual, 10/2020, 6FC5397-2GP40-0BA1
Preprocessing
9
9.1
Brief description
Preprocessing
The programs stored in the directories for standard and user cycles can be preprocessed to
reduce runtimes.
Preprocessing is activated via machine data.
Standard and user cycles are preprocessed when the power is switched on, i.e. as an internal
control function, the part program is translated (compiled) into a binary intermediate code
optimized for processing purposes.
All program errors that can be corrected by means of a compensation block are detected during
preprocessing. In addition, when the program includes branches and check structures, a check
is made to ensure that the branch destinations are present and that structures are nested
correctly.
The full scope of control functionality is available:
• Override influence
• Reactions to data and signals that are input by the PLC or the operator
• Current block display
• The programs can be processed in single block mode (SBL1 and SBL2). Block searches can be
executed. The compilation cannot be stored; it is concealed from the user and regenerated
every time the power is switched on.
Preprocessing can be used:
• To optimize the runtimes of part programs with high-level language components (branches,
check structures, motion-synchronous actions)
• CPU time intensive part programs (e.g. stock removal cycles)
• Faster processing of time-critical sections (e.g. program continuation after preprocessing
stop during rapid deletion of distance-to-go, or return stroke, or in the tool change cycle).
General information
Preprocessing standard and user cycles is possible. The processing time of part programs can
then be reduced without restricting the control functionality.
The standard and user cycles are preprocessed when machine data is set accordingly:
MD10700 $MN_PREPROCESSING_LEVEL (program preprocessing level)
Preprocessing is carried out program-specifically. It is possible to mix preprocessed part
programs and part programs interpreted in ASCII format. Preprocessing serves to reduce
incidental times.
Basic functions
Function Manual, 10/2020, 6FC5397-2GP40-0BA1
563
Preprocessing
9.1 Brief description
Memory space is needed for preprocessing cycles. You can optimize your memory utilization in
two ways:
• The program to be executed can be shortened with the command DISPLOF (display off).
• MD10700 $MN_PREPROCESSING_LEVEL has been expanded by bit 2 and 3. This allows
selective cycle preprocessing of the individual directories (e.g. user cycles).
MD10700 $MN_PREPROCESSING_LEVEL has been expanded by bit 4. In this way, the
preprocessing of the user cycles can be selected from the directory _N_CMA_DIR.
MD10700 $MN_PREPROCESSING_LEVEL has been expanded by bit 5. In this way, individual user
cycles can be preprocessed in a targeted manner if they have the command PREPRO after the
PROC instruction.
Precompiled cycles are stored in the dynamic NC memory by default. MD10700
$MN_PREPROCESSING_LEVEL has been expanded by bit 6. This allows specifying that the
compiled programs that are now stored in the dynamic NC memory and no longer have enough
space can be stored in static NC memory.
Functionality
The programs stored in the directories for standard and user cycles are preprocessed when the
power is switched on, i.e. the part program is translated (compiled) into an intermediate binary
code optimized for processing purposes. The compilation is processed when called.
Runtime optimization
The preprocessing function is primarily suited for optimizing the runtimes of part programs with
high-level language components (jumps, control structures, synchronized actions).
While jumps and control structures are dissolved by a search through all blocks (block start)
when part programs are interpreted in ASCII format (active as default), a branch is made directly
to the destination block in a preprocessed part program.
This lifts the runtime differences between jumps and control structures.
Example of preprocessing execution time:
Execution reduction by 30% with active compressor
DEF INT COUNTER
Target: G1 G91 COMPCAD
G1 X0.001 Y0.001 Z0.001 F100000
COUNTER=COUNTER +1
COUNTER=COUNTER -1
COUNTER=COUNTER +1
IF COUNTER<= 100000 GOTOB TARGET
Computation-intensive programs and programs with symbolic names are processed more
quickly.
Execution time-critical sections (e.g. continuation of processing after deletion of distance-to-go
or preprocessing stop in cycles) can be processed faster.
Basic functions
564
Function Manual, 10/2020, 6FC5397-2GP40-0BA1

Preprocessing
9.2 Program handling
If the interrupt routine exists as a preprocessed cycle, the processing can be continued more
quickly after the program interrupt.
9.2
Program handling
Activation/Deactivation
Cycles are preprocessed on POWER ON if the following machine data is set:
MD10700 $MN_PREPROCESSING_LEVEL, bit 1 (program preprocessing level)
Bit
Value
Meaning
0
No preprocessing
0
Call description of cycles is not known by default.
Cycles, like normal subprograms, have to be stated as external before the cycle call. This
is a sensible setting when no cycles with call parameters are used.
1
During control power-up, the call description of the cycles is generated. All user cycles
(_N_CUS_DIR directory) and Siemens cycles (_N_CST_DIR directory) with transfer pa-
rameters can be called up without external statement. Changes to the cycle-call inter-
face do not take effect until the next POWER ON.
The following machine data must be set:
MD18170 $MN_MM_NUM_MAX_FUNC_NAMES (number of auxiliary actions)
MD18180 $MN_MM_NUM_MAX_FUNC_PARAM (number of auxiliary parameters for
cycles)
1
1
During control power-up, all cycles are preprocessed into a compilation optimized for
processing. All user cycles (_N_CUS_DIR directory) and standard cycles (_N_CST_DIR
directory) are processed at high speed. Program changes to cycle programs do not take
effect until the next POWER ON.
2
1
During control power-up, the standard cycles in the _N_CST_DIR directory are prepro-
cessed in a compilation optimized for processing.
3
1
During control power-up, the user cycles in the _N_CUS_DIR directory are preprocessed
in a compilation optimized for processing.
4
1
Preprocessing of user cycles from the directory _N_CMA_DIR
5
1
Preprocessing the user cycles with the PREPRO command in the PROC instruction line.
Unmarked files of directories marked with bits 1-4 are not preprocessed.
If bit 0, then control of the preprocessing is carried out in accordance with the specifi-
cations of bits 0-4.
6
0
The compilation is stored in the dynamic NC memory as long as free memory is still
available. If sufficient memory is not available, preprocessing is aborted.
The size of the dynamic NC memory is obtained with this machine data:
MD18351 $MN_MM_DRAM_FILE_MEM_SIZE.
The areas occupied in the dynamic NC memory by the compilation are visible to the user.
Bit combinations are permissible.
Basic functions
Function Manual, 10/2020, 6FC5397-2GP40-0BA1
565
Preprocessing
9.2 Program handling
Compiling
Subroutines (_SPF file extension) located in the directories for standard cycles (_N_CST_DIR,
_N_CMA_DIR) and user cycles (_N_CUS_DIR) and any subroutines marked with PREPRO are
compiled. The name of the compilation corresponds to the original cycle with extension _CYC.
Note
Program changes to precompiled programs do not take effect until the next POWER ON.
Access rights
The preprocessed program can only be executed, but not read or written. The compilation
cannot be modified or archived. The original cycles _SPF files are not deleted.
The compilation is not changed when the ASCII cycle is altered, i.e. changes do not take effect
until after the next POWER ON.
Memory requirements
The memory requirement for compiled cycles is approximately factor 2 in addition to the ASCII
part program.
The memory requirements for variables defined in the part programs are defined by the
following machine data:
MD28020 $MC_MM_NUM_LUD_NAMES_TOTAL (number of local user variables)
MD28010 $MC_MM_NUM_REORG_LUD_MODULES (number of modules for local user variables
with REORG)
MD28040 $MC_MM_LUD_VALUES_MEM (memory size for local user variables)
MD18242 $MC_MM_MAX_SIZE_OF_LUD_VALUE (memory block size for LUD/GUD values)
Further information is provided under Memory configuration (Page 885).
While preprocessing is in progress, the amount of memory required is the same as if the
preprocessed program were called on the first subprogram level.
When programs are preprocessed after POWER ON, a name is counted for each branch
destination/label as if it were a variable. These names must be taken into account in the
following machine data:
MD28020 $MC_MM_NUM_LUD_NAMES_TOTAL (number of local user variables)
Example
Program code
Comment
PROC NAMES
;
DEF INT VARIABLE, ARRAY[2]
; 2 names
START:
; 1 name, only for preprocessing
FOR VARIABLE = 1 TO 9
; 1 name, only for preprocessing
Basic functions
566
Function Manual, 10/2020, 6FC5397-2GP40-0BA1
Preprocessing
9.3 Program call
Program code
Comment
G1 F10 X=VARIABLE*10-56/86EX4+4*SIN(VARI-
ABLE/3)
ENDFOR
; 1 name, only for preprocessing
M17
In order to execute this program normally, the following machine data must specify at least 3
names:
MD28020 $MC_MM_NUM_LUD_NAMES_TOTAL
Six names are required to compile this program after POWER ON.
Preprocessed programs/cycles are stored in the dynamic NC memory. The space required for
each program must be flashed over unmodified as outlined above. Adjustment of the memory
mapping in the static NC memory is required only if bit 6 = 1 is set in the following machine data:
MD10700 $MN_PREPROCESSING_LEVEL (program processing level)
In this case, the program compilations for which there is insufficient space in the dynamic NC
memory are stored in the static NC memory.
Examples for appropriate machine data settings can be found under "Examples" in the
Subsection "Preprocessing in the dynamic NC memory".
9.3
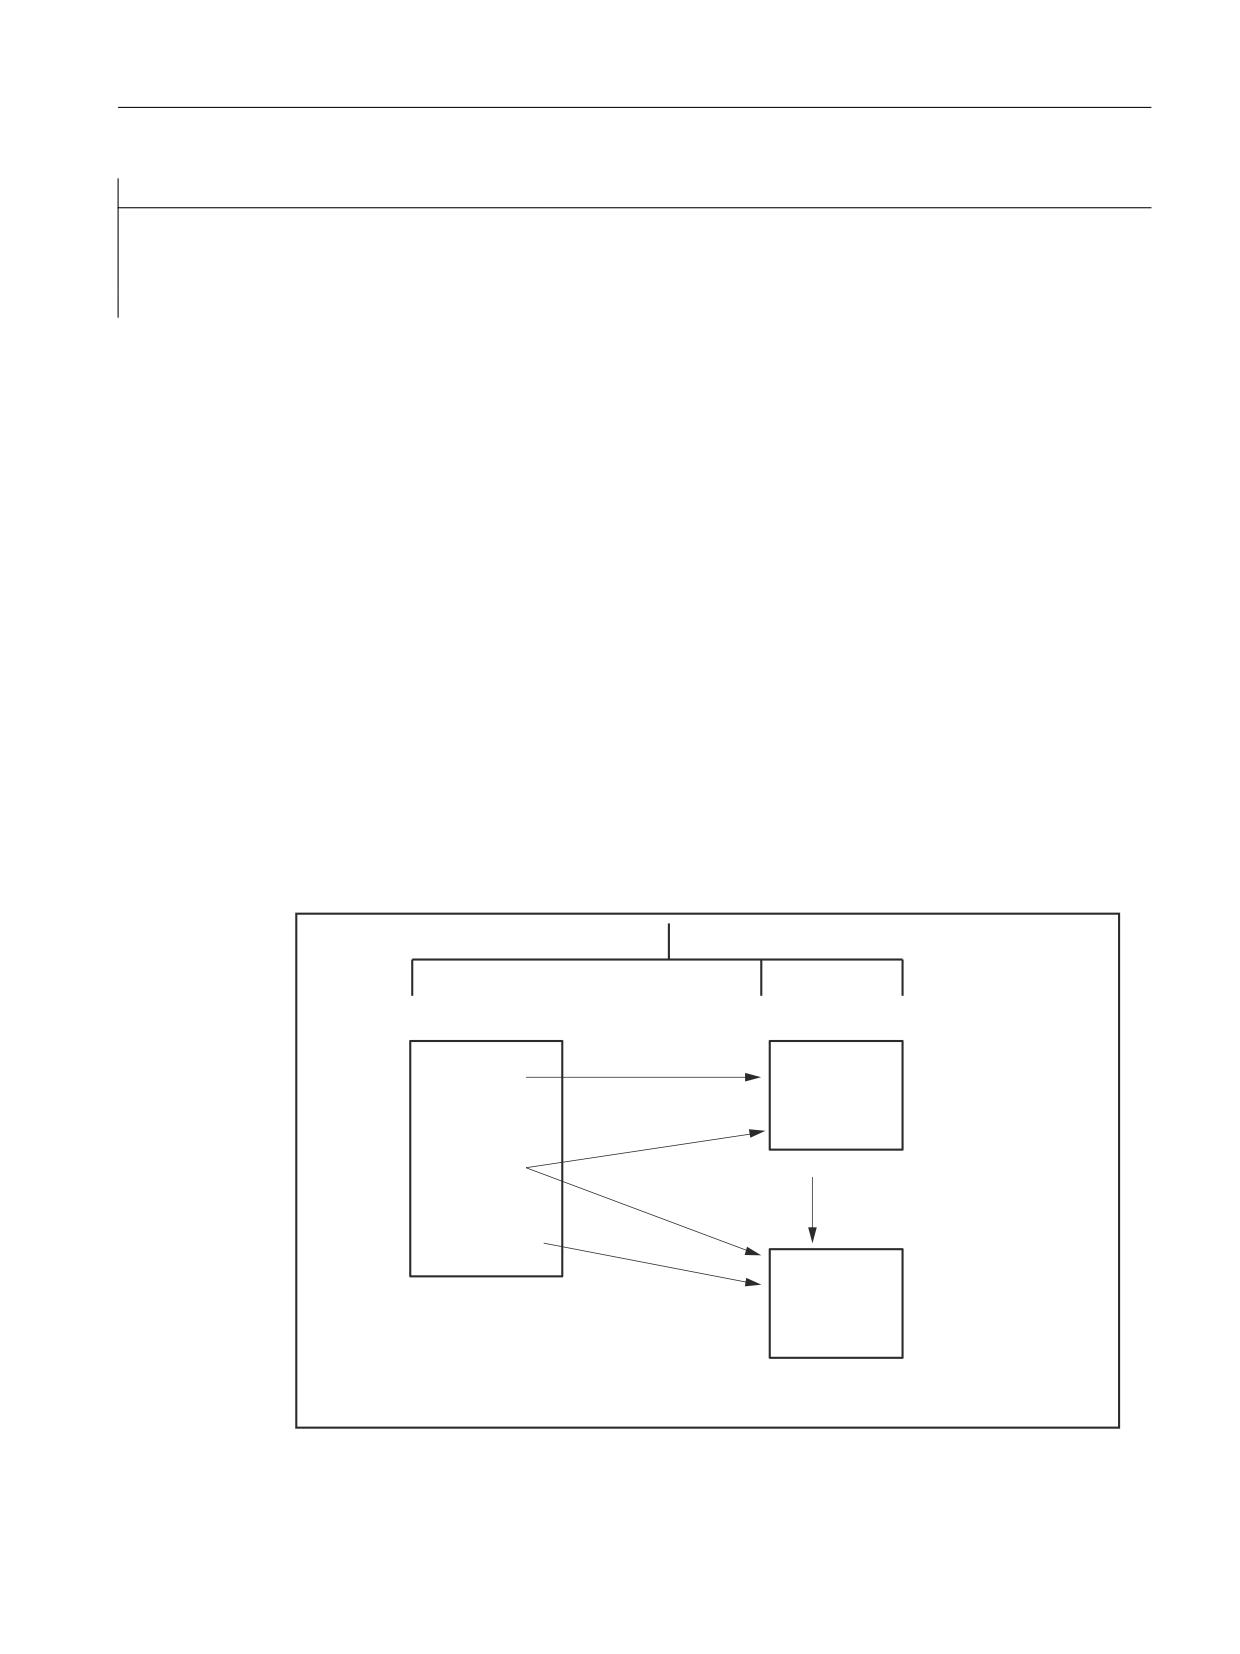
Program call
Overview
Main programs
User cycles
Standard cycles
/_N_MPF_DIR
/_N_CUS_DIR
/_N_CST_DIR
Main program
Call
CYCLE_SPF
ASCII
without preprocessing
Cycle
CYCLE
_N_CYCLE_SPF
Preprocessing
CYCLE_CYC
_N_MAIN_SPF
Call
Pre-
with preprocessing
processed
Cycle
_N_CYCLE_CYC
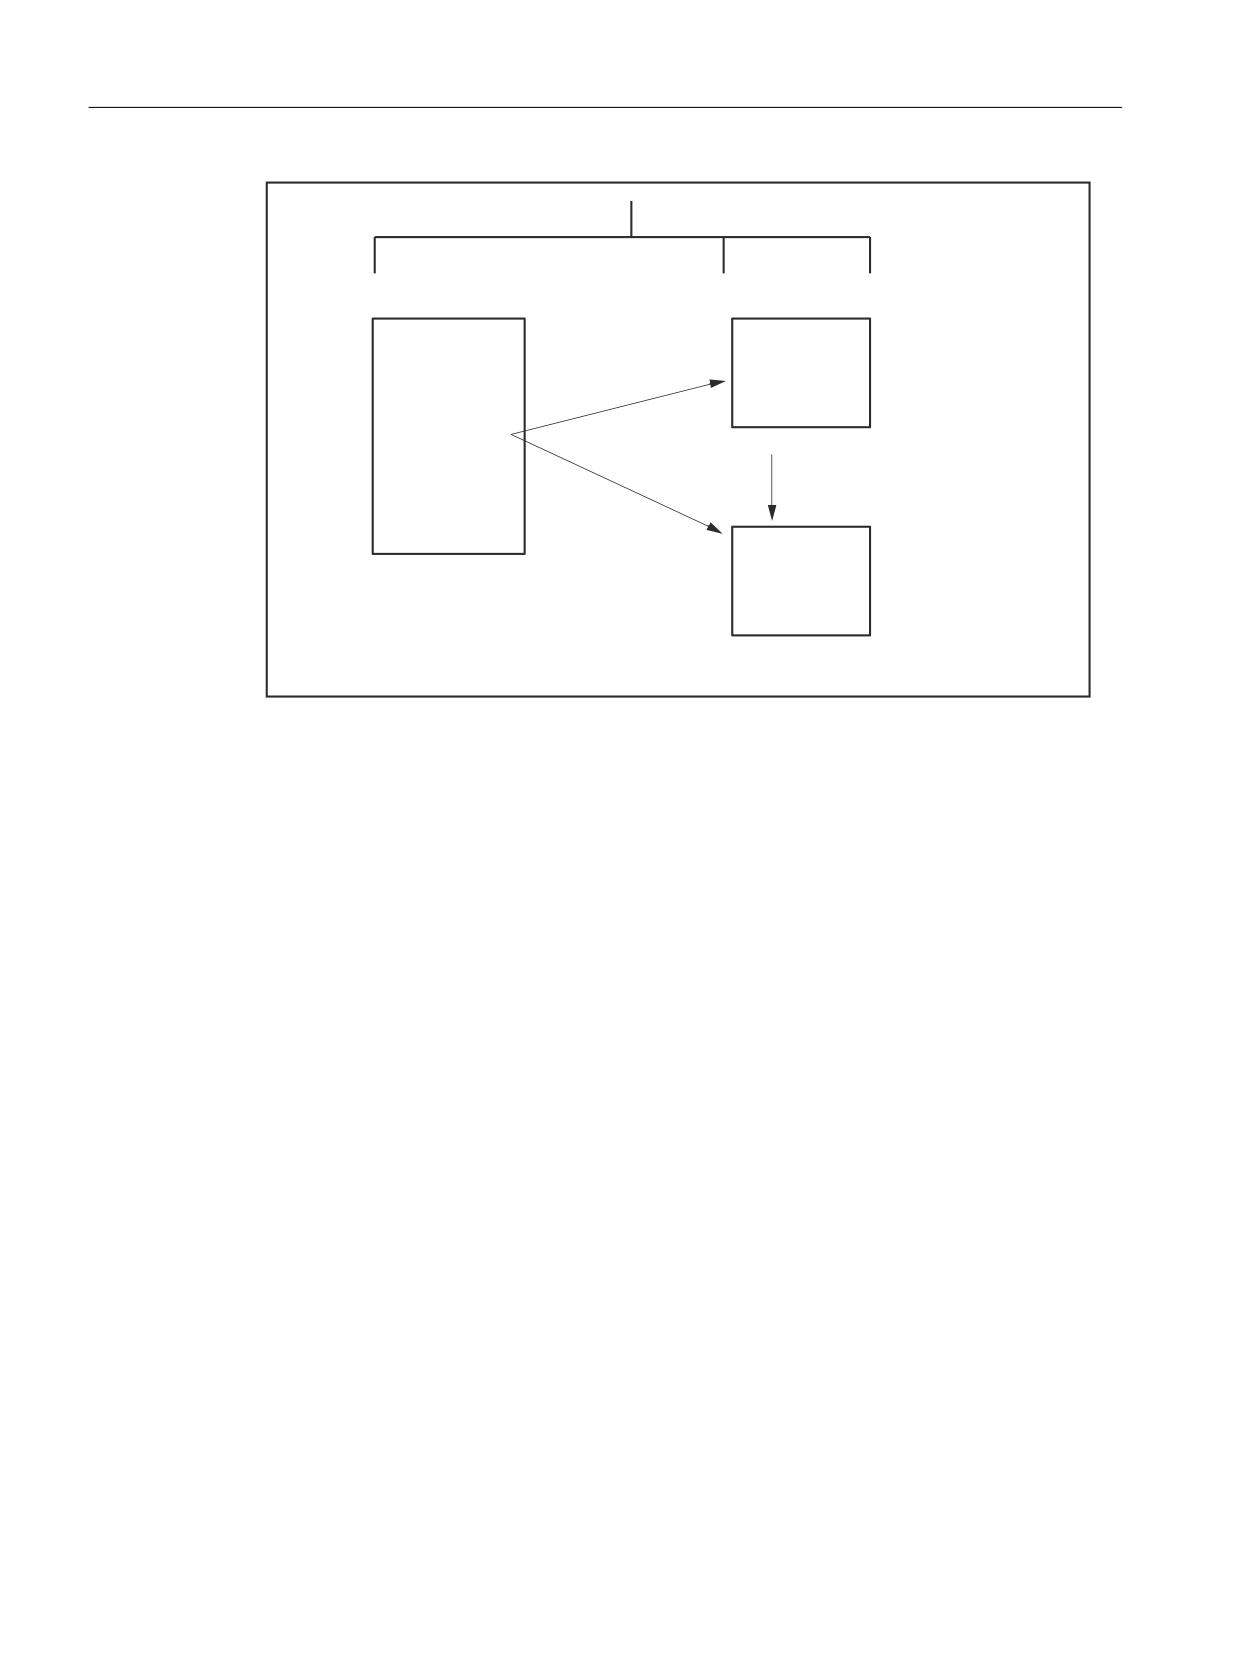
Figure 9-1
Generation and call of preprocessed cycles without parameters
Basic functions
Function Manual, 10/2020, 6FC5397-2GP40-0BA1
567
Preprocessing
9.3 Program call
Main programs
User cycles
Standard cycles
/_N_MPF_DIR
/_N_CUS_DIR
/_N_CST_DIR
Main program
Call
ASCII
Cycle
without preprocessing
PROC CYCLE95
(REAL FFW1, ...)
CYCLE95 (10...)
_N_CYCLE95_SPF
Preprocessing
Call
Pre-
with preprocessing
processed
Cycle
_N_CYCLE95_CYC
Figure 9-2
Generation and call of preprocessed cycles with parameters
Call
• Compiled cycle: A compiled cycle is called in exactly the same way as a normal subroutine.
Example: CYCLE
• Preprocessing is activated: The compiled cycle is called instead of the ASCII cycle.
- If the subroutine is called explicitly with extension _SPF, then the ASCII cycle is called even
if a compilation is available.
Example: CYCLE_SPF; ASCII cycle call
- If the subroutine is called explicitly with extension _CYC, then the preprocessed cycle is
called (assuming that it is available). An error message is output if no compilation is
available.
Example: CYCLE_CYC; calls a precompiled cycle
- If bit 5 is set and a file that is not marked with PREPRO is called explicitly with the extension
_CYC, an error message is issued with Alarm 14011.
• If a subroutine is called without explicit extension, an attempt is first made to load the
program. If this is not possible (not marked with PREPRO), an attempt is made to load the SPF
program.
Basic functions
568
Function Manual, 10/2020, 6FC5397-2GP40-0BA1
Preprocessing
9.4 Constraints
• The change to an external language mode with G291 is rejected and an alarm issued. When
calling a precompiled cycle, an explicit change is made into the Siemens language mode.
• When the subroutine is called, it is checked whether the compiled file is older than the cycle.
If so, the compile file is deleted and an alarm issued. The user must preprocess the cycles
again.
Note
Only cycles without parameters may be called with the extension _SPF or _CYC.
It is not permissible that PUDs are used in cycles that have been preprocessed. The PUDs are
created in the calling main program. At the time of compilation after POWER ON, this data is
not known to the cycles.
The actual program display shows whether the current ASCII cycle or the compilation has been
called (extension _SPF or _CYC).
Call condition
All cycles in the cycle directories must be compiled before preprocessing is activated. Non-
compiled cycles in _N_CUS_DIR and _N_CST_DIR which were loaded after POWER ON, for
example, can only be called through explicit specification of extension _SPF.
If preprocessing is active and bit 5 is set, all programs that do not start with the PREPRO PROC
instruction are not precompiled.
Syntax check
All program errors, which can be corrected using a correction block, are already identified at the
time of preprocessing. In addition, when the program includes branches and check structures,
a check is made to ensure that the branch destinations are present and that structures are nested
correctly.
Branch destinations and labels must be unique in the program.
After the errors detected during preprocessing have been corrected, preprocessing must be
started again by means of an NC POWER ON.
9.4
Constraints
Availability of the "preprocessing" function
The function is an option ("Program pre-processing"), which must be assigned to the hardware
via the license management.
Language scope
The full vocabulary of the NC language is available in the part program.
Basic functions
Function Manual, 10/2020, 6FC5397-2GP40-0BA1
569
Preprocessing
9.5 Examples
There are no restrictions on the calculation of measured process variables and in the reaction to
signals from the process and other channels (override, deletion of distance-to-go, motion-
synchronous actions, channel coordination, interrupt processing, etc.).
Axis name
Part programs are compiled independently of channels. For this reason, the geometry and
channel names set in the following machine data must be identical in all channels if they
are used directly in the precompiled cycles:
MD20060 $MC_AXCONF_GEOAX_NAME_TAB (name of the geometry axis in the channel)
MD20080 $MC_AXCONF_CHANAX_NAME_TAB (name of the channel axis in the channel)
Generally speaking, axis names are not used directly in machining cycles since cycles are written
as follows:
• independently of channels and
• independently of the axis names defined on the machine.
The axes to be traversed are addressed indirectly via machine data or transferred as parameters:
• Indirect axis programming:
- IF $AA_IM[AXNAME($MC_AXCONF_CHANAX_NAME_TAB[4])] > 5
; This branch will pass through if the actual value of the 5th channel axis
; with reference to the machine coordinate system is greater than 5.
- G1 AX[AXNAME($MC-AXCONF-GEOAX-NAME-TAB[0])] = 10
F1000 G90.
; Traverse the 1st geometry axis to the value 10.
ENDIF
• Transfer of axis to be traversed from the main program:
- Cycle definition
PROC DRILL(AXIS DRILL_AXIS)
WHILE $AA_IW[DRILL_AXIS] > -10
G1 G91 F250 AX[DRILL_AXIS] = -1
ENDWHILE
- Call from the main program
DRILL(Z)
9.5
Examples
9.5.1
Preprocessing individual files
Program code
Comment
PROC UP1 PREPRO
; Preprocessing if bit 5 = 1
; in PREPROCESSING_LEVEL
Basic functions
570
Function Manual, 10/2020, 6FC5397-2GP40-0BA1
Preprocessing
9.5 Examples
Program code
Comment
N1000 DEF INT COUNTER
N1010 TARGET: G1 G91 COMPCAD
N1020 G1 X0.001 Y0.001 Z0.001 F100000
N1030 COUNTER=COUNTER+1
N1040 COUNTER=COUNTER-1
N1050 COUNTER=COUNTER+1
N1060 IF COUNTER<=10 GOTOB TARGET
N1070 M30
PROC UP2
N2000 DEF INT VARIABLE, ARRAY[2]
N2010 IF $AN_NCK_Version < 3.4
N2020 SETAL(61000)
N2030 ENDIF
N2040 START:
N2050 FOR VARIABLE = 1 TO 5
N2060 G1 F1000 X=VARIABLE*10-56/86EX4+4*SIN(VARIABLE/3)
N2070 ENDFOR
N2080 M17
PROC MAIN
N10 G0 X0 Y0 Z0
N20 UP1
N30 G0 X10 Y10 Z10
N40 UP2
N50 G0 X100 Y100
N60 UP3
N70 G0 X10 Y10
N80 M30
Sample constellations:
a) Bit 5 = 1
MD10700 $MN_PREPROCESSING_LEVEL=45 ; bit 0, 2, 3, 5
Subprogram UP1 is pretranslated, and the call description is generated.
Subprogram UP2 is not pretranslated, but the call description is generated.
b) Bit 5 = 0
MD10700 $MN_PREPROCESSING_LEVEL=13 ; bit 0, 2, 3,
Both subprograms are pretranslated, and the call description is generated.
c) Example of an invalid subprogram with activated compiling:
Program code
Comment
PROC SUB1 PREPRO
G291
; ← Alarm when compiling, G291 not possible
Basic functions
Function Manual, 10/2020, 6FC5397-2GP40-0BA1
571

Preprocessing
9.6 Data lists
Program code
Comment
G0 X0 Y0 Z0
M17
9.5.2
Preprocessing in the dynamic NC memory
Machine data for preprocessing only in the dynamic NC memory with selective selection:
Program code
Comment
; Bit 5 = 1 Selective program selection
; Bit 6 =0 no switch to
; static NC memory if
; dynamic NC memory is full
N30 $MN_MM_DRAM_FILE_MEM_SIZE = 800
; Reserve space
N40 $MN_PREPROCESSING_LEVEL = 63
; Bit 0-5 = 1
M17
Machine data for preprocessing in the dynamic NC memory with the option of using the static
NC memory and selective selection:
Program code
Comment
; Bit 5 = 1 Selective program selection
; Bit 6 = 1 switch to static
; NC memory if dynamic NC
; memory full
N30 $MN_MM_DRAM_FILE_MEM_SIZE = 800
; Reserve space
N40 $MN_PREPROCESSING_LEVEL = 127
; Bit 0-6 = 1
M17
9.6
Data lists
9.6.1
Machine data
9.6.1.1
General machine data
Number Identifier: $MN_
Description
10700
PREPROCESSING_LEVEL
Program preprocessing level
18242
MM_MAX_SIZE_OF_LUD_VALUE
Maximum LUD-variable array size
Basic functions
572
Function Manual, 10/2020, 6FC5397-2GP40-0BA1

Preprocessing
9.6 Data lists
9.6.1.2
Channelspecific machine data
Number Identifier: $MC_
Description
28010
MM_NUM_REORG_LUD_MODULES
Number of blocks for local user variables for REORG
(DRAM)
28020
MM_NUM_LUD_NAMES_PER_PROG
Number of local user variables (DRAM)
28040
MM_LUD_VALUES_MEM
Memory size for local user variables (DRAM)
Basic functions
Function Manual, 10/2020, 6FC5397-2GP40-0BA1
573
Preprocessing
9.6 Data lists
Basic functions
574
Function Manual, 10/2020, 6FC5397-2GP40-0BA1
Measurement
10
10.1
Brief description
Measurement level 1: Channel-specific measurement
Function
Up to two switching probes can be connected simultaneously to the CNC. In the case of channel-
specific measurement, the measurement process for an NC channel is always activated from the
part program running in the relevant channel. All of the axes programmed in the measurement
block take part in the measurement process. It is possible to program a trigger event (rising or
falling edge) and a measurement mode with or without deletion of distance-to-go for each
measurement process. The results of measurements can be read in the part program or with
synchronized actions in both the machine and the workpiece coordinate system. It is possible to
test the deflection of the probe by scanning a system variable and outputting it to the PLC
interface and deriving responses in the part program. An extended functionality is available with
measurement level 2.
Benefits
• Influencing the process during machining
• Ensuring machining precision
Measurement level 2: Axis-specific measurement (option; order code M32)
Article No.: 6FC5800-0AM32-0YB0
Function
While the measurement function in motion blocks in the part program is limited to one block,
you can activate measurement functions from synchronized actions at any time, independent
of the part program. The measurement events can be assigned to the axes in the NC block (axis-
specific measurement). In the case of simultaneous measurement, up to four trigger events can
be evaluated per position controller cycle. Measured values are read as a function of the three
parameters: probe, axis and measuring edge.
In the case of continuous (cyclic) measurement, the measurement results are written to a FIFO
variable. Endless measurement can be achieved by reading out the FIFO values cyclically.
Measurement results can be logged in the form of a file.
Benefits
• Influencing the process during machining
• Ensuring machining precision
• Logging of the measurement results
Basic functions
Function Manual, 10/2020, 6FC5397-2GP40-0BA1
575
Measurement
10.1 Brief description
Measuring functions for workpiece and tool measurement
Function
All the measuring tasks to be resolved in a milling or turning machine can be efficiently managed
with the measuring functions for workpiece and tool measurement. The measurements can be
performed via an HMI operator action or via measuring cycles from the part program. They can
execute either channel-specifically including all axes programmed in the measurement block as
well as axis-specifically from the part program or from synchronized actions beyond NC block
limits.
Additional properties:
• Measuring in JOG
• Two probes can be connected simultaneously
• Measuring in space with frame
• Adaptable measurement types with/without deletion of distance-to-go
• Display and logging of measurement parameters and results (with measuring cycles)
• Measurement results can be read in the machine or workpiece coordinate system
• Cyclic measurement with synchronized actions parallel to the workpiece machining
Benefits
• Ensuring machining precision
• Reduction of idle times
• Elimination of error sources
• Automation of production processes.
Siemens measuring cycles (option; order code P28)
Article No.: 6FC5800-0AP28-0YB0
Function
Measuring cycles provided by Siemens as an option are predefined subprograms for resolving
specific measuring tasks on tools or workpieces that can be adapted to certain measuring
situations via specific parameters.
Benefits
• Almost all measuring tasks that have to be resolved in a turning/milling machine can be
handled
• Reliable quality of the manufactured parts through automatic measurement directly in the
machine
• Fast programming even for complex measuring tasks thanks to input screens with graphic
support
• Superior workpiece accuracy and optimum transparency of the quality data
Further information: Measuring Cycles Programming Manual
Basic functions
576
Function Manual, 10/2020, 6FC5397-2GP40-0BA1
Measurement
10.2 Probes that can be used
10.2
Probes that can be used
Hardware requirement
In order to measure tool and workpiece dimensions, a touch trigger probe is required that
supplies a constant bounce-free signal (rather than a pulse) when deflected.
Probe types
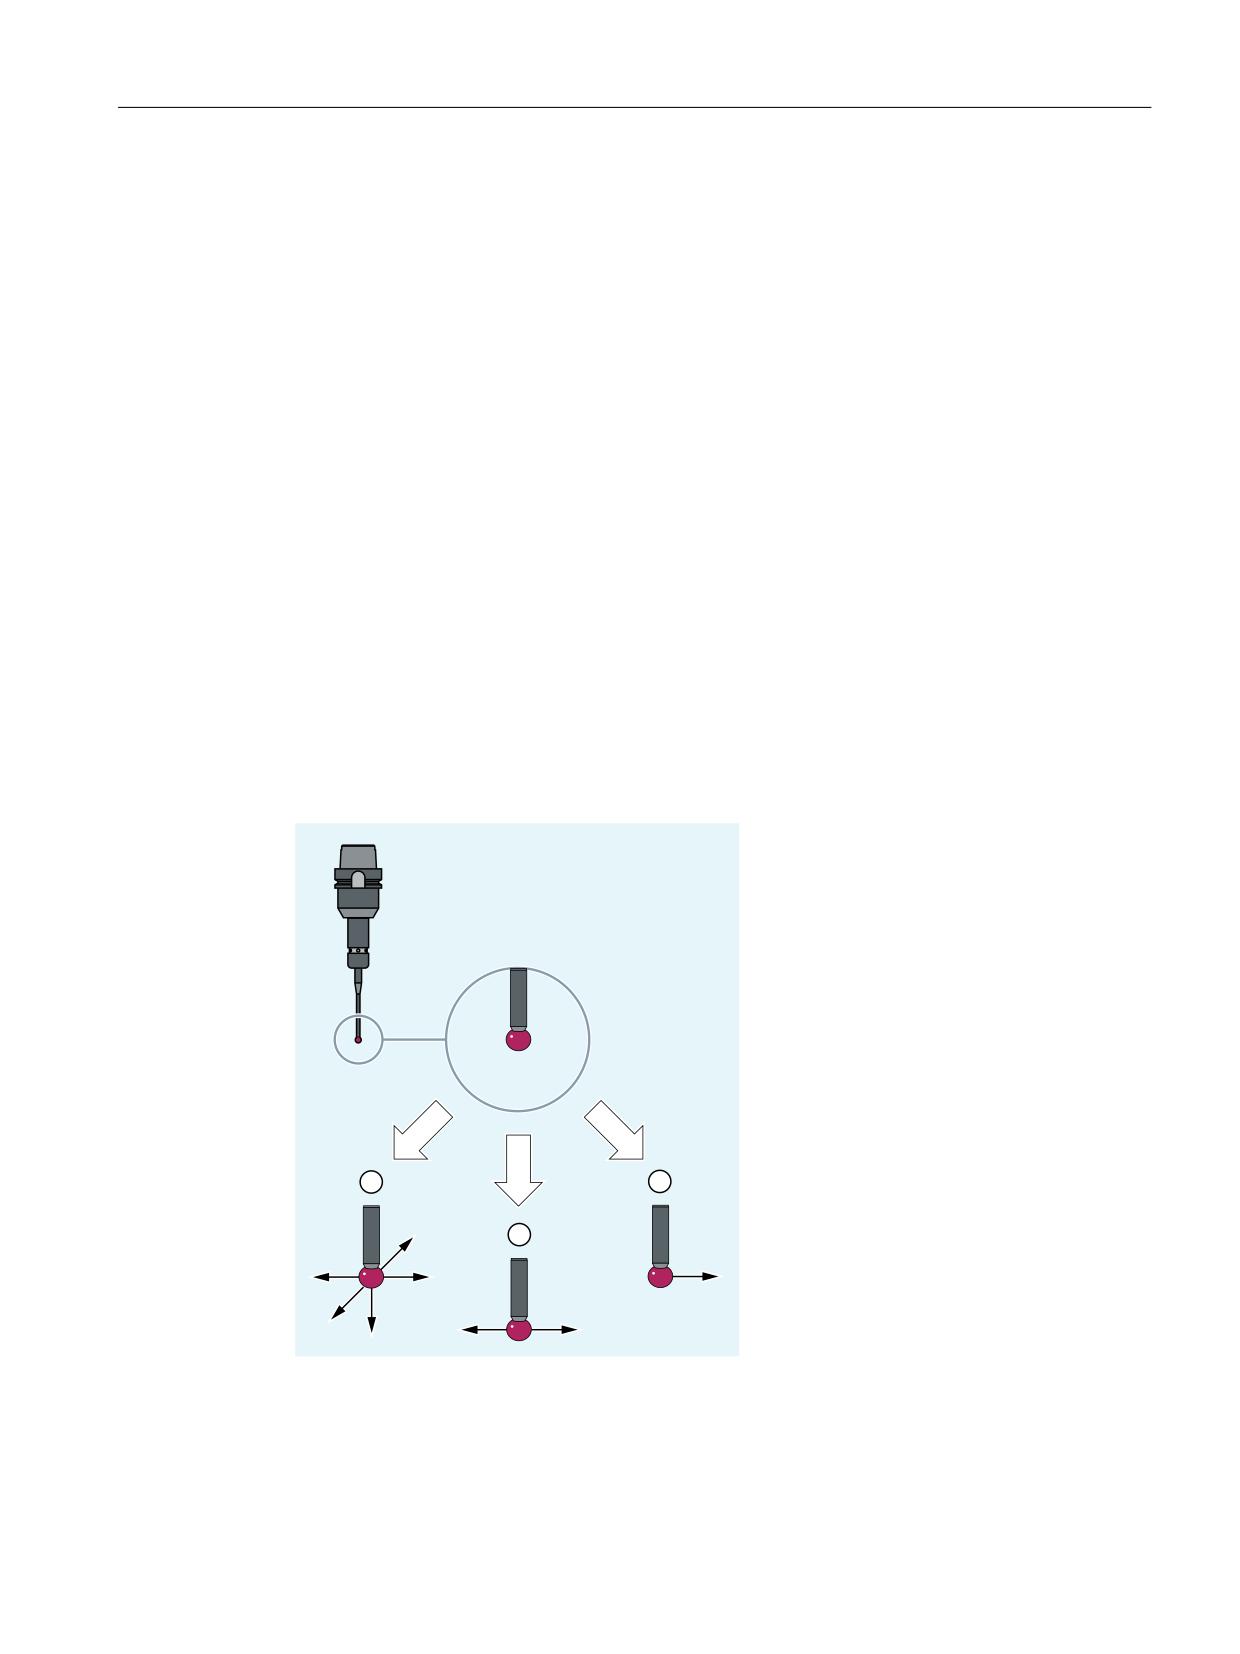
A distinction is made between the following probe types according to the number of possible
deflection directions:
• Multidirectional probe (3D)
Suitable for all tool and workpiece measurements on turning and milling machines.
• Bidirectional probe
Suitable for workpiece measurement on milling machines and machining centers (treated
like monodirectional probes) and turning machines.
Not suitable for tool measurement.
• Monodirectional probe
Suitable for workpiece measurement on milling machines and machining centers with minor
restrictions.
Not suitable for workpiece measurement on turning machines.
Not suitable for tool measurement.
① Multidirectional probe (3D)
② Bidirectional probe
③ Monodirectional probe
Basic functions
Function Manual, 10/2020, 6FC5397-2GP40-0BA1
577

Measurement
10.3 Measurement level 1: Channel-specific measurement
Requirements for the use of monodirectional probes
The following requirements apply for the use of monodirectional probes in milling machines and
machining centers:
• The spindle must be capable of being positioned with the SPOS function.
• The probe switching signal must be transmittable through 360°.
The probe must also be mechanically aligned in the spindle to permit measurements in the
following directions at the 0° spindle position:
Plane
Measuring direction
G17 (X-Y)
Positive X direction
G18 (Z-X)
Positive Z direction
G19 (Y-Z)
Positive Y direction
Note
The complete measurement takes longer because the spindle needs to be positioned several
times with SPOS during the measuring cycle.
10.3
Measurement level 1: Channel-specific measurement
In the case of channel-specific measuring, the measuring process for an NC channel is always
activated from the part program running in the relevant channel. One trigger event (positive or
negative edge of the probe) and one measuring mode with deletion of distance-to-go (MEAS)
or without deletion of distance-to-go (MEAW) are programmed in a measuring block. All the
axes programmed in the measuring block then take part in the measuring process.
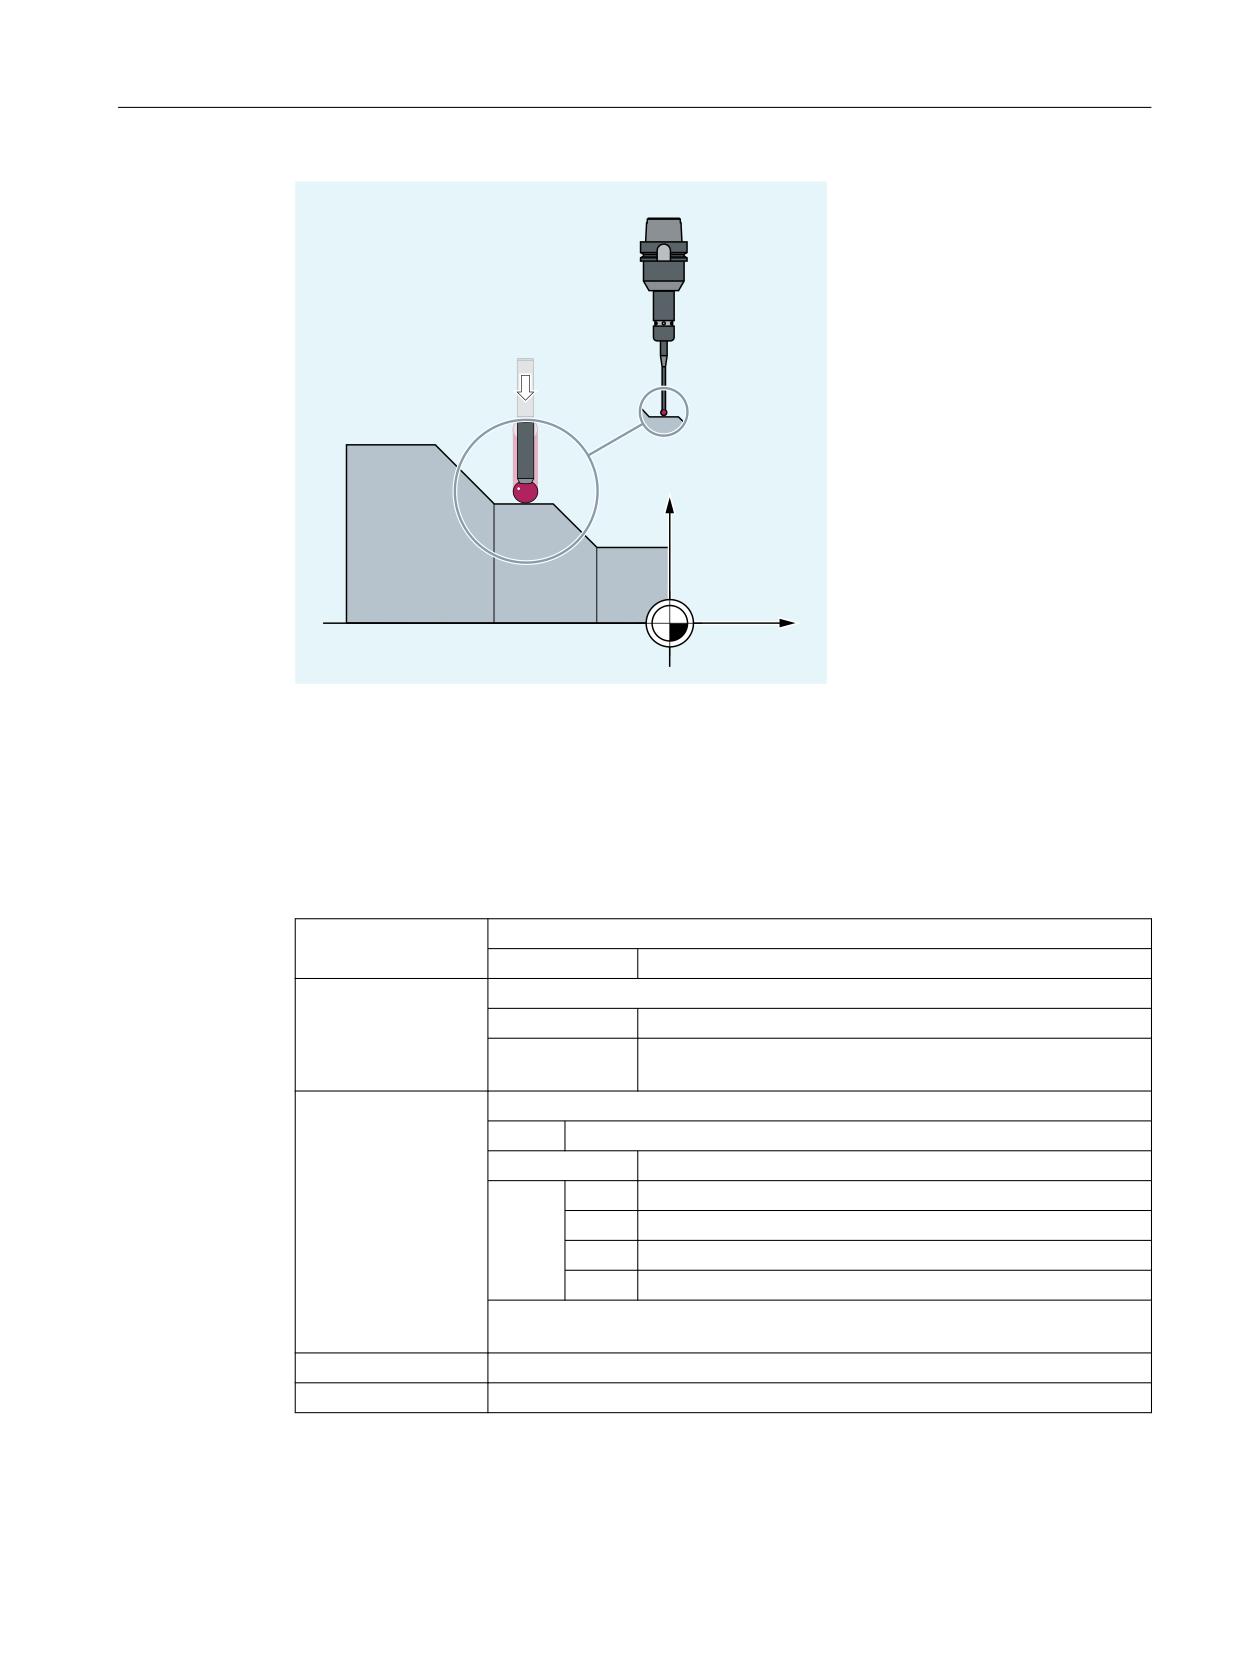
As soon as a measuring block becomes active, the probe is moved to the workpiece. On the
probe's switching edge, the positions for all axes programmed in the measuring block are
measured and written to the appropriate memory cell for each axis.
The results of measurements can be read in the part program or with synchronized actions in
both the machine and the workpiece coordinate systems.
Basic functions
578
Function Manual, 10/2020, 6FC5397-2GP40-0BA1
Measurement
10.3 Measurement level 1: Channel-specific measurement
;
=
Syntax
MEAS=<TE> G... X... Y... Z...
MEAW=<TE> G... X... Y... Z...
Meaning
MEAS:
Measurement with delete distance-to-go
Effectiveness:
Non-modal
MEAW:
Measurement without delete distance-to-go
Effectiveness:
Non-modal
Application:
For measuring tasks in which the programmed position is to
be approached in every case.
<TE>:
Trigger event to initiate measurement
Type:
INT
Range of values:
-2, -1, 1, 2
Value:
(+)1
Positive edge of probe 1 (on measuring input 1)
-1
Negative edge of probe 1 (on measuring input 1)
(+)2
Positive edge of probe 2 (on measuring input 2)
-2
Negative edge of probe 2 (on measuring input 2)
Note:
There is a maximum of 2 probes (dependent on configuration level).
G...:
Type of interpolation, e.g. G0, G1, G2 or G3
X... Y... Z...:
End points in Cartesian coordinates
Basic functions
Function Manual, 10/2020, 6FC5397-2GP40-0BA1
579
Measurement
10.3 Measurement level 1: Channel-specific measurement
Note
MEAS and MEAW are non-modal, and programmed together with motion operations. The
feedrate and interpolation type (G0, G1, etc.) as well as the number of axes must be adapted for
the respective measuring task.
Example
Program code
Comment
N10 MEAS=1 G1 F1000 X100 Y730 Z40
; Measuring block with probe at first
measuring input and linear interpola-
tion. A preprocessing stop is automati-
cally generated.
Further information
Query status
If an evaluation is required in the program, whether a probe has been deflected or has switched,
the status can be queried through the following system variables:
System variable
Meaning
Data type
Value
$A_PROBE[<n>]
Probe state
INT
0
Probe not deflected.
1
Probe deflected.
$AC_MEA[<n>]
Switching status of the probe
INT
0
Probe has not switch-
ed
$AC_MEA[<n>] is automati-
cally reset at the beginning of
1
Probe has switched.
a measurement.
<n> = number of the probe
Reading measured values
For channel-specific measuring, the positions of all traversing path and positioning axes of the
block are acquired (maximum number of axes depends on the control configuration). For MEAS,
the motion is braked in a defined fashion after the probe has been triggered.
Note
If a geometry axis is programmed in a measuring block, the measured values are stored for all
current geometry axes.
If an axis participating in a transformation is programmed in a measuring block, the measured
values are stored for all axes participating in this transformation.
Basic functions
580
Function Manual, 10/2020, 6FC5397-2GP40-0BA1
Measurement
10.4 Measurement level 2: Axis-specific measurement (option)
Reading measurement results
The measured values of the axes acquired by probes can be read through the following system
variables in the part program and in synchronized actions.
System variable
Meaning
$AA_MM[<Axis>]
Probe measured value in the machine coordinate system
$AA_MW[<Axis>]
Probe measured value in the workpiece coordinate system
10.4
Measurement level 2: Axis-specific measurement (option)
With axis-specific measuring, activation can take place in the part program or in synchronized
actions. If two measuring systems are available for the axis, both can be used for the
measurement.
The following measuring methods are available:
• Measurement with delete distance-to-go (MEASA)
• Measurement without delete distance-to-go (MEAWA)
• Continuous measurement without delete distance-to-go (MEAC)
With MEASA or MEAWA for the programmed axis, up to four measured values are acquired for
each measurement and are then saved in system variables in accordance with the trigger event.
With continuous measurement with MEAC, the measurement results are stored in FIFO
variables.
Syntax
MEASA[<Axis>]=(<Mode>,<TE1>,...,<TE4>)
MEAWA[<Axis>]=(<Mode>,<TE1>,...,<TE4>)
MEAC[<Axis>]=(<Mode>,<MeasMem>,<TE1>,...,<TE4>)
Note
MEASA and MEAWA are non-modal; and can be programmed together in one block. If, on the
contrary, MEASA/MEAWA are programmed with MEAS/MEAW in one block, there is an error
message.
Meaning
MEASA:
Axis-specific measurement with deletion of distance-to-go
Effectiveness:
Non-modal
MEAWA:
Axes-specific measurement without delete distance-to-go
Effectiveness:
Non-modal
MEAC:
Axis-specific, continuous measurement without delete distance-to-go
Effectiveness:
Non-modal
<Axis>:
Name of channel axis used for measurement
Basic functions
Function Manual, 10/2020, 6FC5397-2GP40-0BA1
581
Measurement
10.4 Measurement level 2: Axis-specific measurement (option)
<Mode>:
Two-digit (xx) number indicating the operating mode (measuring mode and meas-
uring system)
Units decade: Measuring mode
Specifies whether the trigger events are to be activated in chronological or pro-
grammed order.
x0
Cancel measuring job.
x1
Up to 4 different trigger events can be activated simultaneously.
x2
Up to 4 trigger events that can be activated successively.
x3
Up to 4 different trigger events can be activated in succession, but there is
no monitoring of trigger event 1 at the start (alarms 21700/21703 are
suppressed).
Note:
MEAC does not support this mode.
Tens decade: Measuring system
Specifies the measuring system with which measuring is to be performed.
0x (or no specification)
Active measuring system
1x
Measuring system 1
2x
Measuring system 2
3x
Both measuring systems
<TE>:
Trigger event to initiate measurement
Type:
INT
Range of values:
-2, -1, 1, 2
(+)1
Positive edge of probe 1
-1
Negative edge of probe 1
(+)2
Positive edge of probe 2
-2
Negative edge of probe 2
Note:
If the measuring process is performed with two measuring systems, a maximum of
two trigger events can be programmed (positive or negative edge). The measured
values of both measuring systems are acquired for both the trigger events.
<MeasMem>:
Number of FIFO (circular buffer)
Examples
Example 1: Axis-specific measurement with delete distance-to-go in mode 1 (evaluation in
chronological sequence)
a) Measuring with one measuring system
Program code
Comment
N100 MEASA[X]=(1,1,-1) G01 X100 F100
; Measuring in mode 1 with active measur-
ing system. Wait for measuring signal
with positive/negative edge from probe 1
for travel path to X=100.
N110 IF $AC_MEA[1]==FALSE GOTOF END
; Check that the measurement was success-
ful.
Basic functions
582
Function Manual, 10/2020, 6FC5397-2GP40-0BA1

Measurement
10.4 Measurement level 2: Axis-specific measurement (option)
Program code
Comment
N120 R10=$AA_MM1[X]
; Save measured value acquired at the
first programmed trigger event (positive
edge).
N130 R11=$AA_MM2[X]
; Save measured value acquired at the sec-
ond programmed trigger event (negative
edge).
N140 END:
b) Measuring with two measuring systems
Program code
Comment
N200 MEASA[X]=(31,1,-1) G01 X100 F100
; Measuring in mode 1 with both measuring
systems. Wait for measuring signal with
positive/negative edge from probe 1 for
travel path to X=100.
N210 IF $AC_MEA[1]==FALSE GOTOF END
; Check that the measurement was success-
ful.
N220 R10=$AA_MM1[X]
; Save measured value of measuring system
1 at positive edge.
N230 R11=$AA_MM2[X]
; Save measured value of measuring system
2 at positive edge.
N240 R12=$AA_MM3[X]
; Save measured value of measuring system
1 at negative edge.
N250 R13=$AA_MM4[X]
; Save measured value of measuring system
2 at negative edge.
N260 END:
Example 2: Axis-specific measurement with delete distance-to-go in mode 2 (evaluation in
programmed sequence)
Program code
Comment
N100 MEASA[X]=(2,1,-1,2,-2) G01 X100 F100
; Measuring in mode 2 with active measur-
ing system. Wait for measuring signal in
the sequence positive edge probe 1, nega-
tive edge probe 1, positive edge probe 2,
negative edge probe 2 while traversing
path to X=100.
N110 IF $AC_MEA[1]==FALSE GOTOF PROBE2
; Check that the measurement with probe 1
is successful.
N120 R10=$AA_MM1[X]
; Save measured value acquired at the
first programmed trigger event (positive
edge of probe 1).
N130 R11=$AA_MM2[X]
; Save measured value acquired at the sec-
ond programmed trigger event (positive
edge of probe 1).
N140, PROBE2:
Basic functions
Function Manual, 10/2020, 6FC5397-2GP40-0BA1
583

Measurement
10.4 Measurement level 2: Axis-specific measurement (option)
Program code
Comment
N150 IF $AC_MEA[2]==FALSE GOTOF END
; Check that the measurement with probe 2
is successful.
N160 R12=$AA_MM3[X]
; Save measured value acquired at the
third programmed trigger event (positive
edge of probe 2).
N170 R13=$AA_MM4[X]
; Save measured value acquired at the
fourth programmed trigger event (positive
edge of probe 2).
N180 END:
Example 3: Axis-specific, continuous measurement in mode 1 (evaluation in chronological
sequence)
a) Measurement of up to 100 measured values
Program code
Comment
N110 DEF REAL MEASVALUE[100]
N120 DEF INT loop=0
N130 MEAC[X]=(1,1,-1) G01 X1000 F100
; Measuring in mode 1 with active measur-
ing system, save measured values under
$AC_FIFO1, wait for measuring system with
negative edge from probe 1 on the travel
path to X=1000.
N135 STOPRE
N140 MEAC[X]=(0)
; Terminate measurement when axis posi-
tion is reached.
N150 R1=$AC_FIFO1[4]
; Save number of accumulated measured val-
ues in parameter R1.
N160 FOR loop=0 TO R1-1
N170 MEASURED VALUE[loop]=$AC_FIFO1[0]
; Read-out measured values from $AC_FIFO1
and save.
N180 ENDFOR
b) Measurement with delete distance-to-go after 10 measured values
Program code
Comment
N10 WHEN $AC_FIFO1[4]>=10 DO MEAC[x]=(0) DELDTG(x)
; Delete distance-to-go.
N20 MEAC[x]=(1,1,1,-1) G01 X100 F500
N30 MEAC [X]=(0)
N40 R1 = $AC_FIFO1[4]
; Number of measured values.
Basic functions
584
Function Manual, 10/2020, 6FC5397-2GP40-0BA1

Measurement
10.4 Measurement level 2: Axis-specific measurement (option)
c) Measurement of a positive/negative tooth flank with 2 probes
Program code
Comment
N110 DEF REAL MEASVALUE[16]
N120 DEF INT loop=0
N130 MEAC[X]=(1,1,-1,2) G01 X100 F100
; Measurement in mode 1 with active meas-
uring system, save measured values under
$AC_FIFO1, wait for measuring signal in
the sequence negative edge of probe 1,
positive edge of probe 2 while traversing
the travel path to X=100.
N140 STOPRE
; Preprocessing stop.
N150 MEAC[X]=(0)
; Terminate measurement when axis posi-
tion is reached.
N160 R1=$AC_FIFO1[4]
; Save number of accumulated measured val-
ues in parameter R1.
N170 FOR loop=0 TO R1-1
N180 MEASURED VALUE[loop]=$AC_FIFO1[0]
; Read-out measured values from $AC_FIFO1
and save.
N190 ENDFOR
Further information
Measuring job
A measuring job can be programmed in the part program or from a synchronized action. Please
note that only one measuring job can be active at any given time for each axis.
Note
The feed must be adjusted to suit the particular measuring task
In the case of MEASA and MEAWA, the correctness of results can be only guaranteed for
feedrates at which no more than one trigger event of the same type and no more than 4 trigger
events of different types occur in each position control cycle.
In the case of continuous measurement with MEAC, the ratio between interpolator cycle and the
position control cycle must not exceed 1:8.
Trigger event
A trigger event comprises the number of the probe and the trigger criterion (positive or negative
edge) of the measuring signal.
Up to 4 trigger events of the addressed probe can be processed for each measurement; in other
words, up to two probes each with two measuring signal edges. The processing sequence and
the maximum number of trigger events depend on the selected mode.
If the measuring operation is performed with two measuring systems, a maximum of two trigger
events can be programmed (positive or negative edge). The measured values of both probes are
acquired for both of the trigger events.
Basic functions
Function Manual, 10/2020, 6FC5397-2GP40-0BA1
585
Measurement
10.4 Measurement level 2: Axis-specific measurement (option)
With the use of PROFIBUS telegram 391 (default setting for PROFIBUS communication) only one
measured value is possible for each trigger event and position control cycle.
When using PROFIBUS telegram 395 (Page 581), for MEAC in operating mode 1, the number of
measured values for each trigger event can be increased to a total of 8 measured values for
increasing and 8 for falling edge per trigger event and position controller clock cycle:
• One probe: 8 measured values for a positive and 8 for a negative edge
• Two probes: 4 measured values for a positive and 4 for a negative edge for each probe
This means that higher feed rates or higher speeds can be reached by using PROFIBUS telegram
395.
Operating mode
The first digit (tens decade) of the operating mode selects the required measuring system. If only
one measuring system is installed, but a second is programmed, the installed system is
automatically selected.
The second digit (units decade) selects the desired measuring mode. The measuring process is
thus adapted to the options supported by the relevant control:
• Mode 1
Trigger events are evaluated in the chronological sequence in which they occur.
• Mode 2
Trigger events are evaluated in the programmed sequence.
• Mode 3
Trigger events are evaluated in the programmed sequence but there is no monitoring of
trigger event 1 at the start.
Measurement with and without delete distance-to-go
When command MEASA is programmed, the distance-to-go is not deleted until all required
measured values have been acquired.
MEAWA is used for special measuring tasks in which a programmed position always has to be
approached.
Note
MEASA cannot be programmed in synchronized actions. As an alternative, MEAWA plus delete
distance-to-go can be programmed as a synchronized action.
If the measuring job with MEAWA is started from synchronized actions, the measured values will
only be available in the machine coordinate system.
Geometry axes/transformations
If axial measurement is to be started for a geometry axis, the same measuring job must be
programmed explicitly for all remaining geometry axes. The same applies to axes involved in a
transformation.
Examples:
N10 MEASA[Z]=(1,1) MEASA[Y]=(1,1) MEASA[X]=(1,1) G0 Z100
or
Basic functions
586
Function Manual, 10/2020, 6FC5397-2GP40-0BA1
Measurement
10.4 Measurement level 2: Axis-specific measurement (option)
N10 MEASA[Z]=(1,1) POS[Z]=100
Query status
If an evaluation is required in the program, whether a probe has been deflected or has switched,
the status can be queried through the following system variables:
System variable
Meaning
Data type
Value
$A_PROBE[<n>]
Probe state
INT
0
Probe not deflected.
1
Probe deflected.
$AC_MEA[<n>]
Switching status of the probe
INT
0
Probe has not switch-
ed
$AC_MEA[<n>] is automati-
cally reset at the beginning of
1
Probe has switched
a measurement.
(all trigger events pro-
grammed in the
measuring block
have taken place).
<n> = number of the probe
Note
If measurement is started from synchronized actions, $AC_MEA is no longer updated. In this
case, the NC/PLC interface signal DB31, … DBX62.3 or the equivalent variable
$AA_MEAACT[<Axis>] must be queried.
$AA_MEAACT==1: Measurement active
$AA_MEAACT==0: Measurement not active
Probe limitation
In the NC program or synchronized action, the probe limiting status can be read using system
variable $A_PROBE_LIMITED when using PROFIBUS telegram 395:
$A_PROBE_LIMITED[<n>] == 0: Probe limitation inactive/reset
$A_PROBE_LIMITED[<n>] == 1: Probe limitation active
<n> = probe number
Measurement results for MEASA / MEAWA
The values measured by probes can be read through the following system variables in the part
program and in synchronized actions.
System variable
Meaning
$AA_MM1[<Axis>]
Probe measured value for trigger event 1 in the machine coordinate system
$AA_MM4[<Axis>]
Probe measured value for trigger event 4 in the machine coordinate system
$AA_MW1[<Axis>]
Probe measured value for trigger event 1 in the workpiece coordinate system
$AA_MW4[<Axis>]
Probe measured value for trigger event 4 in the workpiece coordinate system
<Axis> = measuring axis
Basic functions
Function Manual, 10/2020, 6FC5397-2GP40-0BA1
587
Measurement
10.4 Measurement level 2: Axis-specific measurement (option)
If a measuring job is executed by two measuring systems, each of the two possible trigger events
is acquired from both measuring systems. The assignment of system variables is then as follows:
$AA_MM1[<Axis>]
or
$AA_MW1[<Axis>]
Measured value from measuring sys-
tem 1 on trigger event 1
$AA_MM2[<Axis>]
or
$AA_MW2[<Axis>]
Measured value from measuring sys-
tem 2 on trigger event 1
$AA_MM3[<Axis>]
or
$AA_MW3[<Axis>]
Measured value from measuring sys-
tem 1 on trigger event 2
$AA_MM4[<Axis>]
or
$AA_MW4[<Axis>]
Measured value from measuring sys-
tem 2 on trigger event 2
Continuous measurement (MEAC)
The measured values for MEAC are available in the machine coordinate system and stored in the
programmed FIFO[<n>] memory (circular buffer). If two probes are configured for the
measurement, the measured values of the second probe are stored separately in the FIFO[<n>
+1] memory configured specifically for this purpose (defined in machine data).
The FIFO memory is a circular buffer in which measured values are written to $AC_FIFO variables
according to the circular principle.
Note
FIFO contents can be read only once from the circular buffer. If this measured data is to be used
several times, it must be buffered in the user data.
If the number of measured values for the FIFO memory exceeds the maximum value defined in
machine data, the measurement is automatically terminated.
An endless measuring process can be implemented by reading out measured values cyclically.
In this case, data must be read out at least with the same frequency as new measured values are
input.
Further information: Function Manual Synchronized Actions
Protection against programming errors
The following programming errors are detected and indicated as errors:
• MEASA/MEAWA programmed with MEAS/MEAW in the same block
Example:
N01 MEAS=1 MEASA[X]=(1,1) G01 F100 POS[X]=100
• MEASA/MEAWA with number of parameters <2 or >5
Example:
N01 MEAWA[X]=(1) G01 F100 POS[X]=100
• MEASA/MEAWA with trigger event not equal to 1/ -1/ 2/ -2
Example:
N01 MEASA[B]=(1,1,3) B100
• MEASA/MEAWA with invalid mode
Example:
N01 MEAWA[B]=(4,1) B100
Basic functions
588
Function Manual, 10/2020, 6FC5397-2GP40-0BA1
Measurement
10.5 Workpiece and tool measurement
• MEASA/MEAWA with trigger event programmed twice
Example:
N01 MEASA[B]=(1,1,-1,2,-1) B100
• MEASA/MEAWA and missing geometry axis
Example:
N01 MEASA[X]=(1,1) MEASA[Y]=(1,1) G01 X50 Y50 Z50 F100; GEO axis X/
Y/Z
• Inconsistent measuring job with geometry axes
Example:
N01 MEASA[X]=(1,1) MEASA[Y]=(1,1) MEASA[Z]=(1,1,2) G01 X50 Y50 Z50
F100
Telegram selection
By default, the axis-specific measurement is implemented with PROFIBUS telegram 391.
PROFIBUS telegram 395 is used for measuring with several measured values per trigger event
and the position controller cycle.
The following settings are also required:
• Drive parameters:
CU: p0922 = 395; setting for the telegram selection
CU: p0684 = 16; setting of the measuring procedure
CU: p0680; configuration of the central probe terminal
• PROFIBUS connection:
MD13211 $MN_MEAS_CENTRAL_SOURCE = 2 (telegram integration without handshake)
10.5
Workpiece and tool measurement
10.5.1
Fundamentals
10.5.1.1
Introduction
In workpiece measurement, a probe is moved to the clamped workpiece in the same way as a
tool and the measured values are acquired. Because of the broad selection of different
measurement types, all the measuring tasks to be resolved in a milling or turning machine can
be managed without a problem. For example, the position of the workpiece can be measured in
relation to an edge, a corner or a hole. To determine the zero position of the workpiece or a hole,
set positions can be added to the measured positions in the WCS. The resulting offsets can be
entered in a selected frame.
The position setpoint of an axis in the WCS can be altered when setting the actual value. The
calculated frame should be written to SETFRAME system frame.
In the tool measurement, the length or radius of a tool can be measured using a measured
reference part.
The measurements can be performed via an HMI operator action or via measuring cycles.
Basic functions
Function Manual, 10/2020, 6FC5397-2GP40-0BA1
589

Measurement
10.5 Workpiece and tool measurement
The calculation is performed in the NC either with activation of a PI service via an HMI operator
action or via the predefined MEASURE() function in the measuring cycle. A tool and a plane can
be selected as a basis for the calculation. The calculated frame is entered in the result frame.
Communication with the NC takes place via predefined system variables. The input variables
must be written by the HMI or the cycles. The output variables contain the calculated results.
10.5.1.2
Input variables
Validity bits of the input variables
Each input variable implicitly sets the corresponding validity bit in $AC_MEAS_VALID system
variable when writing. If the validity bits are not reset, the variable values remain valid for the
next calculation. For this reason, the validity bits of all input variables should be declared as
invalid before each measurement by setting $AC_MEAS_VALID to 0:
$AC_MEAS_VALID = 0
Note
A channel reset or end of program reset does not reset the validity bits.
Bit
System variable
Meaning
0
$AA_MEAS_POINT1[<Axis>]
1st measuring point for all channel axes
1
$AA_MEAS_POINT2[<Axis>]
2nd measuring point for all channel axes
2
$AA_MEAS_POINT3[<Axis>]
3rd measuring point for all channel axes
3
$AA_MEAS_POINT4[<Axis>]
4th measuring point for all channel axes
4
$AA_MEAS_SETPOINT[<Axis>]
Set position of an axis
5
$AC_MEAS_WP_SETANGLE
Set angle for the workpiece position angle; -90 < α
< 180
6
$AC_MEAS_CORNER_SETANGLE
Set angle of intersection of the workpiece corner; 0
< φ < 180
7
$AC_MEAS_T_NUMBER
Tool selection
7
$AC_MEAS_D_NUMBER
Cutting edge selection
9
$AC_MEAS_DIR_APPROACH
Direction of approach to the workpiece
10
$AC_MEAS_ACT_PLANE
Specification of the working plane and infeed di-
rection
11
$AC_MEAS_FRAME_SELECT
Frame selection for the workpiece measurement
12
$AC_MEAS_TYPE
Measurement type selection
13
$AC_MEAS_FINE_TRANS
Fine offset correction
14
$AA_MEAS_SETANGLE[<Axis>]
Set angle of an axis
15
$AA_MEAS_SCALEUNIT
Unit of measurement for input and output values
16
$AA_MEAS_TOOL_MASK
Tool position taking the tool lengths into account
17
$AA_MEAS_P1_COORD
Coordinate system of the 1st measuring point
18
$AA_MEAS_P2_COORD
Coordinate system of the 2nd measuring point
19
$AA_MEAS_P3_COORD
Coordinate system of the 3rd measuring point
Basic functions
590
Function Manual, 10/2020, 6FC5397-2GP40-0BA1

Measurement
10.5 Workpiece and tool measurement
Bit
System variable
Meaning
20
$AA_MEAS_P4_COORD
Coordinate system of the 4th measuring point
21
$AA_MEAS_SET_COORD
Coordinate system of the set position
22
$AA_MEAS_CHSFR
Frame selection for system frames
23
$AA_MEAS_NCBFR
Frame selection for global basic frames
24
$AA_MEAS_CHBFR
Frame selection for channel basic frames
25
$AA_MEAS_UIFR
Frame selection for settable frames
26
$AA_MEAS_PFRAME
Frame selection for programmable frames
27
$AC_MEAS_INPUT[<n>]
Measuring input parameters
28
$AC_MEAS_GFR
Frame selection for grinding frames
29
$AC_MEAS_ORIWKS
Transformation behavior of the measuring inter-
face
Note
All axis actual values of the appropriate measuring point are invalidated by:
$AC_MEAS_LATCH = 0
Measuring points
A maximum of four measuring points are available for all channel axes for the measurements:
System variable
Meaning
Data type
$AA_MEAS_POINT1[<Axis>]
1st measuring point for all chan-
REAL
nel axes
$AA_MEAS_POINT2[<Axis>]
2nd measuring point for all chan-
REAL
nel axes
$AA_MEAS_POINT3[<Axis>]
3rd measuring point for all chan-
REAL
nel axes
$AA_MEAS_POINT4[<Axis>]
4th measuring point for all chan-
REAL
nel axes
The measured points are normally available as actual values in the WCS. A measuring point is
marked as valid as soon as an axis value has been written from it. Each individual measuring
point can be written or picked up directly.
Basic functions
Function Manual, 10/2020, 6FC5397-2GP40-0BA1
591
Measurement
10.5 Workpiece and tool measurement
Some measurement types also support measuring points lying in a different coordinate system
(BCS, MCS). The entry in which coordinate system of the corresponding measuring point was
measured, can be performed via the following system variables:
System variable
Meaning
Data type
Value
$AA_MEAS_P1_COORD
Coordinate system of the 1st measur-
INT
0: WCS (default)
ing point
1: BCS
$AA_MEAS_P2_COORD
Coordinate system of the 2nd meas-
INT
2: MCS
uring point
3: SZS
$AA_MEAS_P3_COORD
Coordinate system of the 3rd measur-
INT
4: WCS_REL
ing point
5: SZS_REL
$AA_MEAS_P4_COORD
Coordinate system of the 4th measur-
INT
ing point
$AA_MEAS_SET_COORD
Coordinate system of the set position
INT
Picking up measuring points
The measuring points can be written with the current axis actual values. The positions are picked
up with reference to the selected coordinate system. The positions are picked up in the WCS if
no coordinate system is specified. The picked up measuring points are saved in
$AA_MEAS_POINT1[<Axis>] ... $AA_MEAS_POINT4[<Axis>].
Picking up a measuring point of all axes
The pick up of all current axis actual values for one measuring point is specified via the
$AC_MEAS_LATCH[0 ... 3] system variable:
System variable
Meaning
Data type
Value
$AA_MEAS_LATCH[0]
Pick up 1st measuring point of all axes
INT
0: Do not accept
axis actual values
$AA_MEAS_LATCH[1]
Pick up 2nd measuring point of all ax-
INT
for the measuring
es
point
$AA_MEAS_LATCH[2]
Pick up 3rd measuring point of all axes
INT
1: Accept axis ac-
$AA_MEAS_LATCH[3]
Pick up 4th measuring point of all axes
INT
tual values for the
measuring point
Picking up the measuring point of one axis
The pick up of individual axis actual values for one measuring point is specified via the
$AA_MEAS_P1_VALID[<Axis>] ... $AA_MEAS_P4_VALID[<Axis>] system variables:
System variable
Meaning
Data type
Value
$AA_MEAS_P1_VAL-
Pick up 1st measuring point of an axis
INT
0: Do not accept
ID[<Axis>]
axis actual value
for the measuring
$AA_MEAS_P2_VAL-
Pick up 2nd measuring point of an axis
INT
point
ID[<Axis>]
1: Accept axis ac-
$AA_MEAS_P3_VAL-
Pick up 3rd measuring point of an axis
INT
tual value for the
ID[<Axis>]
measuring point
$AA_MEAS_P4_VAL-
Pick up 4th measuring point of an axis
INT
ID[<Axis>]
Basic functions
592
Function Manual, 10/2020, 6FC5397-2GP40-0BA1
Measurement
10.5 Workpiece and tool measurement
Setpoints
The resulting frame is calculated so that the measurement complies with the setpoints specified
by the user.
System variable
Meaning
Data type
Value
$AA_MEAS_SETPOINT[<Axis>]
Set position of an axis
REAL
$AA_MEAS_SETANGLE[<Axis>]
Set angle of an axis
REAL
$AA_MEAS_SP_VALID[<Axis>]
Set position of the axis invalid/valid
INT
0
Set posi-
tion of
the axis
is invalid
1
Set posi-
tion of
the axis
is valid
$AC_MEAS_WP_SETANGLE
Set angle for the workpiece posi-
REAL
-90 < α < 180
tion
$AC_MEAS_CORNER_SETANGLE
Set angle of intersection of the
REAL
0 < φ < 180
workpiece corner
$AC_MEAS_DIR_APPROACH *)
Direction of approach to the work-
INT
0
+ X
piece
1
- X
2
+ Y
3
- Y
4
+ Z
5
- Z
*) The direction of approach is required only for the edge, groove, web and tool measurement.
The following measuring points are irrelevant and not evaluated:
• 2nd measuring point when entering the set angle for the workpiece position.
• 4th measuring point when entering the set angle of intersection
Plane setting
The specification of the working plane to define the tool orientation is performed via the
$AC_MEAS_ACT_PLANE system variable:
System variable
Meaning
Data type
Value
$AC_MEAS_ACT_PLANE
Specification of the work-
INT
0
• G17 - working plane
ing plane and infeed direc-
X/Y
tion
• Infeed direction Z
1
• G18 - working plane
Z/X
• Infeed direction Y
2
• G17 - working plane
Y/Z
• Infeed direction X
Basic functions
Function Manual, 10/2020, 6FC5397-2GP40-0BA1
593

Measurement
10.5 Workpiece and tool measurement
If no plane is specified, then the active plane is used for the calculation.
Translational offsets
When measuring workpieces, translational offsets can be entered in the fine offset component
of the selected frame. The $AC_MEAS_FINE_TRANS system variable is used for this purpose:
System variable
Meaning
Data type
Value
$AC_MEAS_FINE_TRANS
Fine offset correction
INT
0
Translational compensa-
tion is entered in the
course offset.
1
Translational compensa-
tion is entered in the fine
offset.
If the $AC_MEAS_FINE_TRANS variable is not written, the compensation value is entered in the
coarse offset and transformed in the time frame. There can also be a fine component in the
translation by virtue of the transformation.
Irrespective of $AC_MEAS_FINE_TRANS, the compensation is always entered in the coarse
offset when:
MD18600 $MN_MM_FRAME_FINE_TRANS = 0
Frame selection during the workpiece measurement
When a workpiece is measured, the calculated frame is entered in the specified frame. The frame
selection is performed via the $AC_MEAS_FRAME_SELECT system variable:
System variable
Meaning
Data type
$AC_MEAS_FRAME_SELECT
Frame selection during the workpiece measure-
INT
ment
The $AC_MEAS_FRAME_SELECT system variable can assume the following values:
Value
Frame
Meaning
0
$P_SETFRAME
Active system frame
1
$P_PARTFRAME
Active system frame
2
$P_EXTFRAME
Active system frame
10 ... 25
$P_CHBFRAME[0 ... 15]
Active channel-specific basic frames
50 ... 65
$P_NCBFRAME[0 ... 15]
Active NCU-global basic frames
100 ... 199
$P_IFRAME
The calculation is performed with the active setta-
ble frame if the corresponding frame is selected. If
the selected frame is not active, the corresponding
data management frame is included in the calcula-
tion.
500
$P_TOOLFRAME
Active system frame
501
$P_WPFRAME
Active system frame
502
$P_TRAFRAME
Active system frame
503
$P_PFRAME
Active current programmable frame
504
$P_CYCFRAME
Active system frame
Basic functions
594
Function Manual, 10/2020, 6FC5397-2GP40-0BA1

Measurement
10.5 Workpiece and tool measurement
Value
Frame
Meaning
505
$P_RELFRAME (WCS)
Active system frame
506
$P_RELFRAME (SZS)
Active system frame
1010 ... 1025
$P_CHBFRAME[0 ... 15]
Active channel-specific basic frames with active
G500
1050 ... 1065
$P_NCBFRAME[0 ... 15]
Active NCU-global basic frames with active G500
2000
$P_SETFR
System frame in the data management
2001
$P_PARTFR
System frame in the data management
2002
$P_EXTFR
System frame in the data management
2010 ... 2025
$P_CHBFR[0 ... 15]
Channel-specific basic frames in the data manage-
ment
2050 ... 2065
$P_NCBFR[0 ... 15]
NCU-global basic frames in the data management
2100 ... 2199
$P_UIFR[0 ... 99]
Settable frames in the data management
2500
$P_TOOLFR
System frame in the data management
2501
$P_WPFR
System frame in the data management
2502
$P_TRAFR
System frame in the data management
2504
$P_CYCFR
System frame in the data management
2505
$P_RELFR (WCS)
System frame in the data management
2506
$P_RELFR (SZS)
System frame in the data management
3010 ... 3025
$P_CHBFR[0 ... 15]
Channel-specific basic frames with active G500 in
the data management
3050 ... 3065
$P_NCBFR[0 ... 15]
NCU-global basic frames with active G500 in the
data management
The MEASURE( ) function calculates frame $AC_MEAS_FRAME according to the specified frame.
For the values from 0 to 1065, the calculation is performed using the active frame.
From 2000 to 3065, the calculation is performed with reference to the selected frame in the data
management. The frame selection in the data management is not supported for measurement
types 14 and 15. A frame does not have to be active in order to select it in the data management.
In this case, the calculation is performed as if the frame were active in the chain.
The measuring point is transformed in the selected system and the selected frame is determined
using the entire frame including the selected frame. Preset actual value is active only after
compensation and activation of the frame.
For the values with active G500 (1010 ... 1025, 1050 ... 1065, 3010 ... 3025, 3050 ... 3065), the
target frame is calculated so that G500 must also be active after this frame is selected in order
to reach the set position.
Basic functions
Function Manual, 10/2020, 6FC5397-2GP40-0BA1
595
Measurement
10.5 Workpiece and tool measurement
Conversion into another coordinate system
If a position is to be converted to a position in another coordinate system, the following system
variables can be used to specify the composition of the desired frame chain:
System variable
Meaning
Data type
Value
$AC_MEAS_CHSFR
Frame selection for system frames
INT
Bit mask correspond-
ing to MD28082
$MC_MM_
SYS-
TEM_FRAME_MASK
$AC_MEAS_NCBFR
Frame selection for global basic frames
INT
Bit mask (0 ... FFFF)
$AC_MEAS_CHBFR
Frame selection for channel basic frames
INT
Bit mask (0 ... FFFF)
$AC_MEAS_UIFR
Frame selection for settable frames
INT
0 ... 99
$AC_MEAS_PFRAME
Frame selection for programmable
INT
0
Is included in
frames
the calculation.
1
Is not included
in the calcula-
tion.
The data management frames are read and a new frame is set up for the corresponding values
in the variables.
If the system variables are not set, the active frames are retained.
Note
Values should only be written to those system variables whose data management frames are
also to be included in the new frame chain. In the case of the basic frames, only all of the frames
can be exchanged, and not just a particular frame. Active changes via $P_NCBFRMASK and
$P_CHBFRMASK are ignored.
Measuring input parameters
The array system variable $AC_MEAS_INPUT[<n>] is used for the input of further parameters
that are used in the various measurement types
System variable
Meaning
Data type
Value
$AC_MEAS_INPUT[<n>]
Measuring input parame-
INT
<n> = 0 ... 9
ters
The control action of the measuring input parameters is described in the measuring methods.
Basic functions
596
Function Manual, 10/2020, 6FC5397-2GP40-0BA1
Measurement
10.5 Workpiece and tool measurement
Tool and cutting edge selection
The tool and cutting edge number of the active tool must correspond to the selected tool. When
T0 and D0 are selected, the active tool is included in the calculation. If no tool is active, the tool
selected by T and D is included in the calculation. However, no tool other than the selected tool
must be active.
System variable
Meaning
Data type
$AC_MEAS_T_NUMBER
Tool selection
INT
$AC_MEAS_D_NUMBER
Cutting edge selection
INT
Measurements with 3D probe
When measuring with the 3D probe, the radius of the tool is already compensated via the
measuring point, and therefore the radius does not have to be included when calculating the
various measurement operations. This property can be specified via the
$AC_MEAS_TOOL_MASK system variable.
System variable
Meaning
Data type
$AC_MEAS_TOOL_MASK
Tool position taking the tool lengths into account
INT
The $AC_MEAS_TOOL_SCREEN system variable can assume the following values:
Value
Meaning
0x0
All tool lengths are considered (default).
0x1
Tool radius is not included in the calculation.
0x2
Tool position in the X direction (G19).
0x4
Tool position in the Y direction (G18).
0x8
Tool position in the Z direction (G17).
0x10
Tool length is not included in the calculation.
0x20
Length of the active tool is included in the coordinate transformation of a position.
0x40
Tool position in the X direction.
0x80
Tool position in the Y direction.
0x100
Tool position in the Z direction.
0x200
Tool length differences are included negatively.
Whether or not the radius of a milling tool is included in the calculation can be determined from
the tool position and approach direction. If the approach direction is not specified explicitly, it is
determined by the selected plane:
Working plane
Approach direction
G17
-Z
G18
-Y
G19
-X
Basic functions
Function Manual, 10/2020, 6FC5397-2GP40-0BA1
597

Measurement
10.5 Workpiece and tool measurement
10.5.1.3
Selecting the measurement type
The $AC_MEAS_TYPE system variable is used to select the measurement type.
System variable
Meaning
Data type
$AC_MEAS_TYPE
Measurement type selection
INT
The $AC_MEAS_TYPE system variable can assume the following values:
Value
Meaning
0
Default setting
1
Measurement type 1: Measurement of an X edge
2
Measurement type 2: Measurement of a Y edge
3
Measurement type 3: Measurement of a Z edge
4
Measurement type 4: Measurement of a C1 corner
5
Measurement type 5: Measurement of a C2 corner
6
Measurement type 6: Measurement of a C3 corner
7
Measurement type 7: Measurement of a C4 corner
8
Measurement type 8: Measurement of a hole
9
Measurement type 9: Measurement of a shaft
10 *)
Measurement type 10: Measurement of the tool length
11 *)
Measurement type 11: Measurement of the tool diameter
12
Measurement type 12: Measurement of a groove
13
Measurement type 13: Measurement of a web
14
Measurement type 14: Preset actual value for geometry and special axes
15
Measurement type 15: Preset actual value for special axes only
16
Measurement type 16: Measurement of an inclined edge
17
Measurement type 17: Measurement of an angle in an inclined plane
18
Measurement type 18: Redefining the WCS on the inclined plane
19
Measurement type 19: 1-dimensional setpoint specification
20
Measurement type 20: 2-dimensional setpoint specification
21
Measurement type 21: 3-dimensional setpoint specification
22 *)
Measurement type 22: ShopTurn - Measurement of tool lengths with zoom-in function
23 *)
Measurement type 23: ShopTurn - Measurement of a tool length with a stored or actual
position
24
Measurement type 24: Coordinate transformation of a measuring point
25
Measurement type 25: Measurement of a rectangle
26
Measurement type 26: Backup of data management frames
27
Measurement type 27: Restoration of backed up data management data
28
Measurement type 28: Specification of an additive rotation for taper turning
*) Measurement types of the tool measurement
The individual measurement types are shown more precisely in Section "Types of workpiece
measurement (Page 604)" or "Measuring types of the tool measurement (Page 643)" and
explained in more detail using an appropriate programming example.
Basic functions
598
Function Manual, 10/2020, 6FC5397-2GP40-0BA1

Measurement
10.5 Workpiece and tool measurement
10.5.1.4
Activating the calculation
Activating via an HMI operator action
The calculation is activated by an HMI operator action with PI service _N_SETUDT. This Pl service
can accept one of the following parameter types:
Parameter type
Meaning
1
Active tool offset
2
Active basic frames
3
Active settable frame
4
Global basic frames
5
Global settable frames
6
Calculate workpiece zero or tool lengths
7
Activate workpiece zero (write scratching)
8
Activate external work offset
9
Activate active tool carrier, TCOABS and PAROT
The change is shown immediately in the Reset state. In the Stop state, the frame is executed at
the next start.
Note
The PI service can be executed only in the Reset and Stop states.
In the case of workpiece measurement, the calculated frame is activated immediately with
parameter type 7.
In the case of tool measurement, the PI service must not be sent with parameter type 7, since
a zero point does not have to be activated.
Activation in the Stop state
The new WCS positions are refreshed in the Stop state. With the continuation of the part
program, the distance-to-go of the interrupted block is deleted. Traversing is from the current
position to the end point of the next block. Therefore, it is also possible in the Stop state to start
a spindle in the MDI mode or in the part program and set and scratch an actual value with M0.
Another measurement can also be performed.
Measuring cycles
The activation of the calculation in the measuring cycles is performed via the predefined
MEASURE( ) function.
MEASURE() delivers a result frame that can be read via $AC_MEAS_FRAME. The result is the
translation and rotation from the setpoints recalculated on the selected frame. The result frame
Basic functions
Function Manual, 10/2020, 6FC5397-2GP40-0BA1
599

Measurement
10.5 Workpiece and tool measurement
is calculated so that the concatenated sum frame equals the concatenation of the entire frame
(prior to measurement) with the calculated translation and rotation.
NOTICE
No preprocessing limitation
MEASURE() does not trigger an implicit preprocessing stop. MEASURE( ) works with the frames
of the preprocessing block. The user must decide whether a preprocessing stop is required prior
to the calculation.
Note
If no frame is selected, the calculated frame is not transformed. This means that the translation
and rotation result from the specified setpoints and the calculated position of the edge, corner,
groove, etc. Where the function is used more than once, it is always added to the result frame.
The result frame may need to be deleted beforehand.
Synchronization of the measuring processes
The measurement variable occurs only once per channel. The measuring process can be
performed via an operator input in the Stop and Reset states. The operation can overlap with the
measuring cycles in the Stop state. The $AC_MEAS_SEMA variable (semaphore to the
measurement interface) serves to protect against mutual overwriting.
The $AC_MEAS_SEMA semaphore variable is set to 1 by the measuring cycle at the start of the
cycle and reset to 0 at the end of the cycle.
HMI does not use the measurement interface when the $AC_MEAS_SEMA variable has the value
1.
10.5.1.5
Output variables
Calculation results
If a set position has been specified, the resulting frame is entered in the $AC_MEAS_FRAME
result frame. This frame can be read and written in the part program. The result frame is
calculated according to the selected frame.
If no frame has been selected, the result frame determines the final translation and rotation in
the WCS. This frame can be entered in the selected frame using the PI service _N_SETUDT and
parameter type 7. Once it has been entered, the result frame is deleted.
The following output variables are available for the results of the calculation:
System variable
Meaning
Data type
$AC_MEAS_FRAME
Result frame
FRAME
$AC_MEAS_WP_ANGLE
Calculated workpiece position angle α
REAL
$AC_MEAS_CORNER_ANGLE
Calculated angle of intersection ϕ
REAL
$AC_MEAS_DIAMETER
Calculated diameter
REAL
Basic functions
600
Function Manual, 10/2020, 6FC5397-2GP40-0BA1
Measurement
10.5 Workpiece and tool measurement
System variable
Meaning
Data type
$AC_MEAS_TOOL_LENGTH
Calculated tool length
REAL
$AC_MEAS_RESULTS[<n>]
Calculation results
DOUBLE
Which array element is written depends on the
measurement type ($AC_MEAS_TYPE).
10.5.1.6
System of units
System of units, inch/metric
The following input and output variables are evaluated with the inch or metric system of units:
System variable
Meaning
$AA_MEAS_POINT1[<Axis>]
Input variable: 1st measuring point for all channel axes
$AA_MEAS_POINT2[<Axis>]
Input variable: 2nd measuring point for all channel axes
$AA_MEAS_POINT3[<Axis>]
Input variable: 3rd measuring point for all channel axes
$AA_MEAS_POINT4[<Axis>]
Input variable: 4th measuring point for all channel axes
$AA_MEAS_SETPOINT[<Axis>]
Input variable: Set position of an axis
$AC_MEAS_DIAMETER
Output variable: Calculated diameter
$AC_MEAS_TOOL_LENGTH
Output variable: Calculated tool length
$AC_MEAS_RESULTS[<n>]
Output variable: Calculation results
The system of units in which the input and output values can be read or written can be set via
the $AC_MEAS_SCALEUNIT system variable.
System variable
Meaning
Data type
Value
$AC_MEAS_SCALEUNIT
Unit of measurement
INT
0
Unit of measurement depends
for input and output
on the active G function of
values
group 13:
• With active G70/G700: Inch
• With active G71/G710: Met-
ric
1
Unit of measurement unit corre-
sponds to the configuration (de-
fault setting).
The value 1 is always treated as the standard setting when $AC_MEAS_SCALEUNIT is not written.
Example:
The following should apply for the example:
• $AC_MEAS_SCALEUNIT = 0
• Basic system: Metric
Program code
Comment
G70
$AC_MEAS_POINT1[X]=$AA_IW[X]
; $AA_IW[X] returns basic system
Basic functions
Function Manual, 10/2020, 6FC5397-2GP40-0BA1
601
Measurement
10.5 Workpiece and tool measurement
Program code
Comment
$AC_MEAS_POINT1[X]=10
; 10 mm
G71
$AC_MEAS_POINT1[X]=$AA_IW[X]
; $AA_IW[X] returns basic system
$AC_MEAS_POINT1[X]=10
; 10 mm
G700
$AC_MEAS_POINT1[X]=$AA_IW[X]
; $AA_IW[X] returns inch value
$AC_MEAS_POINT1[X]=10
; 10 inch
G710
$AC_MEAS_POINT1[X]=$AA_IW[X]
; $AA_IW[X] returns metric value
$AC_MEAS_POINT1[X]=10
; 10 mm
Diameter programming
The diameter programming is set via the machine data:
• MD20100 $MC_DIAMETER_AX_DEF (geometry axis with transverse axis function)
• MD20150 $MC_GCODE_RESET_VALUES (reset setting of the G groups)
• MD20360 $MC_TOOL_PARAMETER_DEF_MASK (definition of the tool parameters)
Example:
MD20100 $MC_DIAMETER_AX_DEF = "X"
; Transverse axis is X.
MD20150 $MC_GCODE_RESET_VALUES[28] = 2
; DIAMON
MD20360 $MC_TOOL_PARAMETER_DEF_MASK =
; Tool length, frames and actual values in
'B1001010'
the diameter
The following must be taken into account:
• Axis positions in the MCS are not included in the calculation as diameter value.
• The calculated tool lengths and frame components do not depend on the active G command
DIAMON or DIAMOF.
• The measuring positions and set positions are read and written depending on DIAMON.
• The translations in the frames are included in the calculation as diameter value in the
transverse axis.
Arithmetic and display precision
Position values in mm, inches or degrees are accurately calculated and displayed to six decimal
places.
Basic functions
602
Function Manual, 10/2020, 6FC5397-2GP40-0BA1

Measurement
10.5 Workpiece and tool measurement
10.5.1.7
Diagnostics
Error messages
PI service _N_SETUDT
If the client is logged on through DIAGN:errCodeSetNrGent or DIAGN:errCodeSetNrPi,
PI_SETUDT provides the following error codes:
Error code
Meaning
EX_ERR_PI_REJ_MEASOK
Correct calculation.
EX_ERR_PI_REJ_MEASNOTYPE
Measurement type not specified.
EX_ERR_PI_REJ_MEASTOOLERROR
Error while determining the tool.
EX_ERR_PI_REJ_MEASNOPOINT1
Measuring point 1 not available.
EX_ERR_PI_REJ_MEASNOPOINT2
Measuring point 2 not available.
EX_ERR_PI_REJ_MEASNOPOINT3
Measuring point 3 not available.
EX_ERR_PI_REJ_MEASNOPOINT4
Measuring point 4 not available.
EX_ERR_PI_REJ_MEASNOSPECPOINT
No reference point available.
EX_ERR_PI_REJ_MEASNODIR
No approach direction.
EX_ERR_PI_REJ_MEASEQUALPOINTS
Measuring points are identical.
EX_ERR_PI_REJ_MEASWRONGALPHA
Alpha (α) is wrong.
EX_ERR_PI_REJ_MEASWRONGPHI
Phi (ϕ) is wrong.
EX_ERR_PI_REJ_MEASWRONGDIR
Wrong approach direction.
EX_ERR_PI_REJ_MEASNOCROSSING
Straight lines do not intersect.
EX_ERR_PI_REJ_MEASNOPLANE
Planes do not exist.
EX_ERR_PI_REJ_MEASWRONGFRAME
No frame or wrong frame selected.
EX_ERR_PI_REJ_MEASNOMEMORY
Insufficient memory available.
EX_ERR_PI_REJ_MEASINTERNALERROR
Internal error.
If the client does not log on, group error number 0xD003 is always generated.
MEASURE( )
The following return values are output via the predefined MEASURE() function:
No.
Return value
Meaning
0
MEAS_OK
Correct calculation.
1
MEAS_NO_TYPE
Measurement type not specified.
2
MEAS_TOOL_ERROR
Error while determining the tool.
3
MEAS_NO_POINT1
Measuring point 1 not available.
4
MEAS_NO_POINT2
Measuring point 2 not available.
5
MEAS_NO_POINT3
Measuring point 3 not available.
6
MEAS_NO_POINT4
Measuring point 4 not available.
7
MEAS_NO_SPECPOINT
No reference point available.
8
MEAS_NO_DIR
No approach direction.
9
MEAS_EQUAL_POINTS
Measuring points are identical.
10
MEAS_WRONG_ALPHA
Alpha (α) is wrong.
Basic functions
Function Manual, 10/2020, 6FC5397-2GP40-0BA1
603
Measurement
10.5 Workpiece and tool measurement
No.
Return value
Meaning
11
MEAS_WRONG_PHI
Phi (ϕ) is wrong.
12
MEAS_WRONG_DIR
Wrong approach direction.
13
MEAS_NO_CROSSING
Straight lines do not intersect.
14
MEAS_NO_PLANE
Planes do not exist.
15
MEAS_WRONG_FRAME
No frame or wrong frame selected.
16
MEAS_NO_MEMORY
Insufficient memory available.
17
MEAS_INTERNAL_ERROR
Internal error.
Error while determining the tool
In the case of error code EX_ERR_PI_REJ_MEASTOOLERROR or MEAS_TOOL_ERROR, the system
stores a more detailed specification of the error with the following values in the
$AC_MEAS_TOOL_LENGTH output variable:
No.
Return value
Meaning
1
TOOL_NO_BLOCK
No block available for the tool calculation.
2
TOOL_WRONG_T_NUMBER
Wrong T number.
3
TOOL_WRONG_D_NUMBER
Wrong D number.
4
TOOL_EVAL_WRONG_TYPE
The tool does not exist.
5
TOOL_NO_TOOLCORR_BODY
Memory problem.
6
TOOL_DATA_READ_ERROR
Error while reading the tool data.
7
TOOL_NO_TOOL_WITH_TRAFO
No tool is selected with an active transformation.
Further diagnostic options
Log
If the "/_N_MPF_DIR/_N_MEAS_DUMP_MPF" file is available, a log is written in the file that should
enable the reproduction of the problem. In order to use the log, an empty file with the name
"_N_MEAS_DUMP_MPF" must first be created in the "/_N_MPF_DIR" directory. The content of the
file is retained until it is deleted with $AC_MEAS_VALID = 0.
Trace
For runtime reasons, the trace should only be activated when a problem is detected.
10.5.2
Types of workpiece measurement
10.5.2.1
Measurement type 1, 2, 3: Measurement of an edge
Function
The edge of a clamped workpiece is measured by approaching this edge with a known tool.
Basic functions
604
Function Manual, 10/2020, 6FC5397-2GP40-0BA1
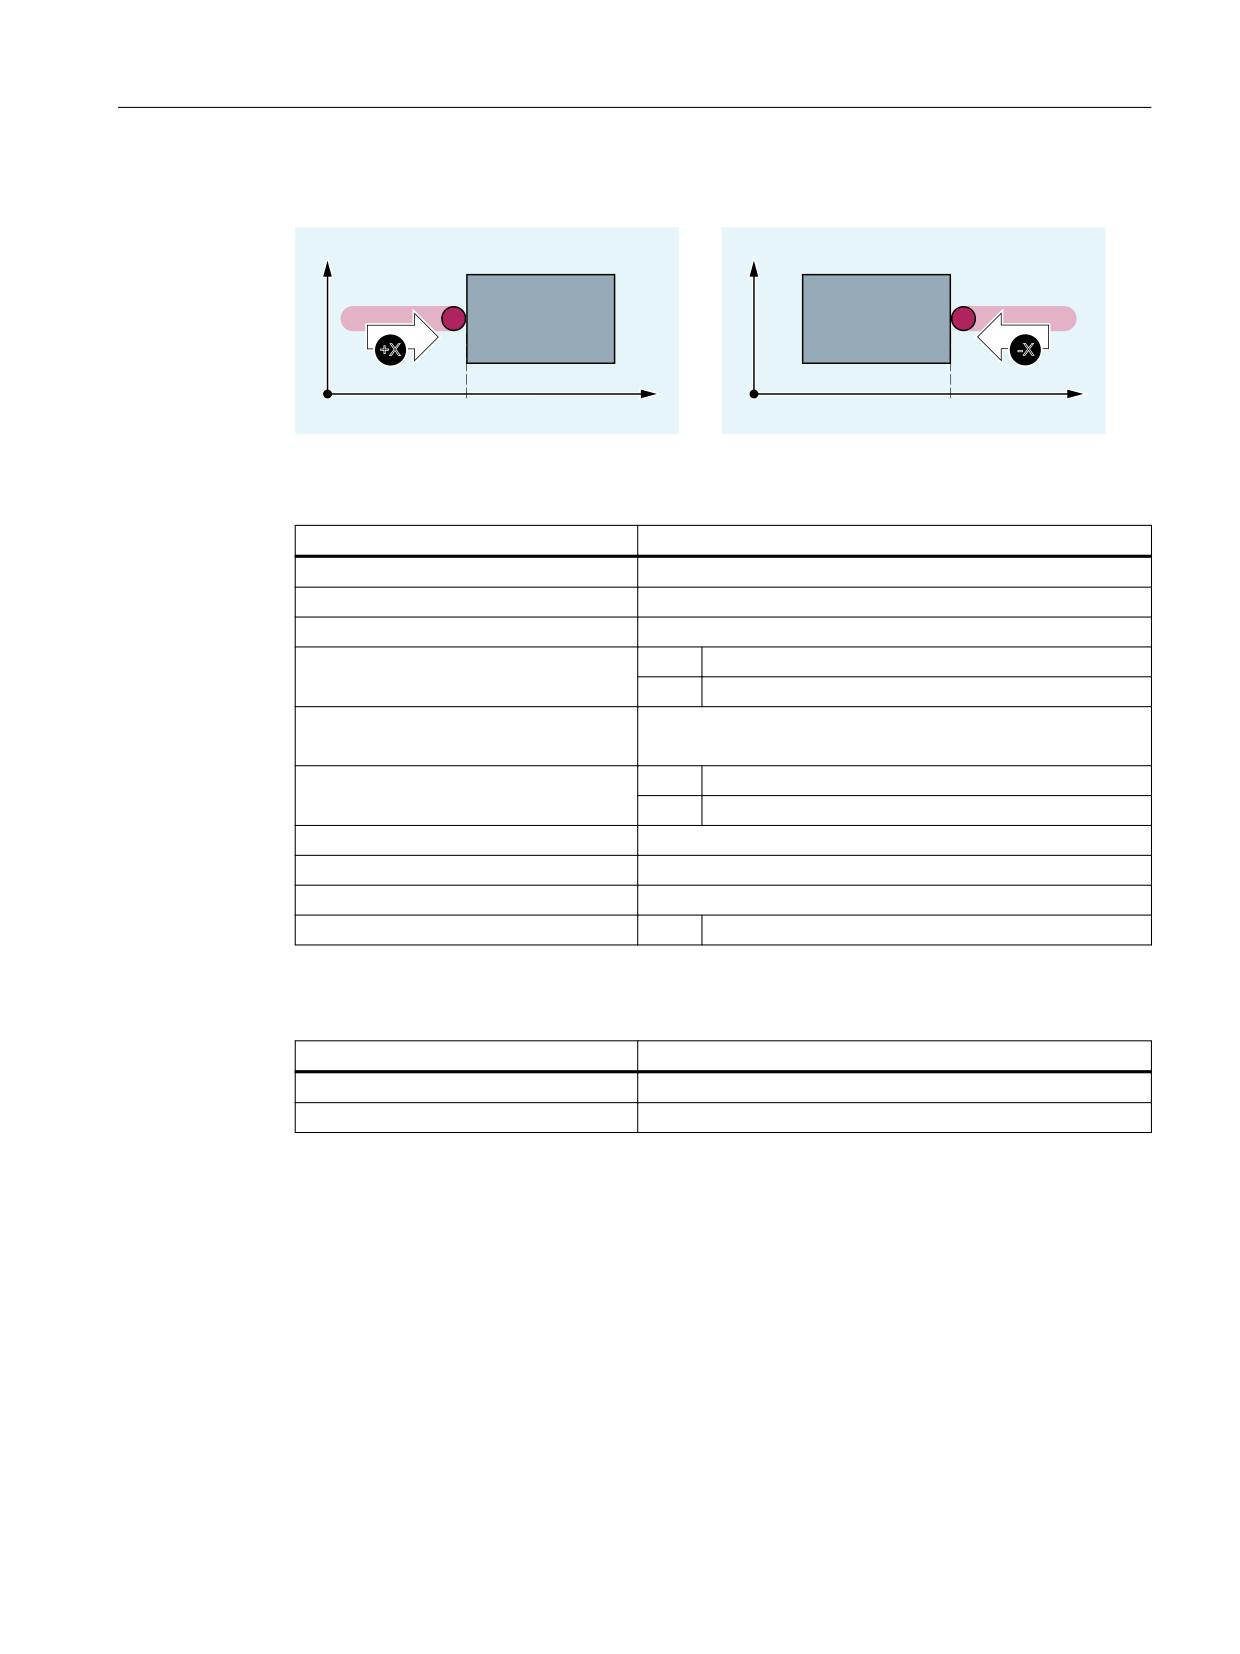
Measurement
10.5 Workpiece and tool measurement
Measurement type 1: Measurement of an X edge
<
<
;
;
;
;
;
;
Figure 10-1
Measurement of an X edge
The values of the following system variables are evaluated for measurement type 1:
Input variable
Meaning
$AC_MEAS_VALID
Validity bits for the input variables
$AA_MEAS_POINT1[<Axis>]
Measuring point 1 for all channel axes
$AA_MEAS_SETPOINT[<Axis>] *)
Set position of the X edge
$AC_MEAS_DIR_APPROACH
= 0
+ X
= 1
- X
$AC_MEAS_ACT_PLANE *)
Calculation with active plane unless otherwise specified.
Tool radius is only included in the calculation in G17 and G18.
$AC_MEAS_FINE_TRANS *)
= 0
Coarse offset
= 1
Fine offset
$AC_MEAS_FRAME_SELECT *)
Calculated as additive frame unless otherwise specified.
$AC_MEAS_T_NUMBER *)
Calculated with active T unless otherwise specified (T0).
$AC_MEAS_D_NUMBER *)
Calculated with active D unless otherwise specified (D0).
$AC_MEAS_TYPE
= 1
Measurement type 1: Measurement of an X edge
*) Optional
The following output variables are written for measurement type 1:
Output variable
Meaning
$AC_MEAS_FRAME
Result frame with translation
$AC_MEAS_RESULTS[0]
Position of the measured edge
Basic functions
Function Manual, 10/2020, 6FC5397-2GP40-0BA1
605
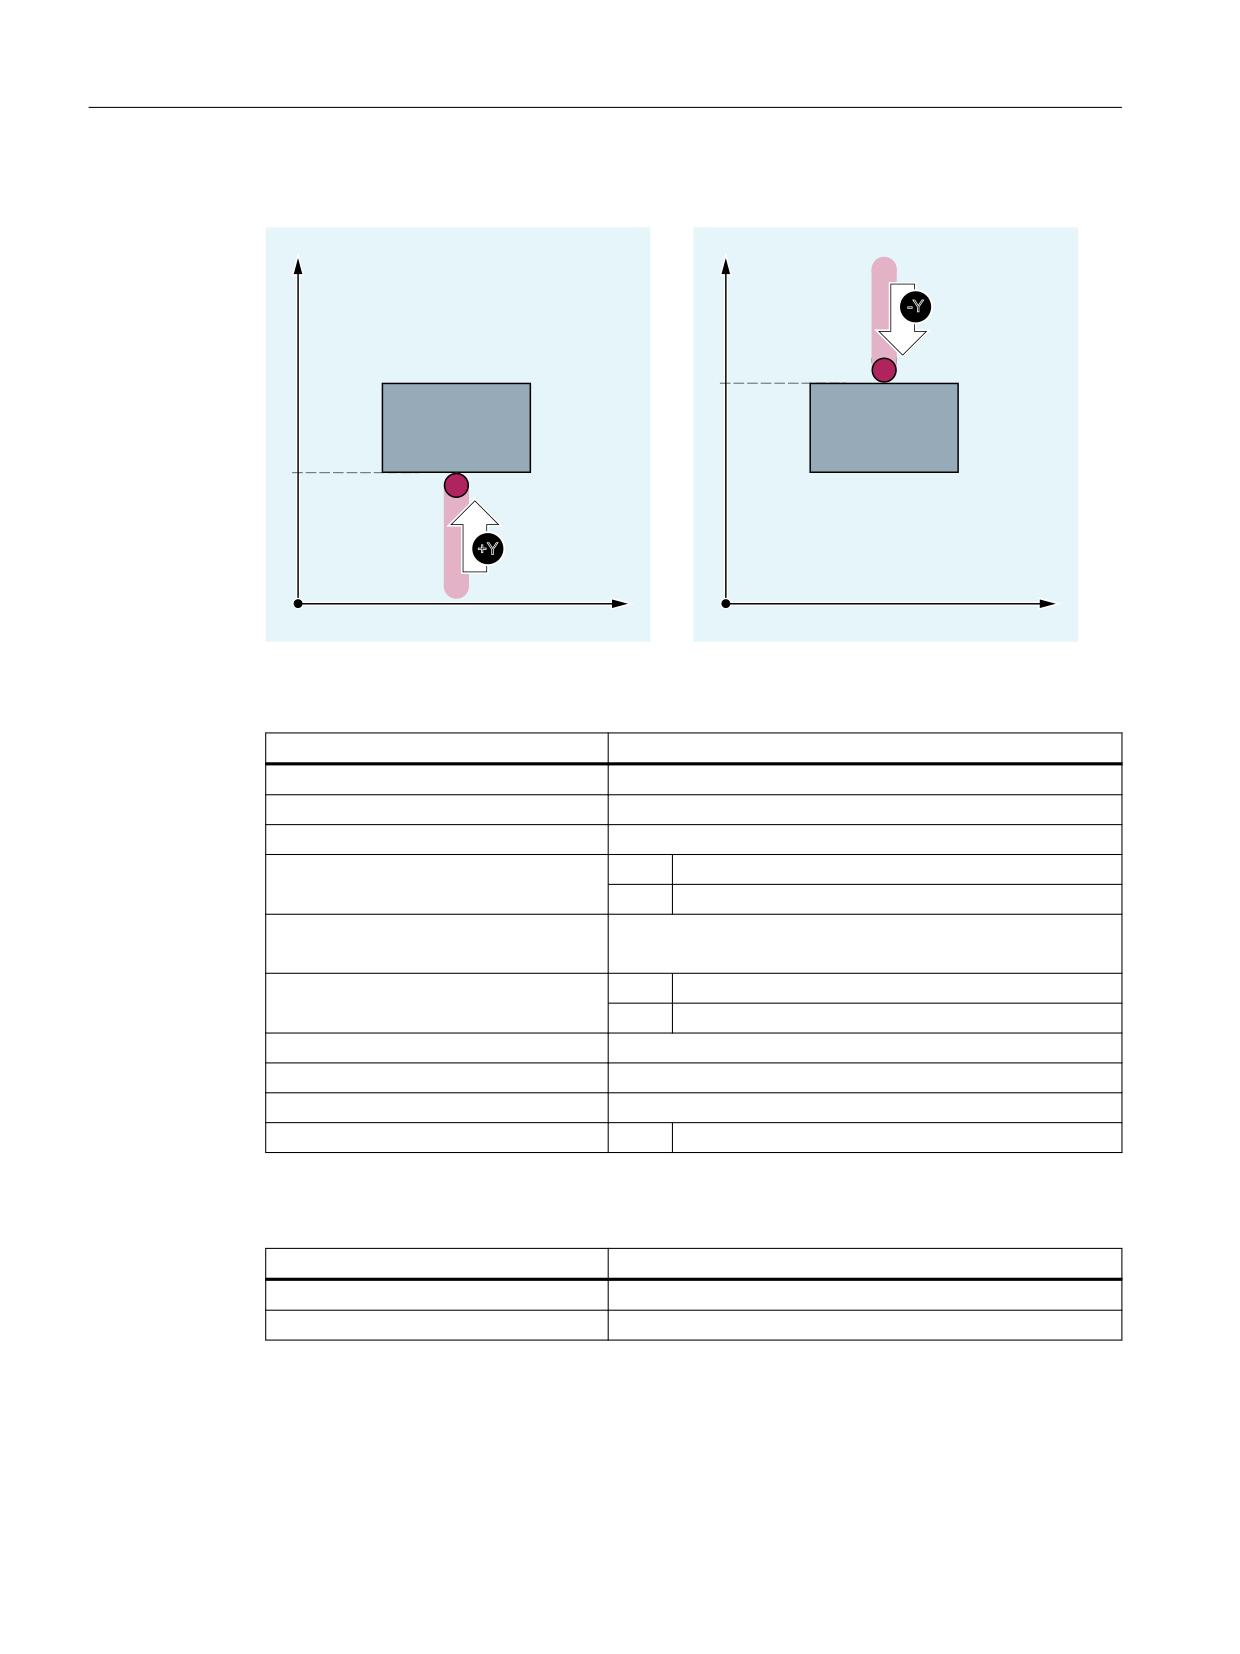
Measurement
10.5 Workpiece and tool measurement
Measurement type 2: Measurement of a Y edge
<
<
<
<
<
<
<
;
;
Figure 10-2
Measurement of a Y edge
The values of the following system variables are evaluated for measurement type 2:
Input variable
Meaning
$AC_MEAS_VALID
Validity bits for the input variables
$AA_MEAS_POINT1[<Axis>]
Measuring point 1 for all channel axes
$AA_MEAS_SETPOINT[<Axis>] *)
Set position of the Y edge
$AC_MEAS_DIR_APPROACH
= 2
+ Y
= 3
- Y
$AC_MEAS_ACT_PLANE *)
Calculation with active plane unless otherwise specified.
Tool radius is only included in the calculation in G17 and G19.
$AC_MEAS_FINE_TRANS *)
= 0
Coarse offset
= 1
Fine offset
$AC_MEAS_FRAME_SELECT *)
Calculated as additive frame unless otherwise specified.
$AC_MEAS_T_NUMBER *)
Calculated with active T unless otherwise specified (T0).
$AC_MEAS_D_NUMBER *)
Calculated with active D unless otherwise specified (D0).
$AC_MEAS_TYPE
= 2
Measurement type 2: Measurement of a Y edge
*) Optional
The following output variables are written for measurement type 2:
Output variable
Meaning
$AC_MEAS_FRAME
Result frame with translation
$AC_MEAS_RESULTS[0]
Position of the measured edge
Basic functions
606
Function Manual, 10/2020, 6FC5397-2GP40-0BA1
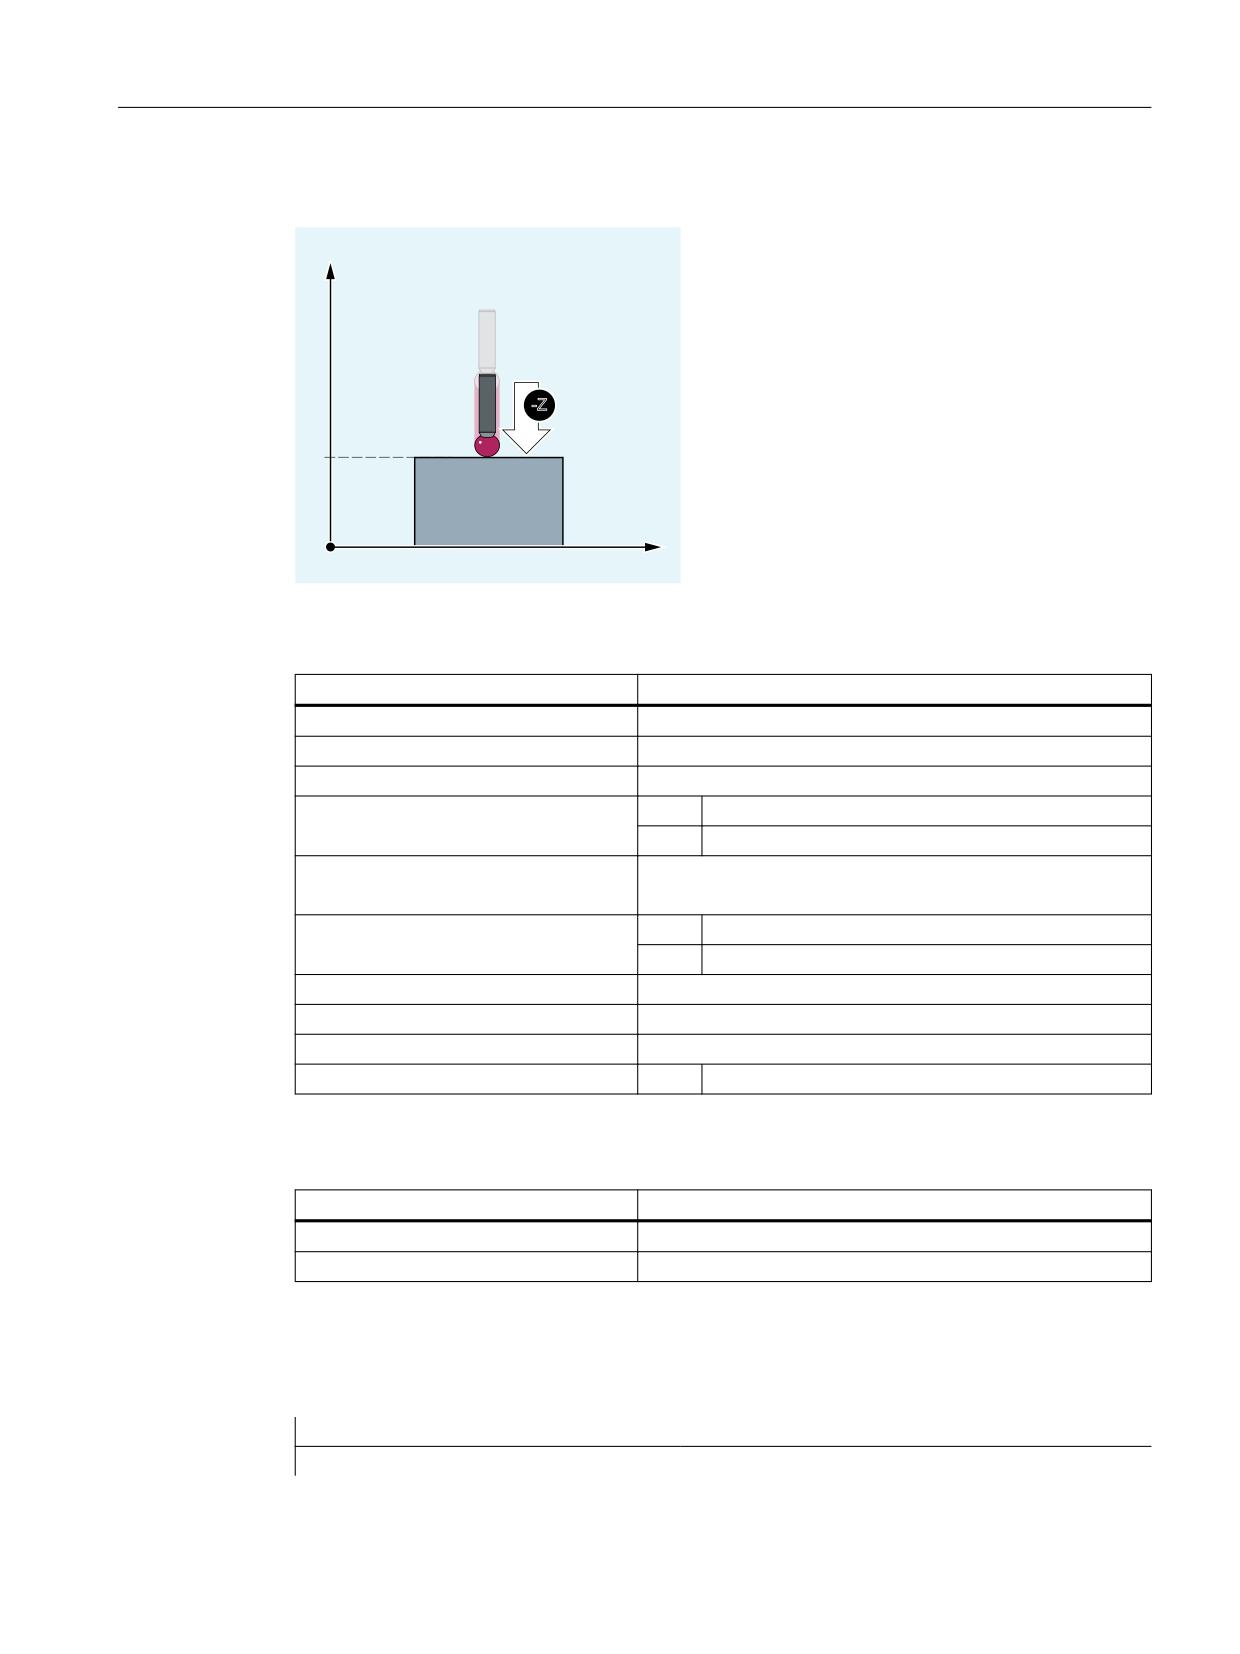
Measurement
10.5 Workpiece and tool measurement
Measurement type 3: Measurement of a Z edge
=
<
=
=
;
Figure 10-3
Measurement of a Z edge
The values of the following system variables are evaluated for measurement type 3:
Input variable
Meaning
$AC_MEAS_VALID
Validity bits for the input variables
$AA_MEAS_POINT1[<Axis>]
Measuring point 1 for all channel axes
$AA_MEAS_SETPOINT[<Axis>] *)
Set position of the Z edge
$AC_MEAS_DIR_APPROACH
= 4
+ Z
= 5
- Z
$AC_MEAS_ACT_PLANE *)
Calculation with active plane unless otherwise specified.
Tool radius is only included in the calculation in G18 and G19.
$AC_MEAS_FINE_TRANS *)
= 0
Coarse offset
= 1
Fine offset
$AC_MEAS_FRAME_SELECT *)
Calculated as additive frame unless otherwise specified.
$AC_MEAS_T_NUMBER *)
Calculated with active T unless otherwise specified (T0).
$AC_MEAS_D_NUMBER *)
Calculated with active D unless otherwise specified (D0).
$AC_MEAS_TYPE
= 3
Measurement type 3: Measurement of a Z edge
*) Optional
The following output variables are written for measurement type 3:
Output variable
Meaning
$AC_MEAS_FRAME
Result frame with translation
$AC_MEAS_RESULTS[0]
Position of the measured edge
Example
Measurement type 1: Measurement of an X edge
Program code
Comment
DEF INT RETVAL
Basic functions
Function Manual, 10/2020, 6FC5397-2GP40-0BA1
607
Measurement
10.5 Workpiece and tool measurement
Program code
Comment
DEF FRAME TMP
$TC_DP1[1,1]=120
;
Type
$TC_DP2[1,1]=20
;
0
$TC_DP3[1,1]=10
;
(Z) length compensation vector
$TC_DP4[1,1]=0
;
(Y)
$TC_DP5[1,1]=0
;
(X)
$TC_DP6[1,1]=2
;
Radius
T1 D1
G0 X0 Y0 Z0 F10000
G54
;
Measure X edge.
$AC_MEAS_VALID=0
;
Set all input values to invalid.
G1 X-1 Y-3
;
1. Approach measuring point.
$AA_MEAS_POINT1[X]=$AA_IW[X]
$AA_MEAS_POINT1[Y]=$AA_IW[Y]
$AA_MEAS_POINT1[Z]=$AA_IW[Z]
$AC_MEAS_DIR_APPROACH=0
;
Set approach direction +X.
$AA_MEAS_SETPOINT[X]=0
;
Set set position of the edge.
$AA_MEAS_SETPOINT[Y]=0
$AA_MEAS_SETPOINT[Z]=0
$AC_MEAS_ACT_PLANE=0
;
Measuring plane is G17.
$AC_MEAS_FRAME_SELECT=101
;
Select frame: IFRAME
$AC_MEAS_T_NUMBER=1
;
Select tool.
$AC_MEAS_D_NUMBER=1
$AC_MEAS_TYPE=1
;
Set measurement type for X edge.
RETVAL=MEASURE()
;
Start measuring process.
IF RETVAL <> 0
SETAL(61043, << RETVAL)
ENDIF
$P_IFRAME=$AC_MEAS_FRAME
Basic functions
608
Function Manual, 10/2020, 6FC5397-2GP40-0BA1
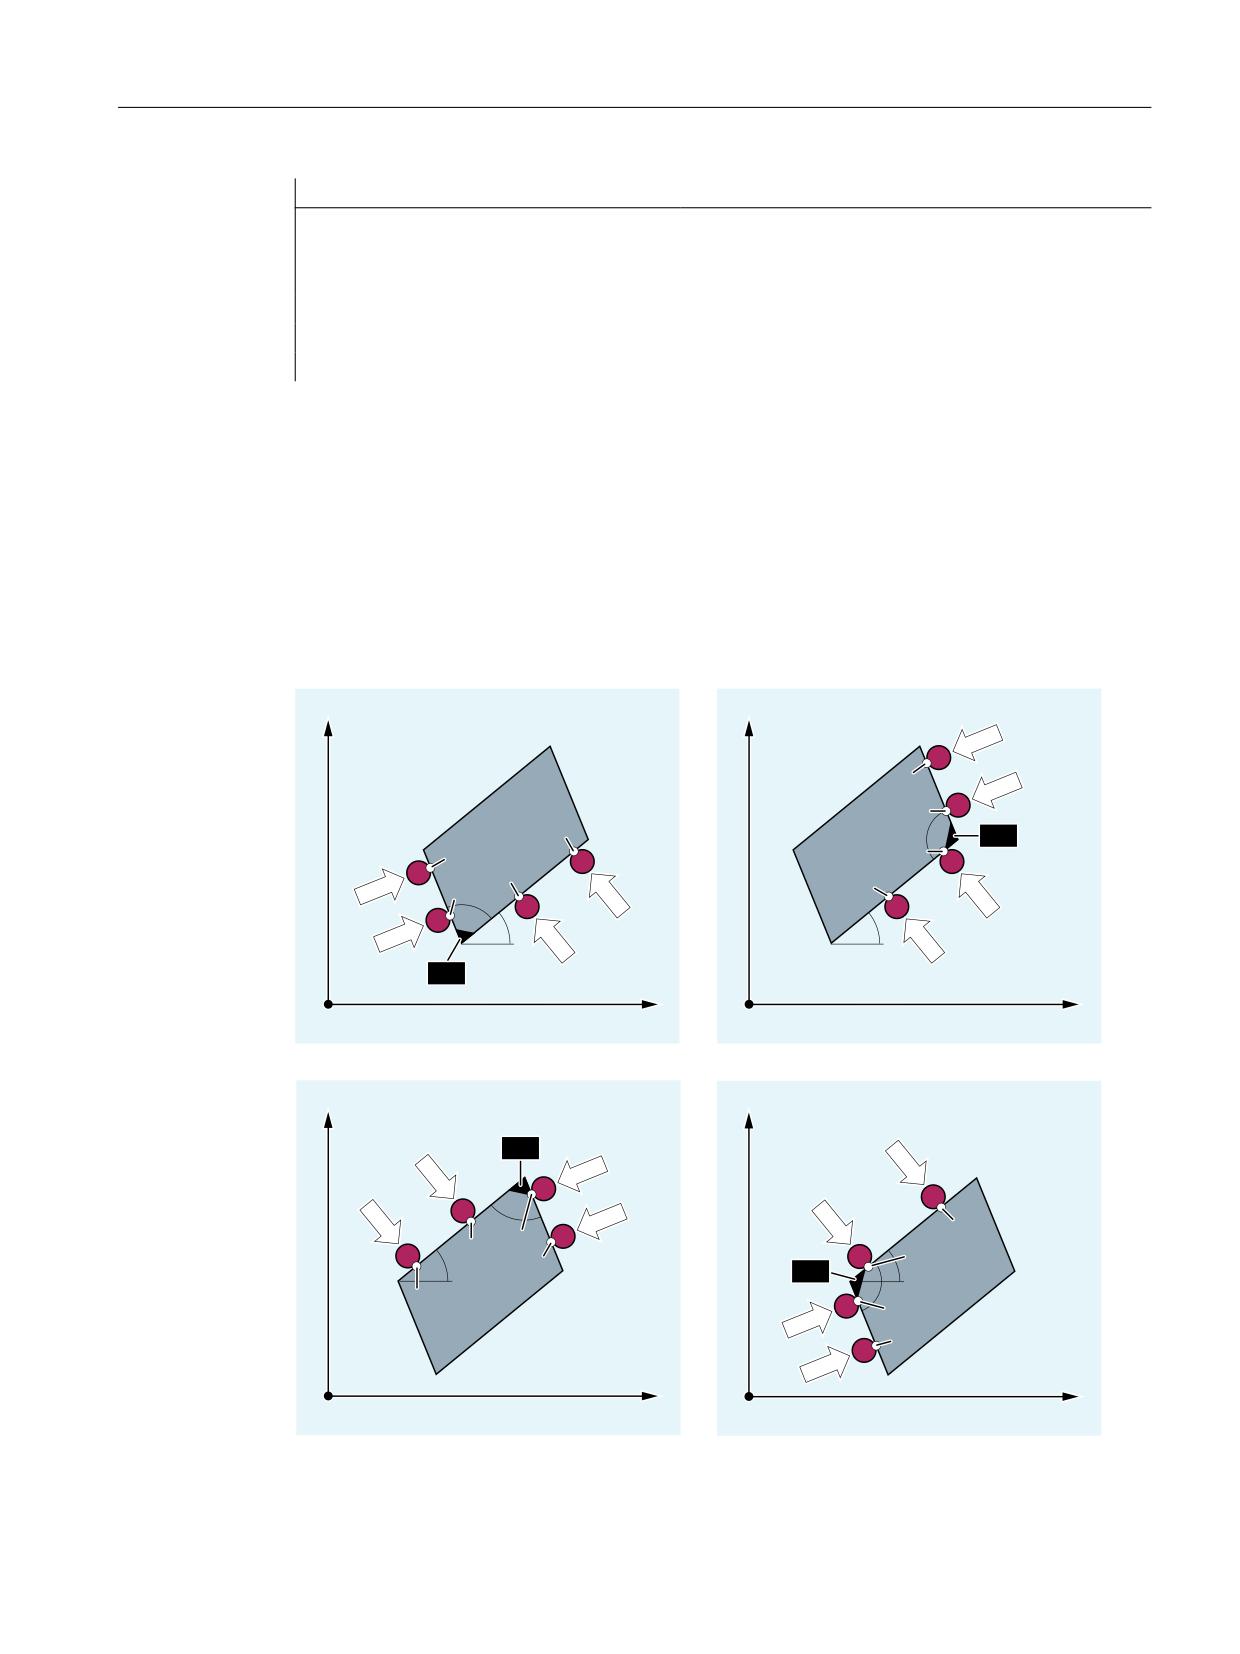
Measurement
10.5 Workpiece and tool measurement
Program code
Comment
$P_UIFR[1]=$P_IFRAME
; Write system frames to the data management.
G1 X0 Y0
; Approach the edge.
M30
10.5.2.2
Measurement type 4, 5, 6, 7: Measurement of a corner
Function
A corner is uniquely defined by approaching four measuring points P1 to P4. Three measuring
points suffice for a known angle of intersection ϕ.
If the angle of intersection ϕ and the workpiece position angle α are known, two measurement
points P1 and P3 suffice.
<
<
3
3
3
́
&
3
3
3
3
3
́
˞
˞
&
;
;
<
<
&
́
3
3
3
3
˞
3
&
˞
́
3
3
3
;
;
Figure 10-4
Measurement of a corner (C1, C2, C3 or C4)
Basic functions
Function Manual, 10/2020, 6FC5397-2GP40-0BA1
609
Measurement
10.5 Workpiece and tool measurement
The values of the following system variables are evaluated for measurement types 4 to 7:
Input variable
Meaning
$AC_MEAS_VALID
Validity bits for the input variables
$AA_MEAS_POINT1[<Axis>]
Measuring point 1
$AA_MEAS_POINT2[<Axis>]
Measuring point 2 (not relevant for $AC_MEAS_WP_SETAN-
GLE)
$AA_MEAS_POINT3[<Axis>]
Measuring point 3
$AA_MEAS_POINT4[<Axis>]
Measuring point 4 (not relevant for $AC_MEAS_CORNER_SE-
TANGLE)
$AA_MEAS_WP_SETANGLE *)
Set workpiece position angle
$AA_MEAS_CORNER_SETANGLE *)
Set angle of intersection
$AA_MEAS_SETPOINT[<Axis>] *)
Set position of the corner
$AC_MEAS_ACT_PLANE *)
Calculation with active plane unless otherwise specified.
$AC_MEAS_FINE_TRANS *)
= 0
Coarse offset
= 1
Fine offset
$AC_MEAS_FRAME_SELECT *)
Calculated as additive frame unless otherwise specified.
$AC_MEAS_T_NUMBER *)
Calculated with active T unless otherwise specified (T0).
$AC_MEAS_D_NUMBER *)
Calculated with active D unless otherwise specified (D0).
$AC_MEAS_INPUT[0] *)
= 0
Measurement for outer corner
= 1
Measurement for inner corner
The following applies unless otherwise specified: Measure-
ment for the outer corner
$AC_MEAS_TYPE
= 4
Measurement type 4: Measurement of a C1 corner
= 5
Measurement type 5: Measurement of a C2 corner
= 6
Measurement type 6: Measurement of a C3 corner
= 7
Measurement type 7: Measurement of a C4 corner
*) Optional
The following output variables are written for measurement types 4 to 7:
Output variable
Meaning
$AC_MEAS_FRAME
Result frame with translation and rotation
$AC_MEAS_WP_ANGLE
Calculated workpiece position angle
$AC_MEAS_CORNER_ANGLE
Calculated angle of intersection
$AC_MEAS_RESULTS[0]
Abscissa of the calculated corner point
$AC_MEAS_RESULTS[1]
Ordinate of the calculated corner point
$AC_MEAS_RESULTS[2]
Applicate of the calculated corner point
Example
Measurement type 4: Measurement of a C1 corner
Basic functions
610
Function Manual, 10/2020, 6FC5397-2GP40-0BA1
Measurement
10.5 Workpiece and tool measurement
Corner with three measuring points (P1, P3 and P4) and known angle of intersection ϕ (90°) and
unknown workpiece position angle α.
Program code
Comment
DEF INT RETVAL
DEF FRAME TMP
$TC_DP1[1,1]=120
; Type
$TC_DP2[1,1]=20
; 0
$TC_DP3[1,1]=10
; (Z) length compensation vector
$TC_DP4[1,1]=0
; (Y)
$TC_DP5[1,1]=0
; (X)
$TC_DP6[1,1]=2
; Radius
T1 D1
G0 X0 Y0 Z0 F10000
G54
$P_CHBFRAME[0]=CROT(Z,45)
$P_IFRAME[x,tr]= -SIN(45)
$P_IFRAME[y,tr]= -SIN(45)
$P_PFRAME[z,tr]= -45
; Measure corner with three measuring
points:
$AC_MEAS_VALID=0
; Set all input values to invalid.
G1 X-1 Y-3
; 1. Approach measuring point.
$AC_MEAS_LATCH[0]=1
; Pick up measuring point P1.
G1 X-4 Y4
; 3. Approach measuring point.
$AC_MEAS_LATCH[2]=1
; Pick up measuring point P3.
G1 X-4 Y1
; 4. Approach measuring point.
$AC_MEAS_LATCH[3]=1
; Pick up measuring point P4.
$AA_MEAS_SETPOINT[X]=0
; Set set position of the corner to
(0,0,0).
$AA_MEAS_SETPOINT[Y]=0
$AA_MEAS_SETPOINT[Z]=0
$AC_MEAS_CORNER_SETANGLE=90
; Specify set angle of intersection ϕ.
$AC_MEAS_ACT_PLANE=0
; Measuring plane is G17.
$AC_MEAS_FRAME_SELECT=0
; Select frame: SETFRAME
$AC_MEAS_T_NUMBER=1
; Select tool.
Basic functions
Function Manual, 10/2020, 6FC5397-2GP40-0BA1
611
Measurement
10.5 Workpiece and tool measurement
Program code
Comment
$AC_MEAS_D_NUMBER=1
$AC_MEAS_TYPE=4
; Set measurement type on corner 1.
RETVAL=MEASURE()
; Start measuring process.
IF RETVAL <> 0
SETAL(61043, << RETVAL)
ENDIF
IF $AC_MEAS_CORNER_ANGLE <> 90
; Query known set angle of intersection ϕ.
SETAL(61043, << $AC_MEAS_CORNER_ANGLE)
ENDIF
$P_SETFRAME=$AC_MEAS_FRAME
$P_SETFR=$P_SETFRAME
; Write system frames to the data manage-
ment.
G1 X0 Y0
; Approach the corner.
G1 X10
; Traverse the rectangle.
Y10
X0
Y0
M30
Basic functions
612
Function Manual, 10/2020, 6FC5397-2GP40-0BA1
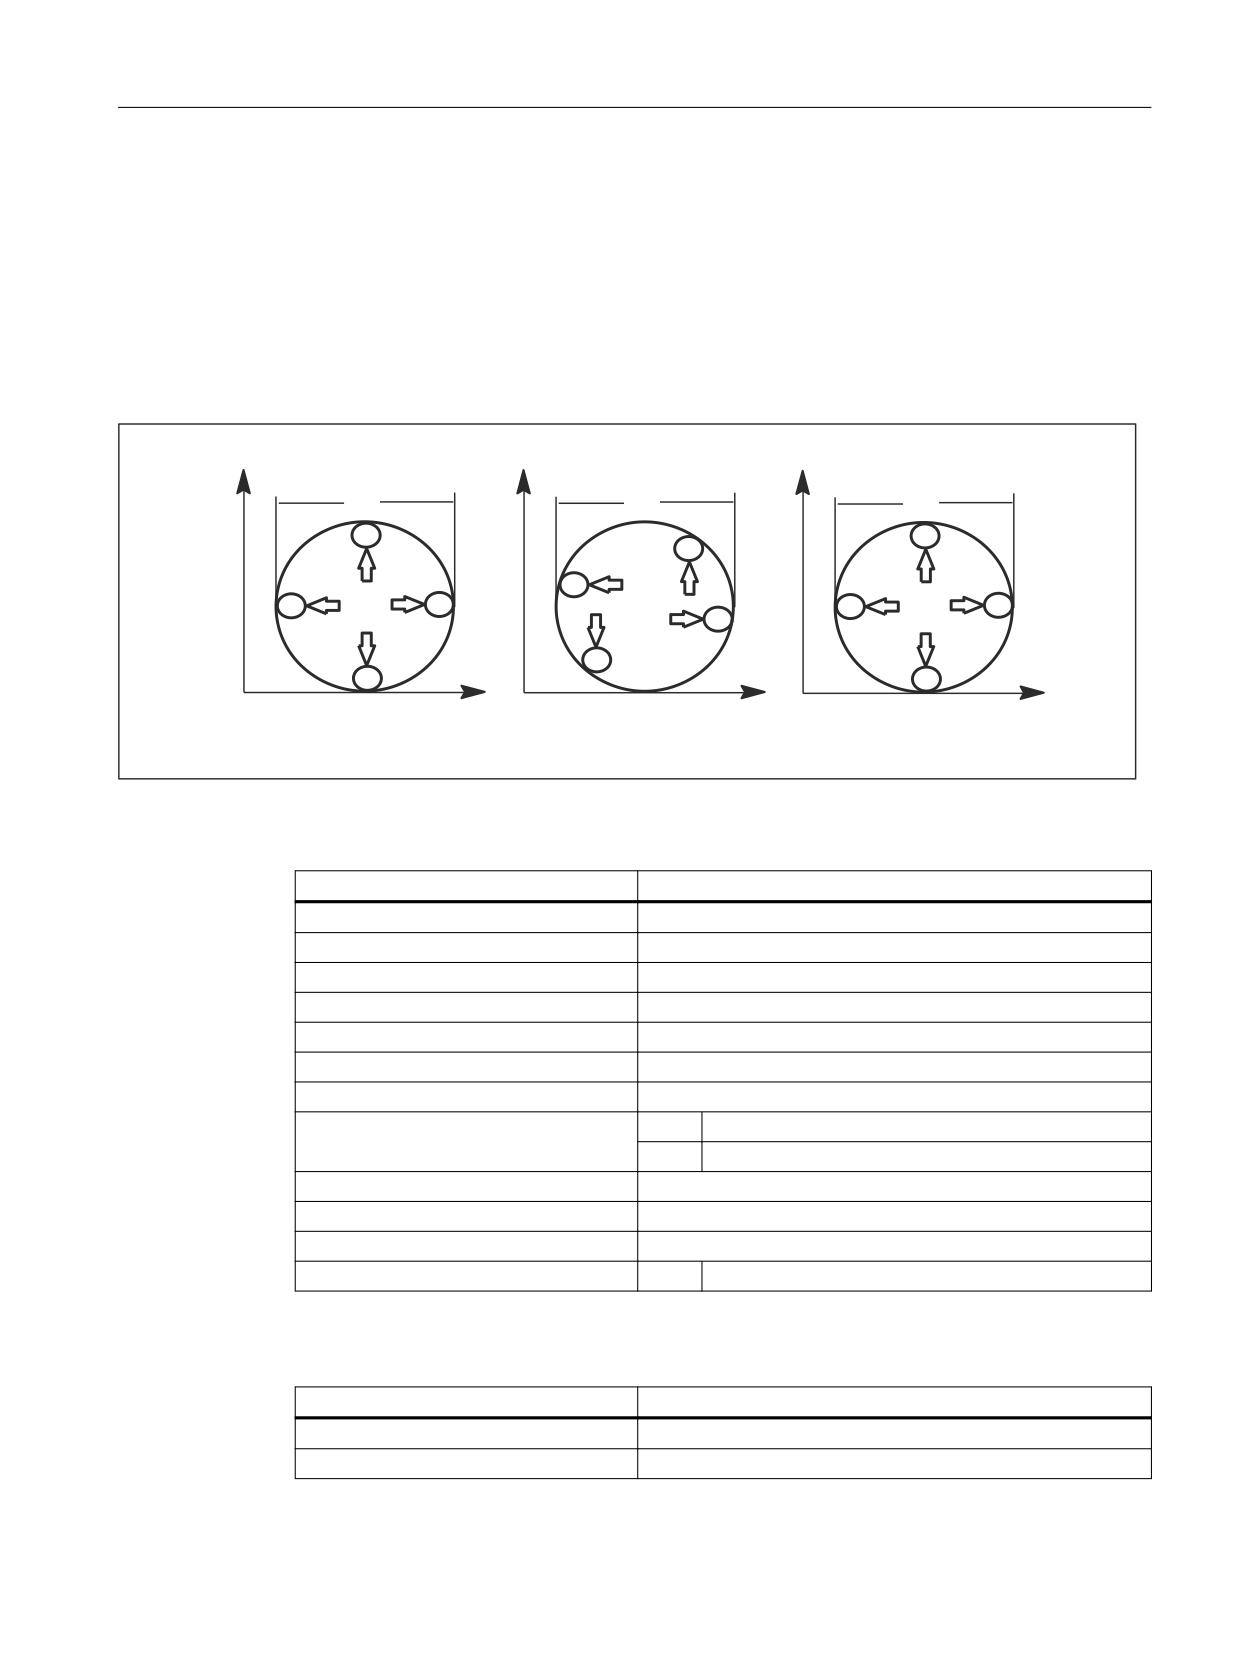
Measurement
10.5 Workpiece and tool measurement
10.5.2.3
Measurement type 8: Measurement of a hole
Function
Three measuring points are needed to determine the center point and diameter. The three
points must all be different. When four points are specified, the circle is adjusted in accordance
with the least square method. The circle is determined so that the sum of the distance squares
of the resulting points to the circle is minimal. The quality of the adjustment can be read.
G17
G18
G19
y
x
z
D
D
D
+
+
+
x
z
y
Figure 10-5
Measurement of a hole
The values of the following system variables are evaluated for measurement type 8:
Input variable
Meaning
$AC_MEAS_VALID
Validity bits for the input variables
$AA_MEAS_POINT1[<Axis>]
Measuring point 1
$AA_MEAS_POINT2[<Axis>]
Measuring point 2
$AA_MEAS_POINT3[<Axis>]
Measuring point 3
$AA_MEAS_POINT4[<Axis>] *)
When specified, the center is determined from four points.
$AA_MEAS_SETPOINT[<Axis>] *)
Set position of the hole center.
$AC_MEAS_ACT_PLANE *)
Calculation with active plane unless otherwise specified.
$AC_MEAS_FINE_TRANS *)
= 0
Coarse offset
= 1
Fine offset
$AC_MEAS_FRAME_SELECT *)
Calculated as additive frame unless otherwise specified.
$AC_MEAS_T_NUMBER *)
Calculated with active T unless otherwise specified (T0).
$AC_MEAS_D_NUMBER *)
Calculated with active D unless otherwise specified (D0).
$AC_MEAS_TYPE
= 8
Measurement type 8: Measurement of a hole
*) Optional
The following output variables are written for measurement type 8:
Output variable
Meaning
$AC_MEAS_FRAME
Result frame with translation
$AC_MEAS_DIAMETER
Diameter of hole
Basic functions
Function Manual, 10/2020, 6FC5397-2GP40-0BA1
613

Measurement
10.5 Workpiece and tool measurement
Output variable
Meaning
$AC_MEAS_RESULTS[0]
Abscissa of the calculated center point
$AC_MEAS_RESULTS[1]
Ordinate of the calculated center point
$AC_MEAS_RESULTS[2]
Applicate of the calculated center point
$AC_MEAS_RESULTS[3]
Quality of the circle adjustment: Sum of the distance squares
Example
Program code
Comment
DEF INT RETVAL
DEF FRAME TMP
$TC_DP1[1,1]=120
;
Type
$TC_DP2[1,1]=20
;
0
$TC_DP3[1,1]=10
;
(Z) length compensation vector
$TC_DP4[1,1]=0
;
(Y)
$TC_DP5[1,1]=0
;
(X)
$TC_DP6[1,1]=2
;
Radius
T1 D1
G0 X0 Y0 Z0 F10000
G54
;
Measure hole
$AC_MEAS_VALID=0
;
Set all input values to invalid.
G1 X-3 Y0
;
1. Approach measuring point.
$AA_MEAS_POINT1[X]=$AA_IW[X]
$AA_MEAS_POINT1[Y]=$AA_IW[Y]
$AA_MEAS_POINT1[Z]=$AA_IW[Z]
G1 X0 Y3
;
2. Approach measuring point.
$AA_MEAS_POINT2[X]=$AA_IW[X]
$AA_MEAS_POINT2[Y]=$AA_IW[Y]
$AA_MEAS_POINT2[Z]=$AA_IW[Z]
G1 X3 Y0
;
3. Approach measuring point.
$AA_MEAS_POINT3[X]=$AA_IW[X]
$AA_MEAS_POINT3[Y]=$AA_IW[Y]
$AA_MEAS_POINT3[Z]=$AA_IW[Z]
$AA_MEAS_SETPOINT[X]=0
;
Set set position of the center.
$AA_MEAS_SETPOINT[Y]=0
$AA_MEAS_SETPOINT[Z]=0
Basic functions
614
Function Manual, 10/2020, 6FC5397-2GP40-0BA1
Measurement
10.5 Workpiece and tool measurement
Program code
Comment
$AC_MEAS_ACT_PLANE=0
; Measuring plane is G17.
$AC_MEAS_FRAME_SELECT=0
; Select frame - SETFRAME
$AC_MEAS_T_NUMBER=1
; Select tool.
$AC_MEAS_D_NUMBER=1
$AC_MEAS_TYPE=8
; Set measurement type on hole.
RETVAL=MEASURE()
; Start measuring process.
If RETVAL <> 0
SETAL(61043, << RETVAL)
ENDIF
IF $AC_MEAS_DIAMETER <> 10
; Query known diameter.
SETAL(61043, << $AC_MEAS_WP_ANGLE)
ENDIF
$P_SETFRAME=$AC_MEAS_FRAME
$P_SETFR=$P_SETFRAME
; Describe system frames in the data manage-
ment.
G1 X-3 Y0
; Approach P1.
G2 I=$AC_MEAS_DIAMETER/2
; Traverse hole with regard to circle center
point.
M30
Basic functions
Function Manual, 10/2020, 6FC5397-2GP40-0BA1
615
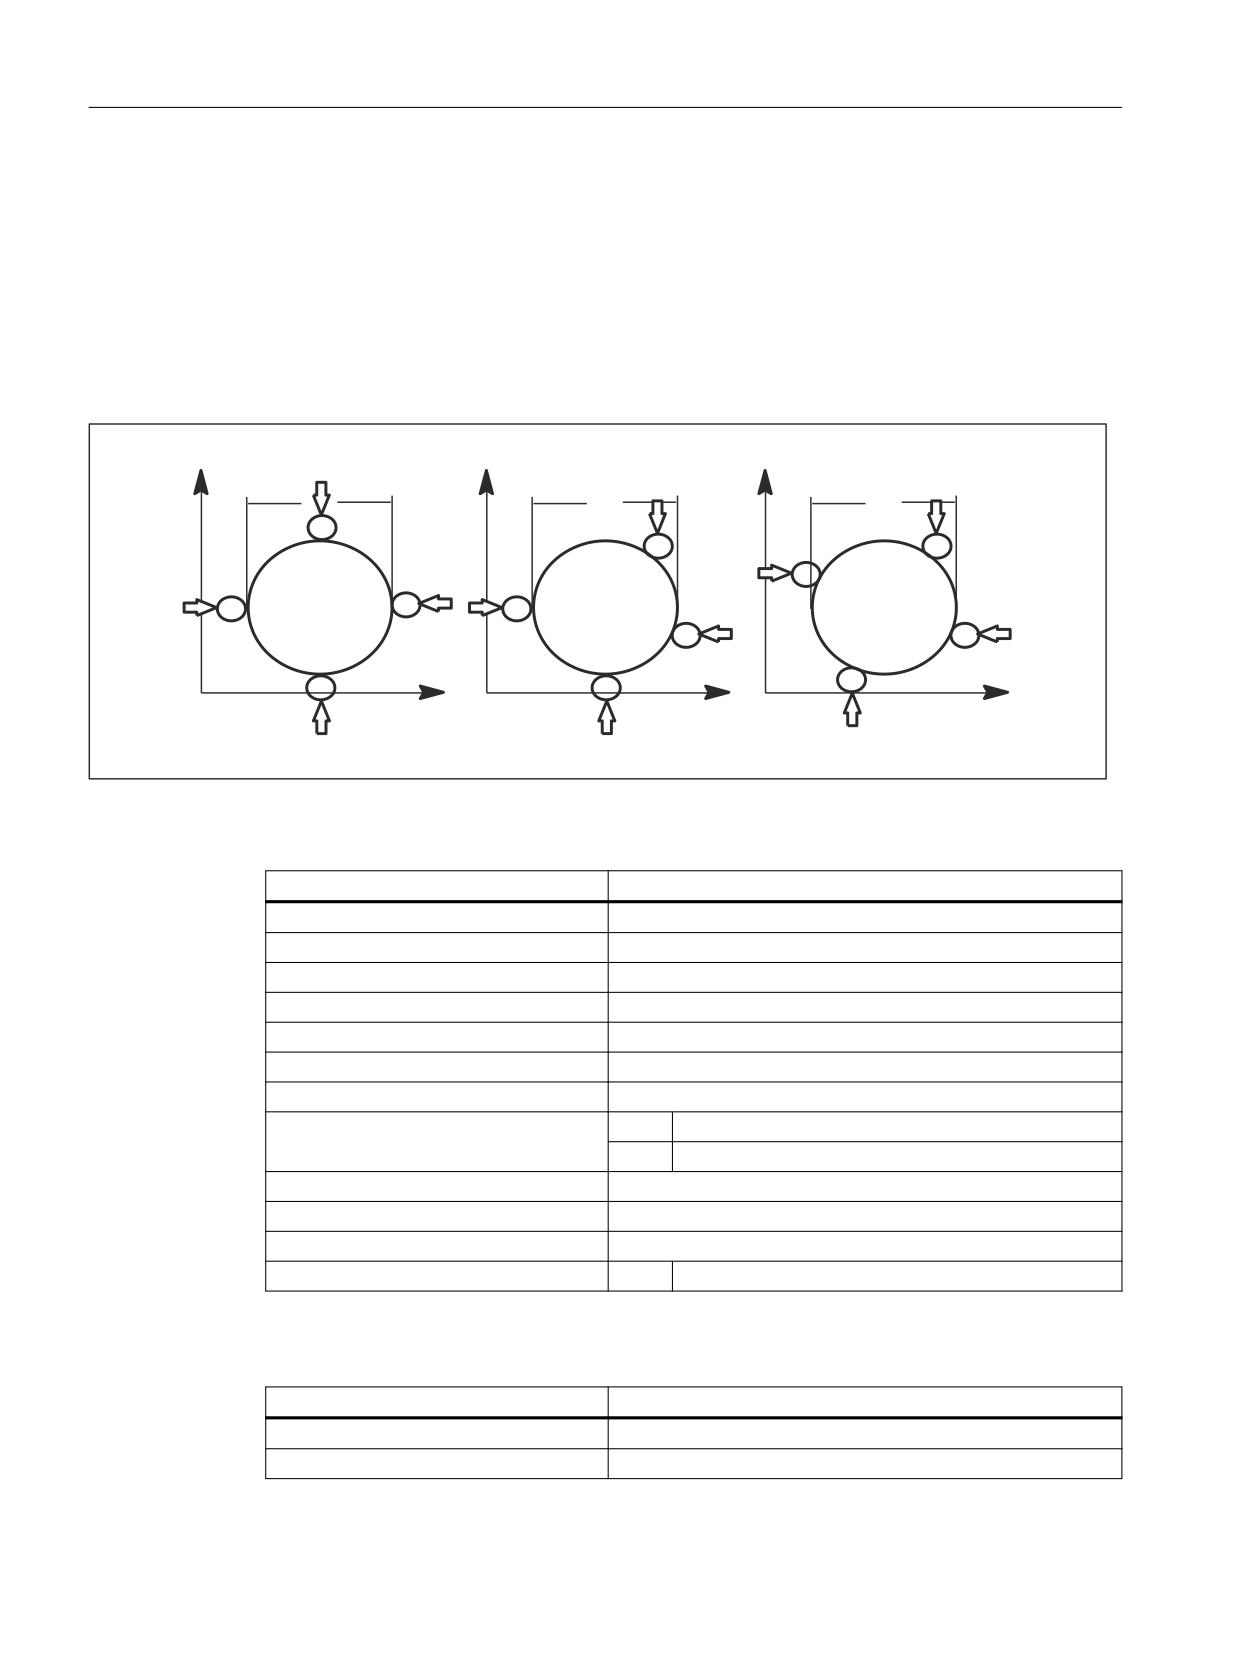
Measurement
10.5 Workpiece and tool measurement
10.5.2.4
Measurement type 9: Measurement of a shaft
Function
Three measuring points are needed to determine the center point and diameter. The three
points must all be different. When four points are specified, the circle is adjusted in accordance
with the least square method. The circle is determined so that the sum of the distance squares
of the resulting points to the circle is minimal. The quality of the adjustment can be read.
G17
G18
G19
y
x
z
D
D
D
+
+
+
x
z
y
Figure 10-6
Measurement of a shaft
The values of the following system variables are evaluated for measurement type 9:
Input variable
Meaning
$AC_MEAS_VALID
Validity bits for input variables
$AA_MEAS_POINT1[<Axis>]
Measuring point 1
$AA_MEAS_POINT2[<Axis>]
Measuring point 2
$AA_MEAS_POINT3[<Axis>]
Measuring point 3
$AA_MEAS_POINT4[<Axis>] *)
When specified, the center is determined from four points.
$AA_MEAS_SETPOINT[<Axis>] *)
Set position of the shaft center point.
$AC_MEAS_ACT_PLANE *)
Calculation with active plane unless otherwise specified.
$AC_MEAS_FINE_TRANS *)
= 0
Coarse offset
= 1
Fine offset
$AC_MEAS_FRAME_SELECT *)
Calculated as additive frame unless otherwise specified.
$AC_MEAS_T_NUMBER *)
Calculated with active T unless otherwise specified (T0).
$AC_MEAS_D_NUMBER *)
Calculated with active D unless otherwise specified (D0).
$AC_MEAS_TYPE
= 9
Measurement type 9: Measurement of a shaft
*) Optional
The following output variables are written for measurement type 9:
Output variable
Meaning
$AC_MEAS_FRAME
Result frame with translation
$AC_MEAS_DIAMETER
Diameter of hole
Basic functions
616
Function Manual, 10/2020, 6FC5397-2GP40-0BA1
Measurement
10.5 Workpiece and tool measurement
Output variable
Meaning
$AC_MEAS_RESULTS[0]
Abscissa of the calculated center point
$AC_MEAS_RESULTS[1]
Ordinate of the calculated center point
$AC_MEAS_RESULTS[2]
Applicate of the calculated center point
$AC_MEAS_RESULTS[3]
Quality of the circle adjustment: Sum of the distance squares
10.5.2.5
Measurement type 12: Measurement of a groove
Function
A groove is measured by approaching the two outside corners or inner edges. The groove center
can be set to a set position. The component of the approach direction determines the groove
position.
y
y
+y
-x
+x
y0
-y
x0
x
x
Figure 10-7
Measurement of a groove
The values of the following system variables are evaluated for measurement type 12:
Input variable
Meaning
$AC_MEAS_VALID
Validity bits for the input variables
$AA_MEAS_POINT1[<Axis>]
Measuring point 1
$AA_MEAS_POINT2[<Axis>]
Measuring point 2
$AA_MEAS_SETPOINT[<Axis>] *)
Set position of the groove center
$AC_MEAS_DIR_APPROACH
Direction of approach to the workpiece
= 0
+ X
= 1
- X
= 2
+ Y
= 3
- Y
= 4
+ Z
= 5
- Z
$AC_MEAS_ACT_PLANE *)
Calculation with active plane unless otherwise specified.
$AC_MEAS_FINE_TRANS *)
= 0
Coarse offset
= 1
Fine offset
$AC_MEAS_FRAME_SELECT *)
Calculated as additive frame unless otherwise specified.
$AC_MEAS_T_NUMBER *)
Calculated with active T unless otherwise specified (T0).
$AC_MEAS_D_NUMBER *)
Calculated with active D unless otherwise specified (D0).
Basic functions
Function Manual, 10/2020, 6FC5397-2GP40-0BA1
617
Measurement
10.5 Workpiece and tool measurement
Input variable
Meaning
$AC_MEAS_INPUT[0] *)
Approach direction for 2nd measuring point for a recess meas-
urement. Must have the same coordinate as the approach
direction of the 1st measuring point.
$AC_MEAS_TYPE
= 12
Measurement type 12: Measurement of a groove
*) Optional
The following output variables are written for measurement type 12:
Output variable
Meaning
$AC_MEAS_FRAME
Result frame with translation
$AC_MEAS_RESULTS[0]
Position of the calculated groove center (X0, Y0 or Z0)
$AC_MEAS_RESULTS[1]
Groove width in approach direction
Example
Groove measurement with approach direction in X.
Program code
Comment
DEF INT RETVAL
DEF FRAME TMP
$TC_DP1[1,1]=120
; Type
$TC_DP2[1,1]=20
; 0
$TC_DP3[1,1]=10
; (Z) length compensation vector
$TC_DP4[1,1]=0
; (Y)
$TC_DP5[1,1]=0
; (X)
$TC_DP6[1,1]=2
; Radius
T1 D1
G0 X0 Y0 Z0 F10000
G54
$P_CHBFRAME[0]= CROT(Z,45)
$P_IFRAME[X,TR]= -sin(45)
$P_IFRAME[Y,TR]= -sin(45)
$P_PFRAME[Z,RT]= -45
; Measure groove.
$AC_MEAS_VALID=0
; Set all input values to invalid.
G1 X-2
; 1. Approach measuring point.
$AA_MEAS_POINT1[X]=$AA_IW[X]
$AA_MEAS_POINT1[Y]=$AA_IW[Y]
$AA_MEAS_POINT1[Z]=$AA_IW[Z]
Basic functions
618
Function Manual, 10/2020, 6FC5397-2GP40-0BA1