Infiniti QX4 (R50). Manual - part 558


  Index      Infiniti     Infiniti QX4 (R50) - service repair manual 2001 year


Search            copyright infringement  


Content   ..  556  557  558  559   ..


Infiniti QX4 (R50). Manual - part 558


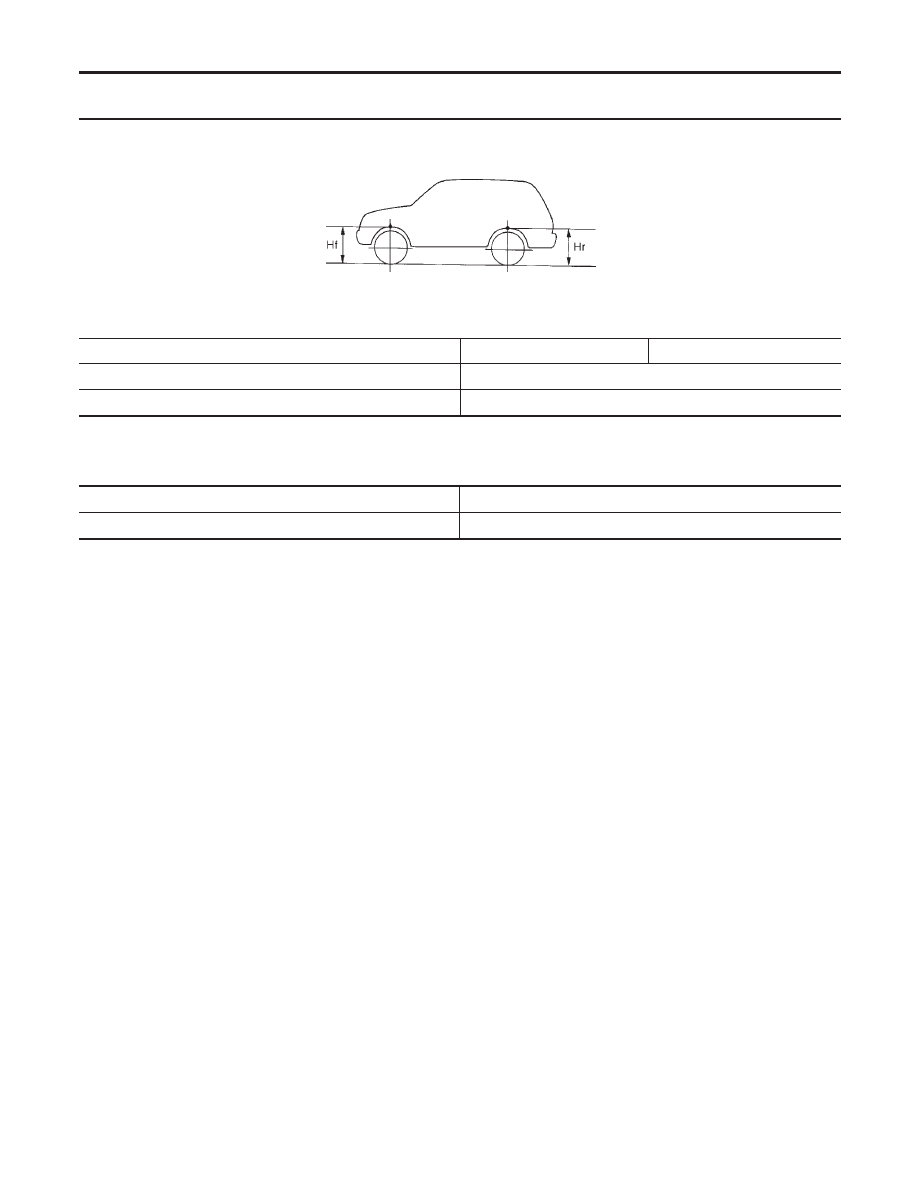
WHEELARCH HEIGHT (UNLADEN*)

NBSU0019

Unit: mm (in)

SFA746B

Applied model

245/70 R16 tire

245/65 R17 tire

Front (Hf)

794 (31.26)

Rear (Hr)

810 (31.89)

*: Fuel, radiator coolant and engine oil full. Spare tire, jack, hand tools and mats in designated positions.

WHEEL RUNOUT AVERAGE*

NBSU0020

Unit: mm (in)

Radial runout limit

0.3 (0.012)

Lateral runout limit

0.3 (0.012)

*: Wheel runout average = (Outside runout value + Inside runout value) x 0.5

FRONT SUSPENSION

Service Data and Specifications (SDS) (Cont’d)

SU-14

SBR686C

Precautions

PRECAUTIONS

NBSU0021

I

When installing rubber parts, final tightening must be car-
ried out under unladen condition* with tires on ground.
*Fuel, radiator coolant and engine oil full. Spare tire, jack,
hand tools and mats in designated positions.

I

Use flare nut wrench when removing and installing brake
tubes.

I

After installing removed suspension parts, check wheel
alignment and adjust if necessary.

I

Always torque brake lines when installing.

Preparation

COMMERCIAL SERVICE TOOLS

NBSU0023

Tool name

Description

1 Flare nut crowfoot
2 Torque wrench

NT360

Removing and installing each brake piping
a: 10 mm (0.39 in)

Noise, Vibration and Harshness (NVH)
Troubleshooting

NBSU0036

Refer to “Noise, Vibration and Harshness (NVH) Troubleshooting”,
“FRONT SUSPENSION”, SU-3.

GI

MA

EM

LC

EC

FE

AT

TF

PD

AX

BR

ST

RS

BT

HA

SC

EL

IDX

REAR SUSPENSION

Precautions

SU-15

Components

NBSU0024

SRA880A

SMA525A

On-vehicle Service

REAR SUSPENSION PARTS

NBSU0025

Check rear axle and rear suspension parts for excessive play, wear
and damage.
1.

Shake each rear wheel to check for excessive play.

2.

Retighten all nuts and bolts to the specified torque.

Tightening torque: Refer to “Coil Spring and Shock
Absorber”, SU-18.

SRA754A

3.

Check shock absorber for oil leakage and other damage.

4.

Check shock absorber bushing for excessive wear and other
damage.

5.

Check wheelarch height. Refer to “On-vehicle Service”,
“FRONT SUSPENSION”, SU-5.

REAR SUSPENSION

Components

SU-16

SBR686C

Removal and Installation

NBSU0026

1.

Support axle and suspension components with a suitable jack
and block.

2.

Disconnect brake hydraulic line and parking brake cables at
back plates.

CAUTION:

I

Use flare nut wrench when removing and installing brake
tubes.

I

Before removing the rear suspension assembly, discon-
nect the ABS wheel sensor from the assembly. Then move
it away from the rear suspension assembly. Failure to do
so may result in damage to the sensor wires and the sen-
sor becoming inoperative.

3.

Remove stabilizer bar from body.

4.

Remove upper links and lower links from body.

5.

Remove panhard rod from body.

6.

Disconnect rear end of propeller shaft. Refer to PD-6,
“Removal and Installation”.

7.

Remove upper end nuts of shock absorber.

SRA935

Final tightening for rubber parts requires to be carried out
under unladen condition with tires on ground.

GI

MA

EM

LC

EC

FE

AT

TF

PD

AX

BR

ST

RS

BT

HA

SC

EL

IDX

REAR SUSPENSION

Removal and Installation

SU-17


Content   ..  556  557  558  559   ..