Volkswagen Golf / Golf GTI / Golf Variant. Manual - part 962
Caution
Risk of damaging the component surfaces.
♦ When positioning a prying tool, put commercially available
adhesive tape over the component in the visible area.
Removing
– Turn off the ignition and all electrical equipment.
– Remove the ignition key, if equipped.
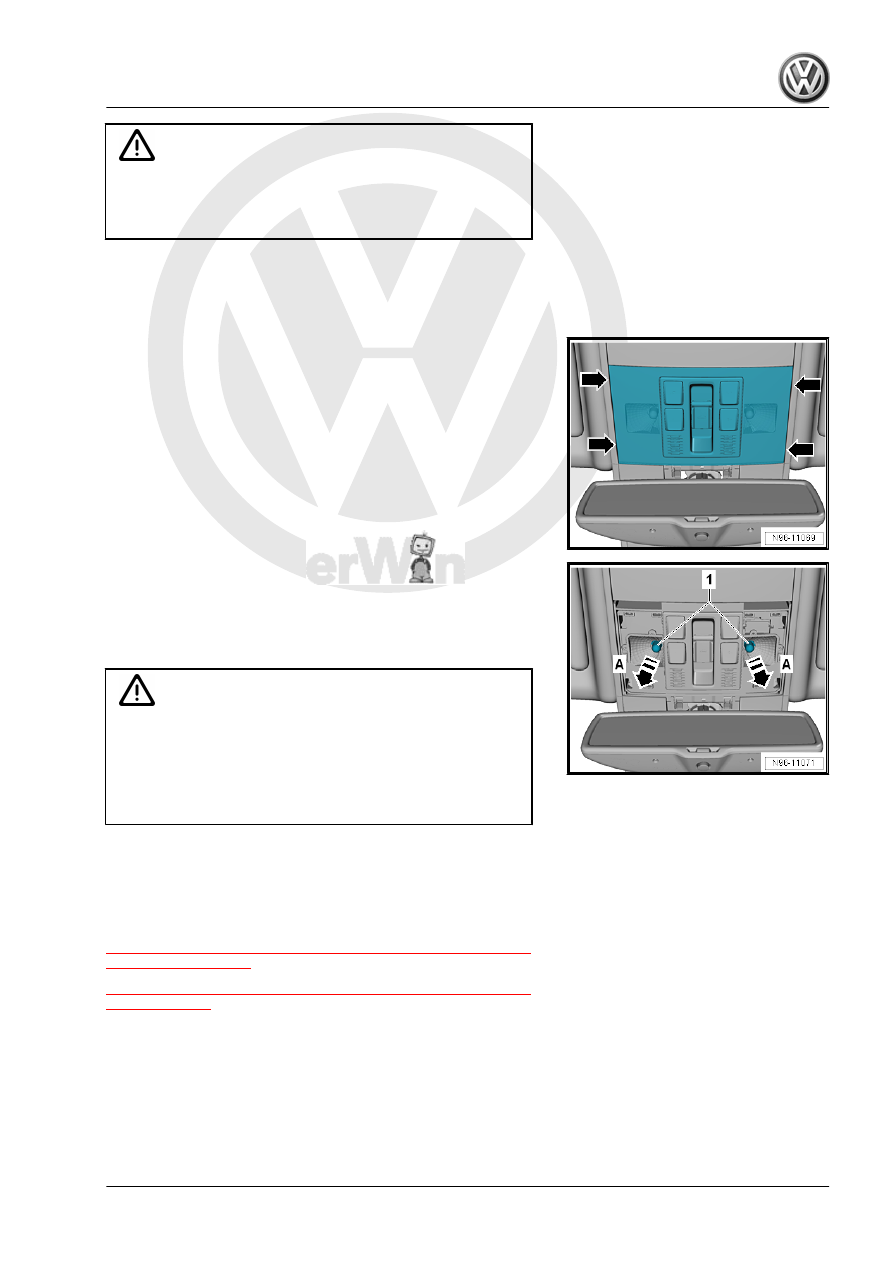
– Pry the diffusion lens in the marked areas -arrows- using the
-3409- from the Front Interior Lamp - W1- .
– Remove the bulb -1- in the direction of the -arrow A- from the
bulb socket.
Installing
Install in the reverse order of removal while paying attention to
the following:
Caution
There is a risk of damaging the bulb.
♦ Do not touch glass cone of bulb with bare fingers. Fingers
will leave traces of grease on the glass which, when the
bulb is switched on, will evaporate and cloud the glass.
♦ Use clean cloth gloves to insert the bulbs.
– Perform a function test.
1.25
Rear Interior Lamp - W43- Bulb, Remov‐
ing and Installing
⇒ “1.25.1 Rear Interior Lamp W43 Bulb, Removing and Installing,
with Bulbs”, page 253
⇒ “1.25.2 Rear Interior Lamp W43 Bulb, Removing and Installing,
1.25.1
Rear Interior Lamp - W43- Bulb, Remov‐
ing and Installing, with Bulbs
Special tools and workshop equipment required
♦ Trim Removal Wedge - 3409-
The Rear Interior Lamp - W43- bulb and the Left Rear Reading
Lamp - W11- and Right Rear Reading Lamp - W12- bulb are one
component.