Volkswagen Golf / Golf GTI / Golf Variant. Manual - part 699
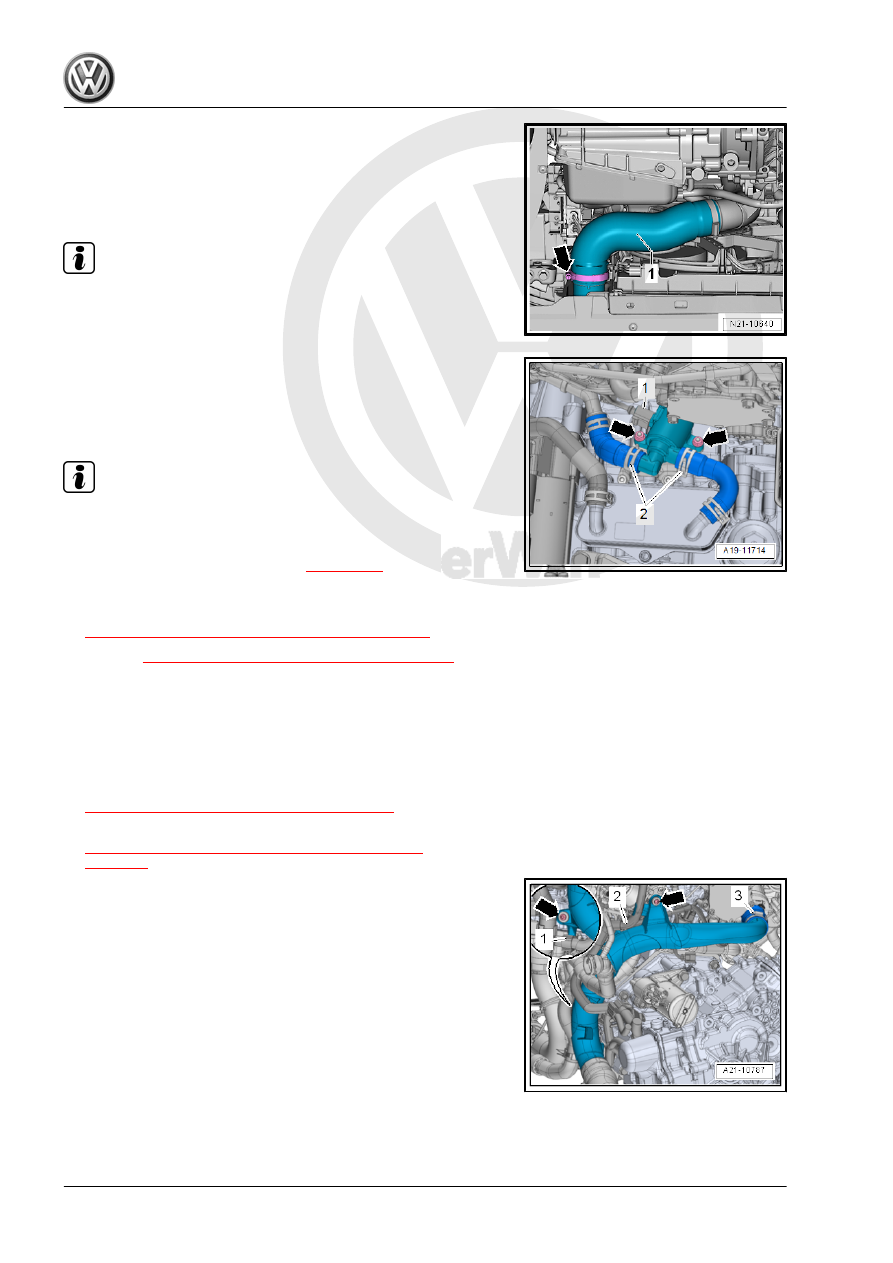
– Loosen the hose clamp -arrow- and remove the charge air
hose -1- with the air guide pipe downward.
– Disconnect the connector -1-.
– Clamp the coolant hoses on Transmission Coolant Valve -
N488- with Hose Clamps - Up To 25mm - 3094- .
Note
Place a cleaning cloth underneath, to catch coolant leaking out.
– Loosen the clamps -2- and remove the coolant hoses.
– Remove the nuts -arrows- and then remove the Transmission
Coolant Valve - N488- .
Installing
Install in reverse order of removal. Note the following:
Note
Secure hose connections with standard production clamps. Refer
to the Parts Catalog.
– Check the coolant level. Refer to
.
Tightening Specifications
♦ Refer to
⇒ “2.2 Overview - Electric Coolant Pump”, page 226
.
♦ Refer to
⇒ “3.1 Overview - Air Filter Housing”, page 293
.
♦ Refer to ⇒ Body Exterior; Rep. Gr. 66 ; Noise Insulation;
Overview - Noise Insulation .
2.7
Coolant Pump, Removing and Installing
Removing
– Drain the coolant. Refer to
⇒ “1.3 Coolant, Draining and Filling”, page 217
.
– Remove the air filter housing. Refer to
⇒ “3.2 Air Filter Housing, Removing and Installing”,
– Free up the wiring harness -1 and 2- from the air guide pipe.
– Loosen the screw-type clamp -3-.
– Remove the bolts -arrows-.