Volkswagen Golf / Golf GTI / Golf Variant. Manual - part 614
 

  Index      Volkswagen     Volkswagen Golf / Golf GTI / Golf Variant - service repair manual 2013 year


Search            copyright infringement  


Content   ..  612  613  614  615   ..


Volkswagen Golf / Golf GTI / Golf Variant. Manual - part 614


32 – Torque Converter

1

Torque Converter

⇒ “1.1 Overview - Torque Converter”, page 13
⇒ “1.2 Torque Converter, Removing and Installing”, page 14
⇒ “1.3 Torque Converter, Checking”, page 15
⇒ “1.4 Torque Converter, Draining”, page 15
⇒ “1.5 Torque Converter Seal, Removing and Installing”,

page 15

1.1

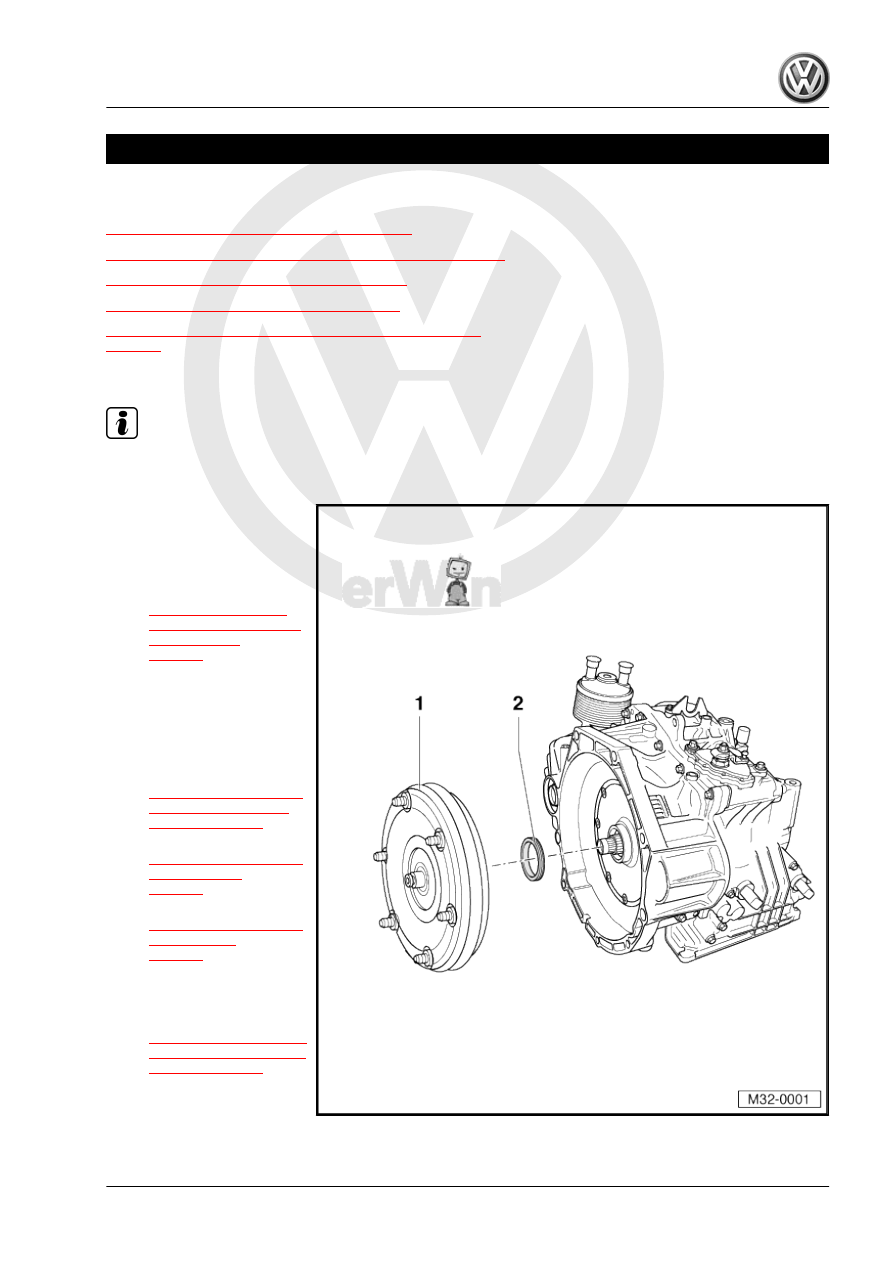
Overview - Torque Converter

Note

The torque converter and transmission in the illustration may differ from the original part.

1 - Torque Converter

❑ Secure the torque con‐

verter from falling when

the transmission is re‐

moved or during trans‐

port. Refer to

⇒ Fig. ““Securing the

Torque Converter from

Falling Out”“ ,

page 14

❑ There are different tor‐

que converters.

❑ Use the code letters to

designate them. Refer

to the Parts Catalog.

❑ Removing and instal‐

ling. Refer to

⇒ “1.2 Torque Convert‐

er, Removing and In‐

stalling”, page 14

 .

❑ Checking. Refer to

⇒ “1.3 Torque Convert‐

er, Checking”,

page 15

 .

❑ Draining. Refer to

⇒ “1.4 Torque Convert‐

er, Draining”,

page 15

 .

2 - Seal

❑ For the torque converter
❑ Replacing. Refer to

⇒ “1.5 Torque Converter

Seal, Removing and In‐

stalling”, page 15

 .

Securing the Torque Converter from Falling Out
– Secure the torque converter with wire -A- to prevent it from

falling when being transported.

Unsecured torque converters can slide out if the transmission is

tipped.

1.2

Torque Converter, Removing and Instal‐

ling

Removing
• Transmission is removed.
– Carefully remove the torque converter from the transmission.
Installing
– Press torque converter hub through the seal as far as first stop.
– Lightly press torque converter toward transmission and turn it

until slots on torque converter hub -arrow- engage in drive lugs

on ATF pump gear and torque converter slides inward notice‐

ably.

The converter is installed correctly if it is easy to turn is by hand

and if it fits evenly in the transmission.

Caution

Before  and  during  fastening  the  engine/transmission  flange

bolts, check that the torque converter can still be turned behind

the drive plate. If the torque converter cannot be turned, it must

be assumed that it has not been inserted properly and that the

coupling plate of the torque converter or the ATF pump will be

destroyed during final tightening of the bolts.

1.3

Torque Converter, Checking

– Check hub -arrow- of torque converter for scoring.

Note

The torque converter is welded together and must be replaced as

a complete unit if it is damaged or faulty.

1.4

Torque Converter, Draining

Special tools and workshop equipment required
♦ Used Oil Collection and Extraction Unit - SMN372500-
Drain the torque converter if the ATF is dirty:
– Extract the ATF from the torque converter using the Used Oil

Collection and Extraction Unit - SMN372500- and the oil ex‐

traction sensor.

1.5

Torque Converter Seal, Removing and

Installing

Special tools and workshop equipment required
♦ Puller - Seal Lever - VW681-
♦ Seal Installer - Torque Converter Seal - T10175-

Caution

This procedure contains mandatory replaceable parts. Refer

to component overview prior to starting procedure.

Mandatory Replacement Parts
♦ Seal - Torque Converter

Removing
– Remove the transmission. Refer to

⇒ “3.1 Transmission, Removing”, page 43

 .

– Remove the torque converter.
– Pry out the seal with the Puller - Seal Lever - VW681- .

Installing
– Coat outer circumference and sealing lips of new seal with

ATF.

• Installed position: The open side of seal faces the transmis‐

sion.

– Install the sealing ring using the Seal Installer - Torque Con‐

verter Seal - T10175- until it is flush.

– Install the torque converter. Refer to

⇒ “1.2 Torque Converter, Removing and Installing”, page 14

 .

– Install the transmission. Refer to

⇒ “3.2 Transmission, Installing”, page 64

 .


Content   ..  612  613  614  615   ..