Volkswagen Golf / Golf GTI / Golf Variant. Manual - part 569
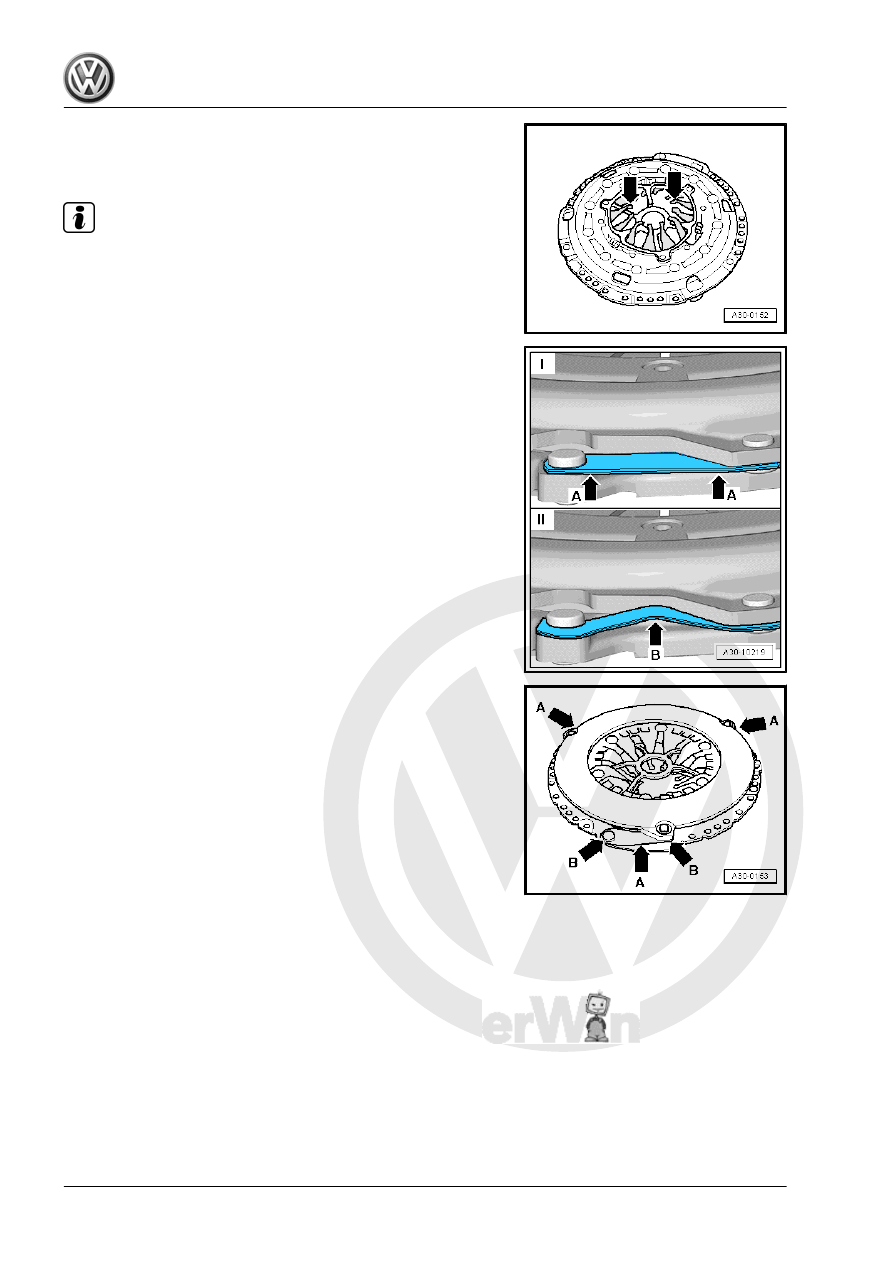
Check the Ends of the Diaphragm Spring
• Wear up to half the thickness of the diaphragm spring
-arrows- is permitted.
Note
Allocate clutch pressure plate and clutch plate according to the
engine code. Refer to the Parts Catalog.
Checking the Pull-Springs and Rivet Connection
I - Pull-spring OK
• Slight offset in the outer area -arrows A-.
II - Pull-springs damaged
• The clutch pressure plates must be replaced if the pull-spring
is bent or broken off -arrow B-.
Checking the Spring Connections and Rivet Connections
– Make sure the rivet connections -arrows B- fit correctly on all
pull-springs -arrows A-.
• Replace any clutch pressure plates that have loose rivet con‐
nections -arrows B-.