Volkswagen Golf / Golf GTI / Golf Variant. Manual - part 567
2
Clutch
⇒ “2.1 Overview - Clutch”, page 36
⇒ “2.2 Clutch, Removing and Installing”, page 39
2.1
Overview - Clutch
⇒ “2.1.1 Overview - Clutch, with Dual Mass Flywheel, Sachs”,
page 36
⇒ “2.1.2 Overview - Clutch, with Dual Mass Flywheel, LuK”, page
37
⇒ “2.1.3 Overview - Clutch, with Single Flywheel”, page 38
2.1.1
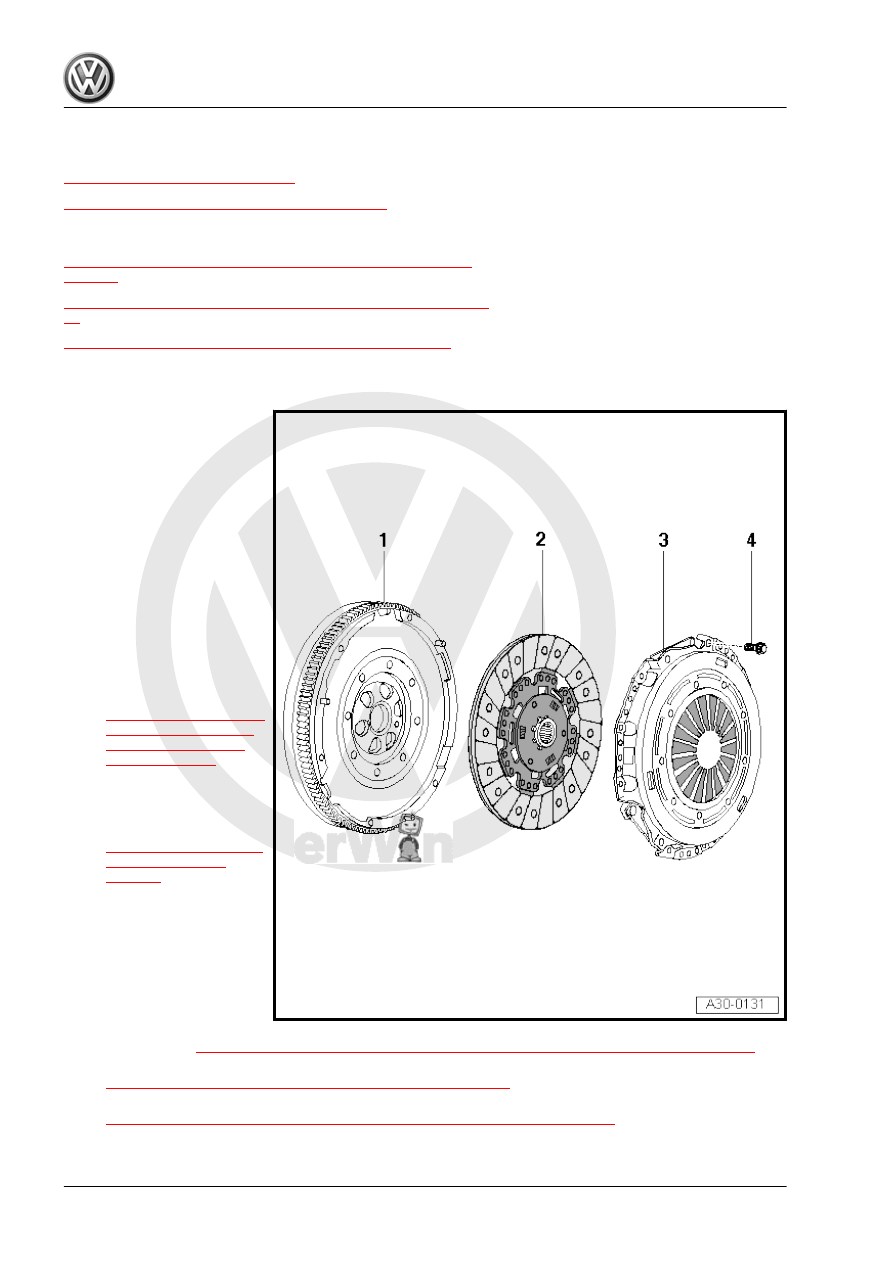
Overview - Clutch, with Dual Mass Flywheel, Sachs
1 - Dual Mass Flywheel
❑ Removing and instal‐
ling. Refer to ⇒ Rep.
Gr. 13 ; Cylinder Block,
Transmission Side; Fly‐
wheel, Removing and
Installing .
❑ Make sure it fits secure‐
ly on the centering pins
❑ Keep the clutch lining
contact surface free of
grooves, oil and grease.
2 - Clutch Plate
❑ Allocation. Refer to the
Parts Catalog.
❑ Removing and instal‐
ling. Refer to
❑ Only replace together
with the pressure plate
❑ Installed position. Refer
to
3 - Pressure Plate
❑ With adjustment mech‐
anism
❑ Only replace together
with the clutch plate
❑ Allocation. Refer to the
Parts Catalog.
❑ Removing and instal‐
ling. Refer to
⇒ “2.2.1 Clutch, Removing and Installing, with Dual Mass Flywheel, Sachs”, page 39
❑ Check the ends of the diaphragm spring. Refer to
⇒ Fig. ““Check the Ends of the Diaphragm Spring”“ , page 41
❑ Checking the spring connections and rivet connections. Refer to
⇒ Fig. ““Checking the Spring Connections and Rivet Connections”“ , page 41
4 - Bolt
❑ M 6: 13 Nm