Volkswagen Golf / Golf GTI / Golf Variant. Manual - part 568


  Index      Volkswagen     Volkswagen Golf / Golf GTI / Golf Variant - service repair manual 2013 year


Search            copyright infringement  


Content   ..  566  567  568  569   ..


Volkswagen Golf / Golf GTI / Golf Variant. Manual - part 568


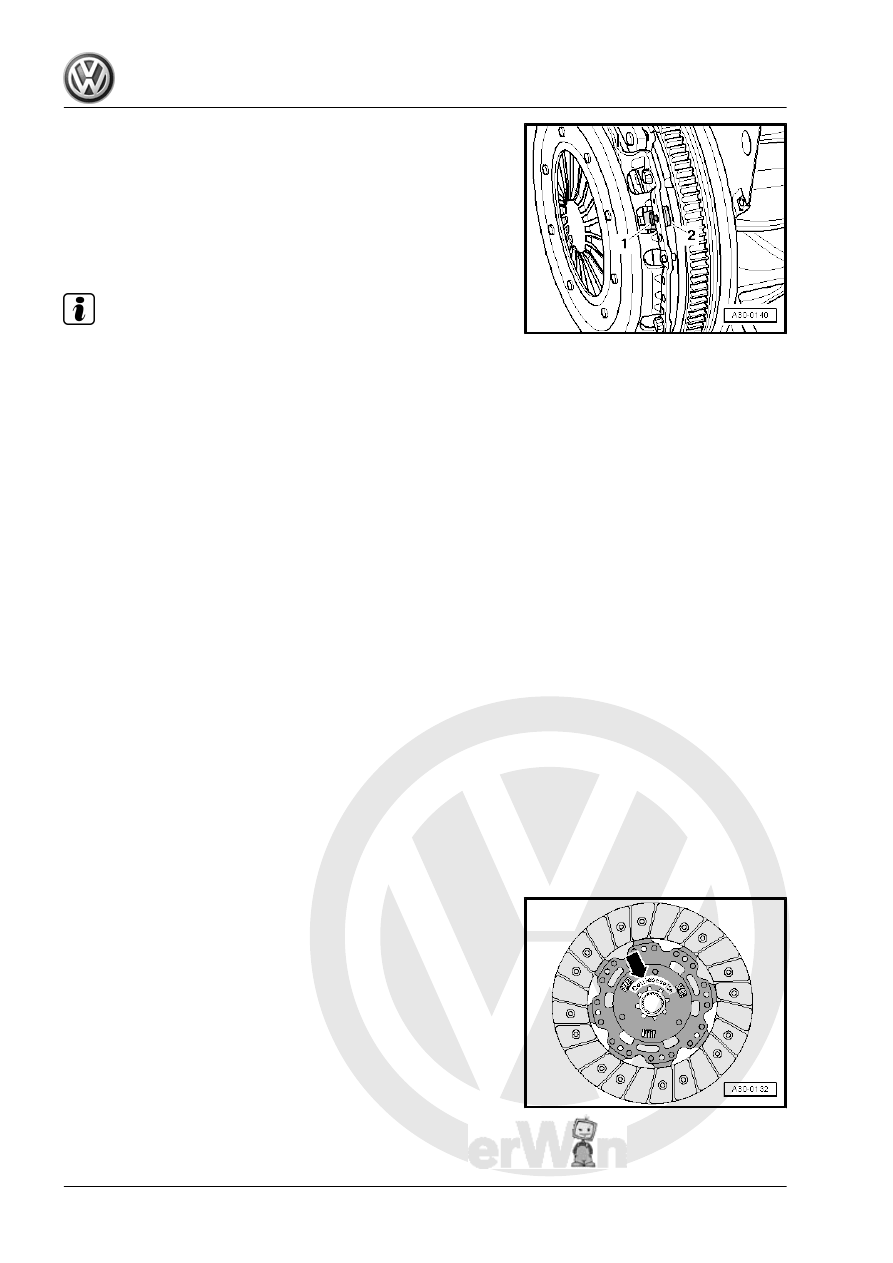
• When loosening, the stop -2- and the bolt -1- must loosen up

together.

– If the stop does not loosen: push the bolt toward the dual mass

flywheel.

– Remove the pressure plate and the clutch plate.
Installing
Install in reverse order of removal. Note the following:

Note

Allocate clutch pressure plate and clutch plate according to the

engine code. Refer to the Parts Catalog.

Clean the input shaft splines and (on used clutch plates) the

hub splines. Remove any corrosion and then apply a very thin

coat of Grease for Clutch Disc Shaft Splines - G 000 100- on

the splines. Then move the clutch plate back and forth on the

input shaft until the hub moves freely on the shaft. Remove

any excess grease.

The clutch pressure plates are corrosion-protected and

greased. With the exception of the friction surface on the clutch

plate, do not clean the clutch pressure plate. This will shorten

the service life of the clutch considerably.

The friction surfaces on the clutch pressure plate and on the

flywheel must be cleaned thoroughly (degreased).

To reduce odor caused by a burnt clutch, thoroughly clean the

clutch housing, the flywheel and the side of the engine facing

toward the transmission.

Only use compressed air to clean the dual mass flywheel.

The clutch plate linings must sit completely on the flywheel and

on the clutch pressure plate friction surface. Install the bolts.

Tighten the bolts diagonally in small steps so as to not damage

the centering holes in the pressure plate and the centering pins

on the flywheel.

Make sure the alignment sleeves for centering the engine/

transmission are installed inside the cylinder block. Install

them if necessary.

If the alignment sleeves are missing, it will be difficult to shift,

there will be clutch problems and the transmission may make

noises (loose rattling).

Clutch Plate Installed Position
• “Transmission side” label faces the transmission.

Check the Ends of the Diaphragm Spring
• Wear up to half the thickness of the diaphragm spring

-arrows- is permitted.

Checking the Spring Connections and Rivet Connections
I - Pull-spring OK
• Slight offset in the outer area -arrows A-.
II - Pull-springs damaged
• The clutch pressure plates must be replaced if the pull-spring

is bent or broken off -arrow B-.

– Make sure the rivet connections -arrows B- fit correctly on all

pull-springs -arrows A-.

• Replace any clutch pressure plates that have loose rivet con‐

nections -arrows B-.

– Install the Flywheel Retainer - 3067- .
– Install the clutch pressure plate on the centering pins.
– Center the clutch plate with the Alignment Tool - Clutch Plate

- 3190A- .

When Installing, Tighten Bolts as Follows so Clutch Pressure

Plate Does Not Distort (Causing Shuddering On Acceleration):
– Make sure the stop pin (position sensor) -arrow- moves easily.
– Install all bolts evenly, by hand, until the bolt heads touch the

clutch pressure plate.

– Tighten the bolt diagonally in small steps.
• When doing this, the stop pin -arrow- must lift off from the

pressure plate.

– Install the transmission. Refer to

⇒ “2.2 Transmission, Installing”, page 77

 .

Tightening Specifications
♦ Refer to

⇒ “2.1.1 Overview - Clutch, with Dual Mass Flywheel, Sachs”,

page 36

 .

2.2.2

Clutch, Removing and Installing, with

Dual Mass Flywheel, LuK

Special tools and workshop equipment required
♦ Flywheel Retainer - 3067-
♦ Alignment Tool - Clutch Plate - 3190A-
♦ Torque Wrench 1331 5-50Nm - VAG1331-
♦ Grease for Clutch Disc Shaft Splines - G 000 100-
Removing
• The transmission is removed.
– Insert the Flywheel Retainer - 3067- to loosen the bolts.
When Removing, Loosen the Bolts as Follows so that the Clutch

Pressure Plate Does Not Distort (Causing Shuddering On Accel‐

eration):
– Loosen the bolt diagonally in small steps.

– Remove the clutch pressure plate and clutch plate.
Installing
Install in reverse order of removal. Note the following:

Note

Allocate clutch pressure plate and clutch plate according to the

engine code. Refer to the Parts Catalog.

Clean the input shaft splines and (on used clutch plates) the

hub splines. Remove any corrosion and then apply a very thin

coat of Grease for Clutch Disc Shaft Splines - G 000 100- on

the splines. Then move the clutch plate back and forth on the

input shaft until the hub moves freely on the shaft. Remove

any excess grease.

The clutch pressure plates are corrosion-protected and

greased. With the exception of the friction surface on the clutch

plate, do not clean the clutch pressure plate. This will shorten

the service life of the clutch considerably.

The friction surfaces on the clutch pressure plate and on the

flywheel must be cleaned thoroughly (degreased).

To reduce odor caused by a burnt clutch, thoroughly clean the

clutch housing, the flywheel and the side of the engine facing

toward the transmission.

Only use compressed air to clean the dual mass flywheel.

The clutch plate linings must sit completely on the flywheel and

on the clutch pressure plate friction surface. Install the bolts.

Tighten the bolts diagonally in small steps so as to not damage

the centering holes in the pressure plate and the centering pins

on the flywheel.

Make sure the alignment sleeves for centering the engine/

transmission are installed inside the cylinder block. Install

them if necessary.

If the alignment sleeves are missing, it will be difficult to shift,

there will be clutch problems and the transmission may make

noises (loose rattling).

Clutch Plate Installed Position
• “Transmission side” label faces the transmission.


Content   ..  566  567  568  569   ..