Volkswagen Golf / Golf GTI / Golf Variant. Manual - part 411
 

  Index      Volkswagen     Volkswagen Golf / Golf GTI / Golf Variant - service repair manual 2013 year


Search            copyright infringement  


Content   ..  409  410  411  412   ..


Volkswagen Golf / Golf GTI / Golf Variant. Manual - part 411


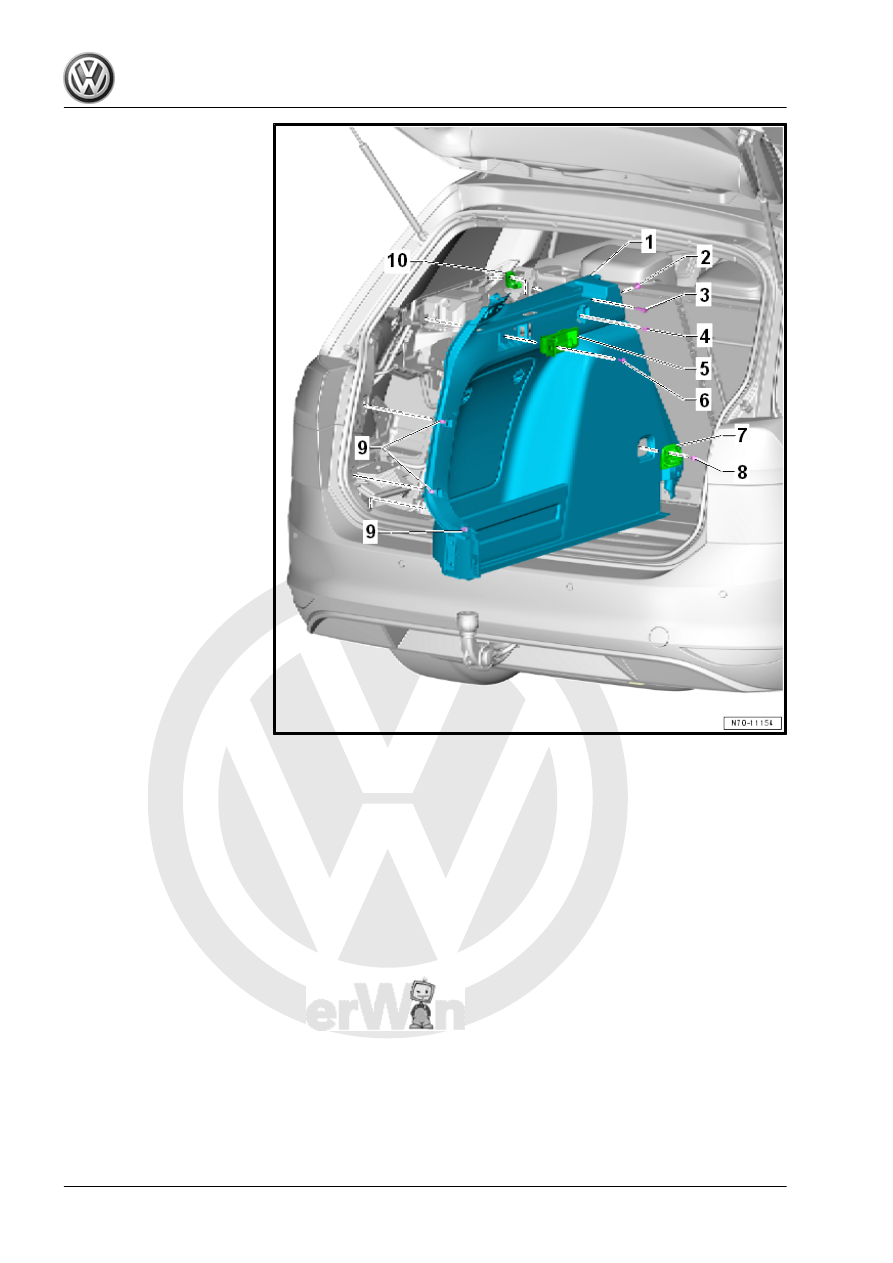
– Remove the clip -2-.
– Remove the bolts -3-.
– Fold up the coat hook -10- and remove the bolt -4-.
– Pull and hold the operating lever for the backrest remote re‐

lease -5-.

– Remove the bolt -6-.
– Loosen the luggage compartment side trim panel -1- near the

clips -9- from the body mounts using the Pry Lever - 80-200- .

Vehicles with Converter with Socket
– Loosen the leaf spring -2- from the cover -1-.
– Release the retaining tabs on the cover -1- for the socket with

converter -3-.

– Remove the socket with the converter -3- from the cover -1-.
Continuation for All Vehicles
– If equipped, disconnect the connectors and remove the lug‐

gage compartment side trim panel.

Installing

Note

♦

Check all the fasteners for damage and replace if necessary.

♦

Remove any remaining clips in the body mounting points using

the Omega Clip Tool - T40280- . To install, insert into the lug‐

gage compartment side trim panel.

♦

Make sure the luggage compartment side trim panel fits inside

the rear lid seal molding after it is installed.

Install in reverse order of removal.
Tightening Specifications
♦ Refer to

⇒ “6.3.2 Overview - Luggage Compartment Side Trim Panel,

Wagon”, page 279

6.13

Rear Lid Upper Trim Panel, Removing

and Installing

Special tools and workshop equipment required
♦ Wedge Set - T10383-
Removing

– Disengage the retaining cable for the rear shelf at the left and

right side window frames.

– Loosen the center window frame -2- with the Wedge Set -

T10383- from the mounts in the rear lid and the side trim

panels -3-.

– Remove the center window frame -2-.
– Loosen the side window frame -3- with the Wedge Set -

T10383- from the retainers in the rear lid and the lower trim

panel -1-.

– Remove the side window frame -3-.
Installing

Note

♦

Check all the fasteners for damage and replace if necessary.

♦

Remove any remaining clips in the rear lid mounting points

using the Omega Clip Tool - T40280- . To install, insert into

the window frame.

Install in reverse order of removal.

6.14

Rear Lid Lower Trim Panel, Removing

and Installing

Special tools and workshop equipment required
♦ Omega Clip Tool - T40280-
Removing
– Remove the rear lid upper trim panel. Refer to

⇒ “6.13 Rear Lid Upper Trim Panel, Removing and Installing”,

page 293

 .

– Remove the emergency triangle.

– Remove the bolts -2-.
– Unclip the side access covers in the trim panel -3-.
– Reach into the trim panel access openings with hands.
– Loosen the trim panel -3- with a »jerky pulling motion« from

the rear lid mounts -1-.

– Make sure that the entire number of clips -4- is in the trim panel

-3-.


Content   ..  409  410  411  412   ..