Volkswagen Golf / Golf GTI / Golf Variant. Manual - part 346


  Index      Volkswagen     Volkswagen Golf / Golf GTI / Golf Variant - service repair manual 2013 year


Search            copyright infringement  


Content   ..  344  345  346  347   ..


Volkswagen Golf / Golf GTI / Golf Variant. Manual - part 346


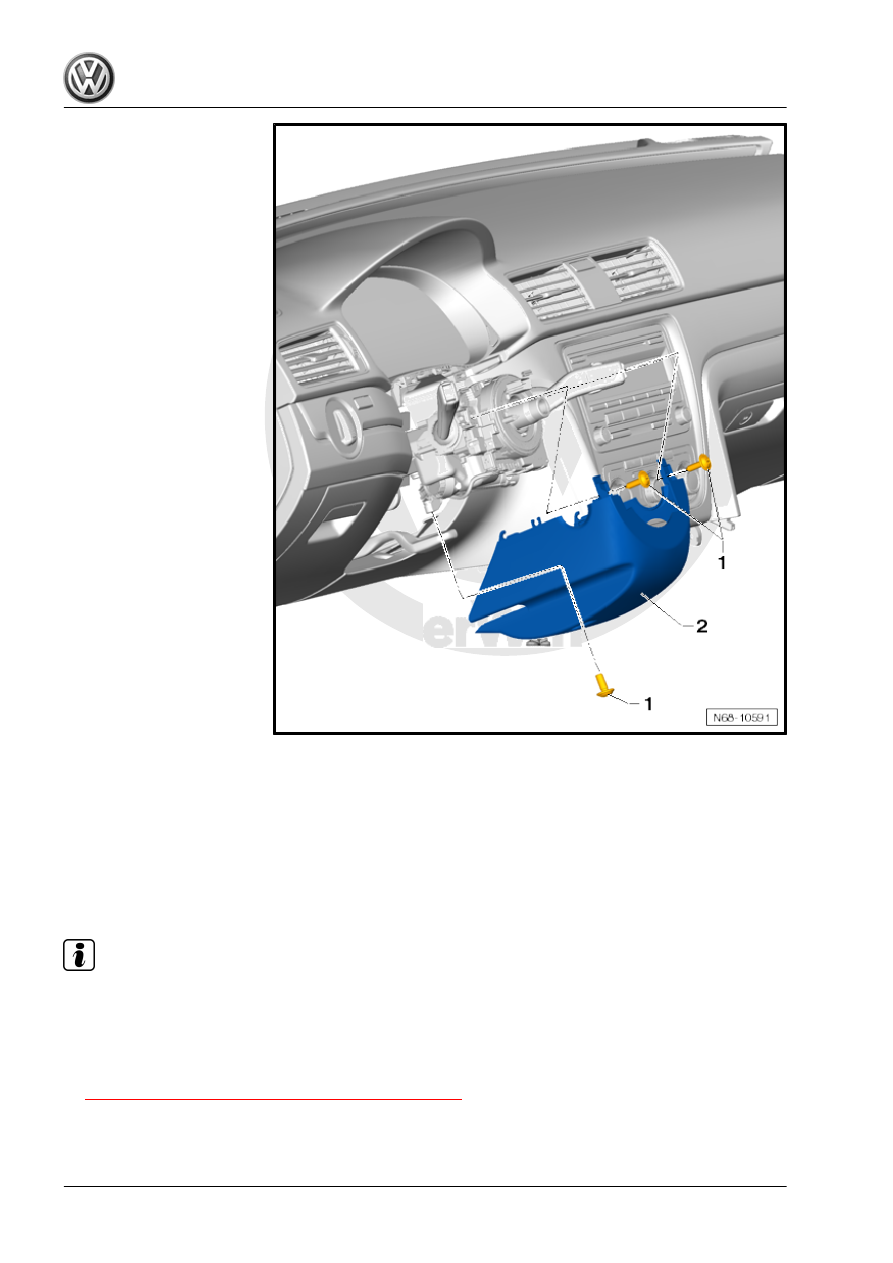
– Remove the screws -1- from the lower steering column trim

panel. To do so, turn the steering wheel accordingly.

– Remove the lower steering column trim panel -2- from the

steering column.

– For vehicles with keyless locking and starting system, discon‐

nect the connector for the Anti-Theft Immobilizer Reader Coil

- D2- .

Installing

Note

Check all the fasteners for damage and replace if necessary.

Install in reverse order of removal.
Tightening Specifications
♦ Refer to

⇒ “1.4 Overview - Steering Column Trim Panel”, page 23

1.13

Front Passenger Side Footwell Cover,

Removing and Installing

Removing
– Remove the bolts -1-.
– Guide the front passenger side footwell cover -2- out of the

instrument panel and center console and remove it.

Installing

Note

Check all the fasteners for damage and replace if necessary.

The screws -1- are installed hand-tight.

Install in reverse order of removal.

1.14

Glove Compartment Handle, Removing

and Installing

Special tools and workshop equipment required
♦ Torque Wrench 1783 - 2-10Nm - VAG1783-

Removing
– Open the glove compartment.
– Remove the bolt -1- and the unlock button -2- from the glove

compartment lid.

Installing
Install in reverse order of removal.
Tightening Specifications

Component

Tightening Specification

Release button to glove com‐

partment lid

1.5 Nm

1.15

Glove Compartment Lid Service Posi‐

tion

Moving into Service Position
– Open the glove compartment lid -2-.
– Press the stops -1- for the glove compartment lid -2- upward

in direction of -arrows A -.

– At the same time, open the glove compartment lid farther -2-

in direction of -arrow B-. While doing so, remove the braking

element for the dampening mechanism carefully from the

damper.

Service Position, Resetting
– Slowly close the glove compartment lid while inserting the

braking element for the braking component carefully into the

insulation component.

– Close the glove compartment lid farther and lock behind the

end stops.

1.16

Glove Compartment Lid Dampening

Mechanism, Removing and Installing

Removing
– Move the glove compartment lid into the service position. Re‐

fer to

⇒ “1.15 Glove Compartment Lid Service Position”, page 35

 .

– Disconnect the connector -2- from the Glove Compartment

Lamp Switch - E26- -3-.

– Turn the damper -1- 90° (

1

/4 turn) -arrow- and remove it from

the glove compartment.


Content   ..  344  345  346  347   ..