Volkswagen Golf / Golf GTI / Golf Variant. Manual - part 30


  Index      Volkswagen     Volkswagen Golf / Golf GTI / Golf Variant - service repair manual 2013 year


Search            copyright infringement  


Content   ..  28  29  30  31   ..


Volkswagen Golf / Golf GTI / Golf Variant. Manual - part 30


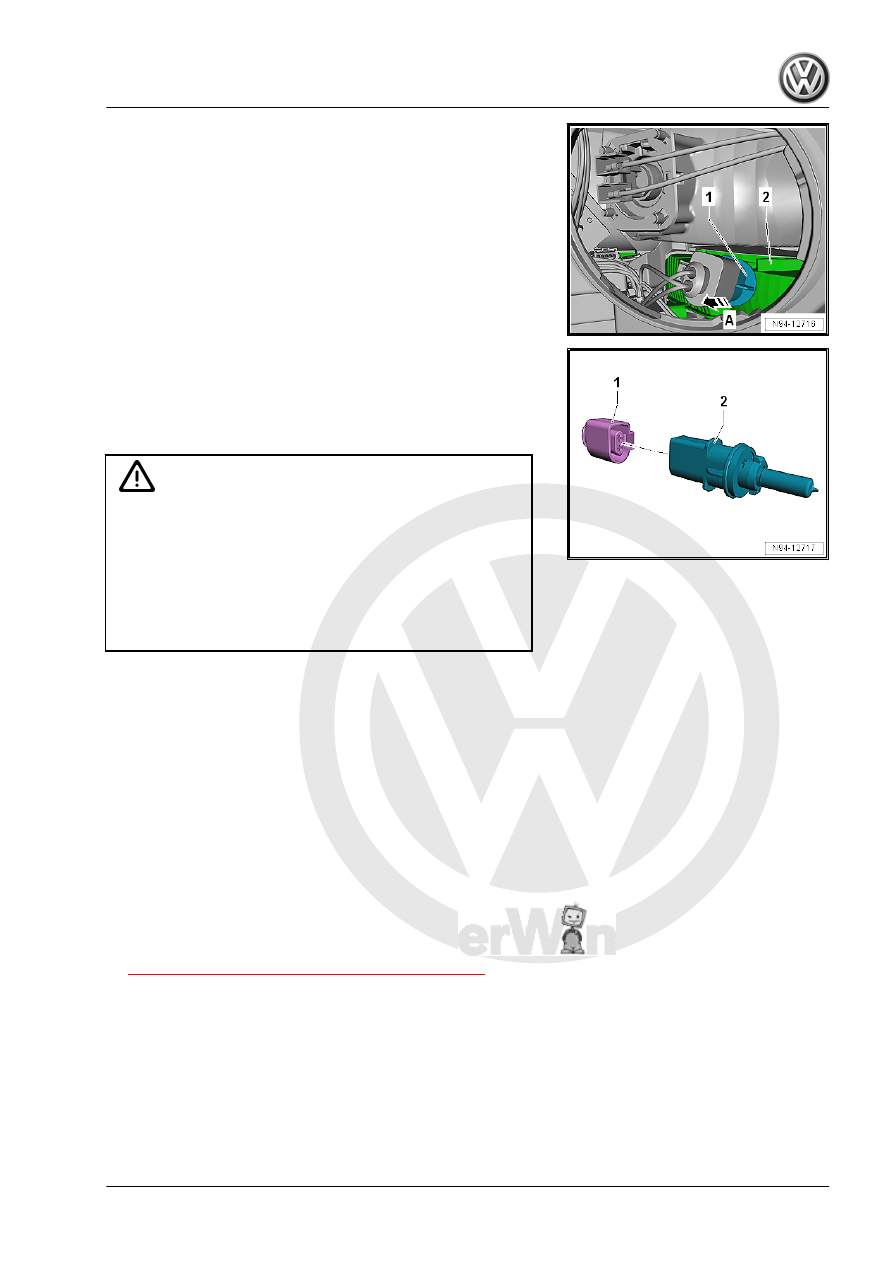
– Turn the bulb socket -1- counter-clockwise until stop.
– Remove the bulb socket -1- in the direction of -arrow A- out of

the reflector -2-.

– Release and disconnect the connector -1- on the Left Front

Turn Signal Bulb - M5- with the bulb socket -2-.

Installing
Install in the reverse order of removal while paying attention to

the following:

Caution

There is a risk of damaging the headlamp.

♦ Do not touch glass cone of bulb with bare fingers. Fingers

will leave traces of grease on the glass which, when the

bulb is switched on, will evaporate and cloud the glass.

♦ Use clean cloth gloves to insert the bulbs.
♦ During installation, ensure proper seating of the housing

cover. Water getting in the headlamp will cause damage.

– Perform a function test.
– Check and correct headlamp adjustment, if necessary. Refer

to ⇒ Maintenance ; Booklet  36.1 ; Procedure Descriptions .

1.6

Headlamp Housing Repair Kit, Installing

The removal and installation is described for the left side. Re‐

moving and installing on the right side is identical.
Headlamp mounting tabs that have broken off can be replaced by

installing the repair set. Completely replacing the headlamp is not

necessary.
There are different repair kits for left and right headlamps. Refer

to Parts Catalog.
Procedure
– Remove the headlamp with the broken tabs. Refer to

⇒ “1.2 Headlamp, Removing and Installing”, page 101

 .

– Remove the rest of the broken tab on the headlamp housing.
– Place the mounting tabs -1- from the repair kit on the headlamp

and secure them with the bolts -2-.

– Install the headlamp and align to the body contour.
– Perform a function test.
– Check and correct headlamp adjustment, if necessary. Refer

to ⇒ Maintenance ; Booklet  36.1 ; Procedure Descriptions .

Tightening Specifications

1.7

Headlamp, Changing from LHD to RHD

⇒ “1.7.1 Headlamp, Changing from LHD to RHD, Halogen Dual

Headlamp”, page 110
⇒ “1.7.2 Headlamp, Changing from LHD to RHD, Except Halogen

Dual Headlamp”, page 111

1.7.1

Headlamp, Changing from LHD to RHD,

Halogen Dual Headlamp

If the vehicle is driven in countries where the traffic drives on the

other side of the road (either right-hand or left-hand traffic) than

where it is normally driven, no actions whatsoever must be per‐

formed.

1.7.2

Headlamp, Changing from LHD to RHD,

Except Halogen Dual Headlamp

If the vehicle is driven in countries where the traffic drives on the

other side of the road (either right-hand or left-hand traffic) than

where it is normally driven, both headlamps must be adjusted. To

prevent the asymmetrical low beam from blinding.
Converting between left and right hand traffic and vice-versa

takes place via the Infotainment system.
The use of travel mode is only permitted, when it is used only short

period of time. For longer use country-specific headlamps must

be installed.
– Push the button 

CAR

 on the Front Information Display Control

Head - J685- .

– Push the functional surface 

Setup

 and 

Lamp

.

– Enter the adaptation in the “Lamp Settings” menu.

1.8

Left/Right Headlamp Beam Adjustment

Motor - V48- / -V49- , Removing and In‐

stalling

⇒ “1.8.1 Left/Right Headlamp Beam Adjustment Motor V48 / V49 ,

Removing and Installing, Halogen Dual Headlamps”, page 111
⇒ “1.8.2 Left/Right Headlamp Beam Adjustment Motor V48 / V49 ,

Removing and Installing, HID Headlamps”, page 112

1.8.1

Left/Right Headlamp Beam Adjustment

Motor - V48- / -V49- , Removing and In‐

stalling, Halogen Dual Headlamps

The removal and installation is described for the left side. Re‐

moving and installing on the right side is identical.
Removing
– Turn off the ignition and all electrical equipment.
– Remove the ignition key, if equipped.
If the Left Headlamp Beam Adjustment Motor - V48- cannot be

removed as described, then the headlamp must be removed. Re‐

fer to 

⇒ “1.2 Headlamp, Removing and Installing”, page 101

 .

– Remove the housing cover -1- from the headlamp in the di‐

rection of -arrow A-.

– Release the Left Headlamp Beam Adjustment Motor - V48-

-1-:

♦ Turn the led headlamp left opposite the direction of the

-arrow A-.

♦ Turn the headlamp right in the direction of the -arrow A-.

– Pull the Left Headlamp Beam Adjustment Motor - V48- -1- in

the direction of the -arrow C-.

– Turn the height adjustment -2- in the direction of the

-arrow B- (lower the reflector). While doing so hold the Left

Headlamp Beam Adjustment Motor - V48- -1- tensioned.

– Remove the Left Headlamp Beam Adjustment Motor - V48-

-1- from the headlamp height adjustment in the direction of the

-arrow C-.

– Disengage the connector and disconnect.
Installing
Install in the reverse order of removal while paying attention to

the following:

Caution

There is a risk of damaging the headlamp.

♦ During installation, ensure proper seating of the housing

cover. Water getting in the headlamp will cause damage.

– Connect the connector when pushing in the Left Headlamp

Beam Adjustment Motor - V48- .

– Pull the reflector rearward and push the Left Headlamp Beam

Adjustment Motor - V48- in the headlamp-height adjustment,

until it engages audibly.

– Secure the Left Headlamp Beam Adjustment Motor - V48-

-1- in the direction of the arrow -A-.

– Turn the height adjustment -2- opposite of the direction of the

arrow -B-. The reflector must be moveable.

– Perform a function test.
– Check and correct headlamp adjustment, if necessary. Refer

to ⇒ Maintenance ; Booklet  36.1 ; Procedure Descriptions .

1.8.2

Left/Right Headlamp Beam Adjustment

Motor - V48- / -V49- , Removing and In‐

stalling, HID Headlamps

The removal and installation is described for the left side. Re‐

moving and installing on the right side is identical.
Removing
– Remove the headlamp. Refer to

⇒ “1.2 Headlamp, Removing and Installing”, page 101

 .


Content   ..  28  29  30  31   ..