Volkswagen Golf / Golf GTI / Golf Variant. Manual - part 19
– Release the connection -1- and remove and remove the Rain/
Light Recognition Sensor - G397- -2-.
Caution
Lay the removed Rain/Light Recognition Sensor - G397- until
it is reinstalled so that the connecting pad is not contaminated
with dust or other deposits.
Installing
Install in the reverse order of removal while paying attention to
the following:
Caution
♦ Always clean the windshield surface inside the Rain/Light
Recognition Sensor - G397- frame before installing. Re‐
move any traces of the connecting pad still remaining on
the windshield.
♦ Surface (connecting pads) of Rain/Light Recognition Sen‐
sor - G397- must not be contaminated or damaged when
installing. Always replace a sensor that has a damaged
connecting pad. Refer to
⇒ “1.10 Rain/Light Recognition Sensor, Servicing”,
.
If the connecting pads surface of the Rain/Light Recognition Sen‐
sor - G397- is soiled, it can be potentially cleaned by “applying”
and then “pulling off” one or more adhesive strips.
– Always clean the windshield inside the retaining plate.
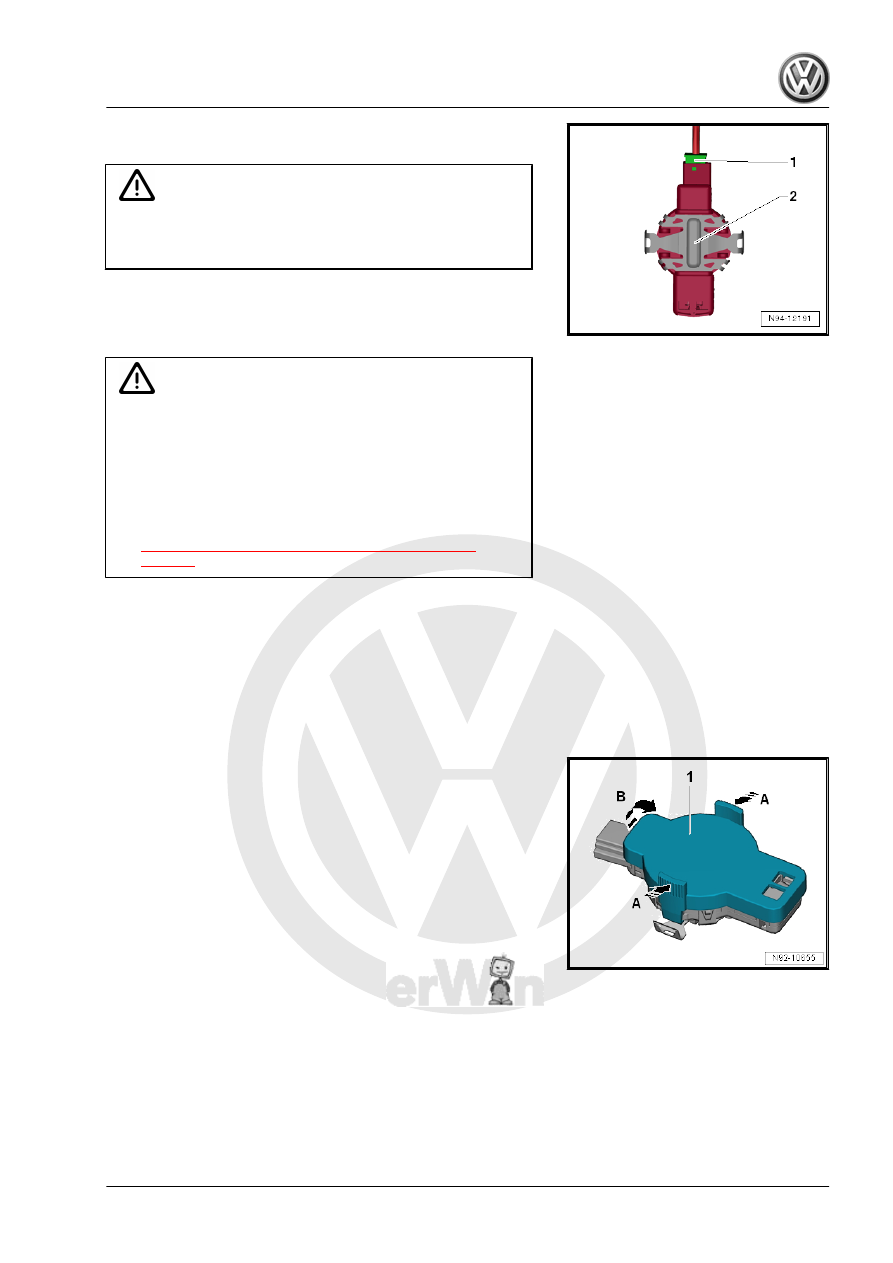
– If necessity remove the protective cap -1- on the new Rain/
Light Recognition Sensor - G397- .
– Push the handle in the direction of -arrow A-.
– Remove the protective cap -1- in the direction of -arrow B-.
– Connect connector.
– Install the Rain/Light Recognition Sensor - G397- -1- in the
frame on the windshield.
– Engage the wire retainer audibly on both sides -arrow-.
Even if the sensor is installed correctly, small air bubbles can form
between the windshield and the connecting pad. The contact sur‐
face must be free-of-bubbles after approximately 10 minutes. If
the contact surface is not free of bubbles after 10 minutes, the
Rain/Light Recognition Sensor - G397- must be removed and in‐
stalled again. Air bubbles between the windshield and the con‐
necting pad cause Rain/Light Recognition Sensor - G397-
malfunctions.