Volkswagen Golf / Golf GTI / Jetta. Manual - part 669


  Index      Volkswagen     Volkswagen Golf / Golf GTI / Jetta - service repair manual 1999-2005 year


Search            copyright infringement  


Content   ..  667  668  669  670   ..


Volkswagen Golf / Golf GTI / Jetta. Manual - part 669


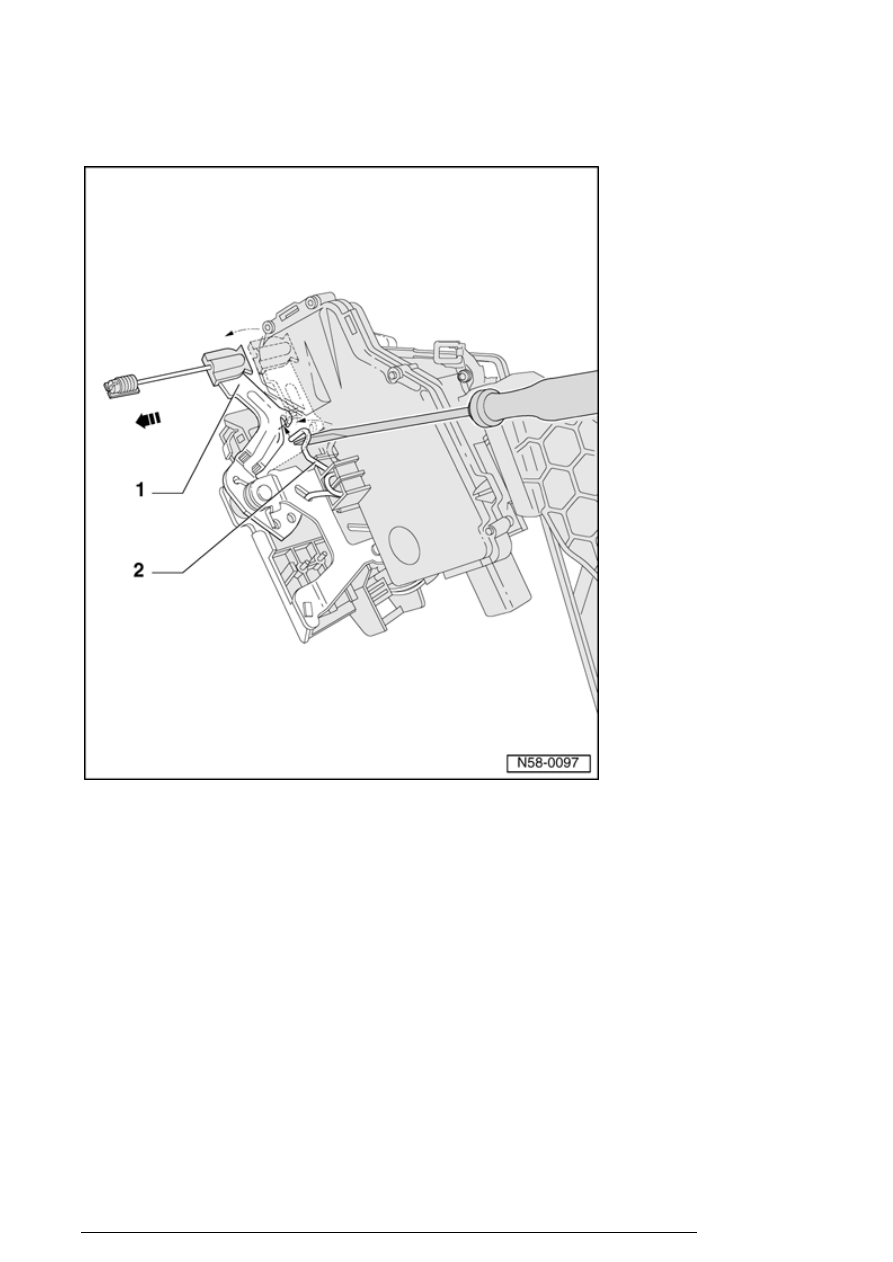
- Pull operating lever - 1 - in direction of 
arrow - 

- Using a screwdriver, tension spring - 2 - 
secured to door lock in direction of 
arrow - 
and engage lock lever into 
spring. 

Note 
Lock is secured by engaging operating 
lever. Thereby later "incorrect" clipping-in 
of Bowden cable is prevented.  
 

- Insert carrier assembly into door. 

Front door

13/2/2005


- Tighten all bolts. Tighten bolts marked - 1 - and - 2 - in 
reverse order of removal. 


Tightening torque: 8 Nm

- Remaining bolts can be tightened in any sequence.  

- Press door window - 3 - into window guide - arrow - and 
tighten clamping brackets with bolts - 4 - 

Tightening torque: Plastic clamping brackets 9 Nm, 
aluminum clamping brackets 11 Nm.  
 

- Then, perform in reverse order of removal.  

Then, perform a function load test.   
 

Locking knob for locking rod, removing and 
installing 


Following descriptions of removing and installing locking 
knob must always be observed.


If disregarded, locking rods may rotate out of front door 
locks and relays may rotate into rear doors/damage 
mounts.

Removing


Right front and left rear door

- Unscrew locking knob 180   to left. 

Front door

13/2/2005


- Remove locking knob upward - arrow - 

Installing


Right front and left rear door

- Attach locking knob onto locking rod with marking -small 
point on top side- toward vehicle interior side. 

- Press locking knob onto locking rod only as far until 
corrugation is at height of door trim.  

- Then screw locking knob 180   to left. 


When locked, locking knob can be approx. 02 mm over 
door trim.

Removing


Left front and right rear door

- Unscrew locking knob 180   to right. 

Front door

13/2/2005


- Remove locking knob upward - arrow - 

Installing


Left front and right rear door

- Attach locking knob onto locking rod with marking -small 
point on top side- toward vehicle interior side.  

- Press locking knob onto locking rod only as far until 
corrugation is at height of door trim.  

- Then screw locking knob 180   to right. 


When locked, locking knob can be approx. 02 mm over 
door trim.

Door seals


Front door

13/2/2005


Content   ..  667  668  669  670   ..