Toyota Corolla (2020 year). Owner's manual - part 19
294
5-3. Connectivity settings
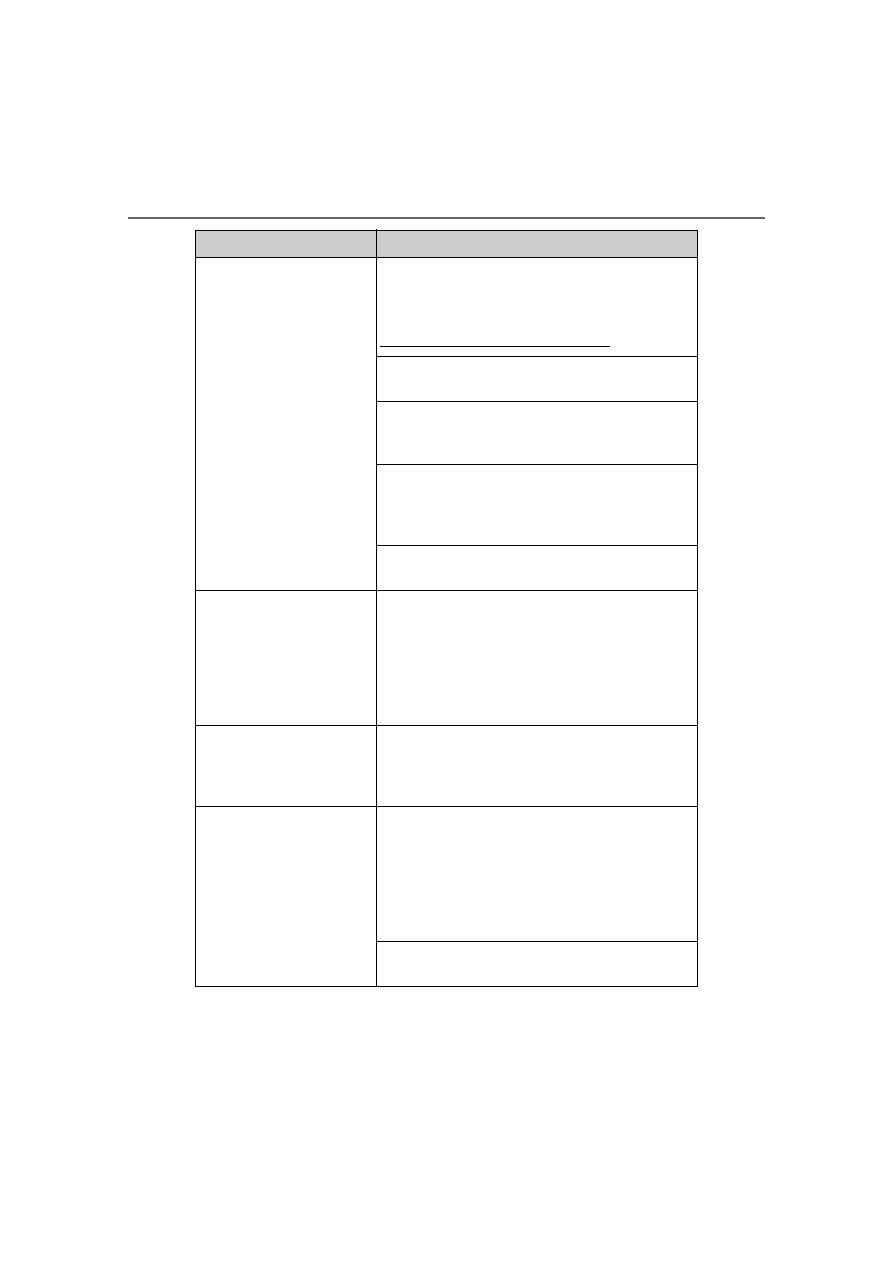
Symptom
Solution
An Apple CarPlay connec-
tion cannot be estab-
lished.
Check if the device supports Apple CarPlay.
Check if Apple CarPlay is enabled on the con-
nected device.
For details, refer to
https://www.apple.com/ios/carplay/.
Check if “Apple CarPlay” on the general set-
tings screen is set to on. (P.296)
Check if the Lightning cable being used is certi-
fied by Apple Inc., and if it is securely con-
nected to the device and USB port.
When the iPhone is connected using a USB
hub, etc., an Apple CarPlay connection may not
be established. Connect the lightning cable to
USB the port directly.
After checking all of the above, try to establish
an Apple CarPlay connection. (P.292)
When an Apple CarPlay
connection is established
and a video is being
played, the video is not
displayed, but audio is
output through the sys-
tem.
As the system is not designed to play video
through Apple CarPlay, this is not a malfunc-
tion.
Although an Apple Car-
Play connection is estab-
lished, audio is not output
through the system.
The system may muted or the volume may be
low. Increase the system volume.
The Apple CarPlay screen
has artifacts and/or audio
from Apple CarPlay has
noise.
Check if the Lightning cable being used to con-
nect the device to the system is damaged.
To check if the Lightning cable is damaged
internally, connect the device to another sys-
tem, such as a PC, and check if the device is
recognized by the connected system. (The
device should begin charging when connected.)
After checking all of the above, try to establish
an Apple CarPlay connection. (P.292)