Index Toyota Toyota Tundra (2015 year) - Service and Repair Manual
Search copyright infringement
Content .. 991 992 993 994 ..
Toyota Tundra (2015 year). Manual - part 993
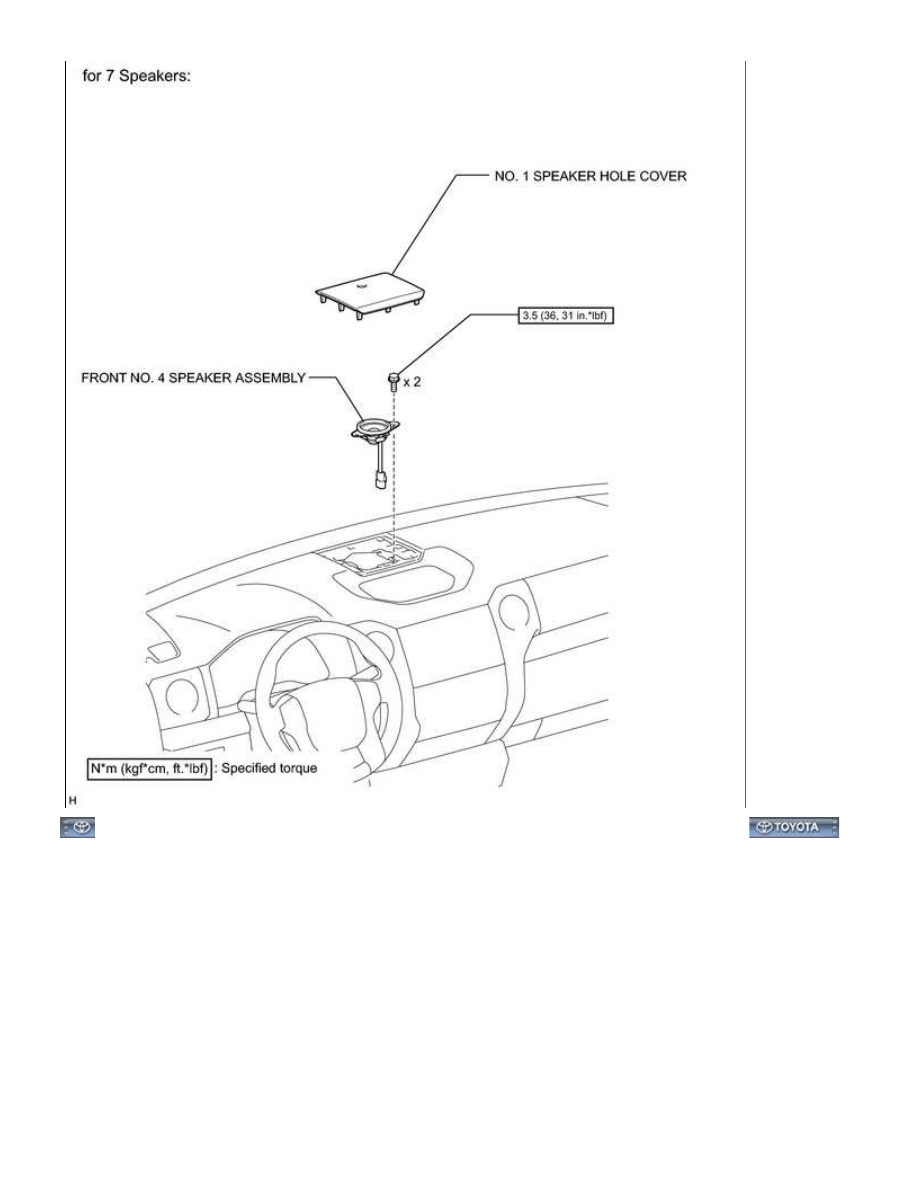
AUDIO / VISUAL: INSTRUMENT PANEL SPEAKER (for Double Cab...