Content .. 2376 2377 2378 2379 ..
Toyota Tundra (2015 year). Manual - part 2378
Disconnect the connector.
30. REMOVE FRONT DOOR OPENING TRIM WEATHERSTRIP LH
(a) for Double Cab:
(b) for CrewMax:
(c) for Regular Cab:
31. REMOVE FRONT PILLAR GARNISH LH
32. REMOVE FRONT DOOR OPENING TRIM WEATHERSTRIP RH
HINT:
Use the same procedure described for the LH side.
33. REMOVE FRONT PILLAR GARNISH RH
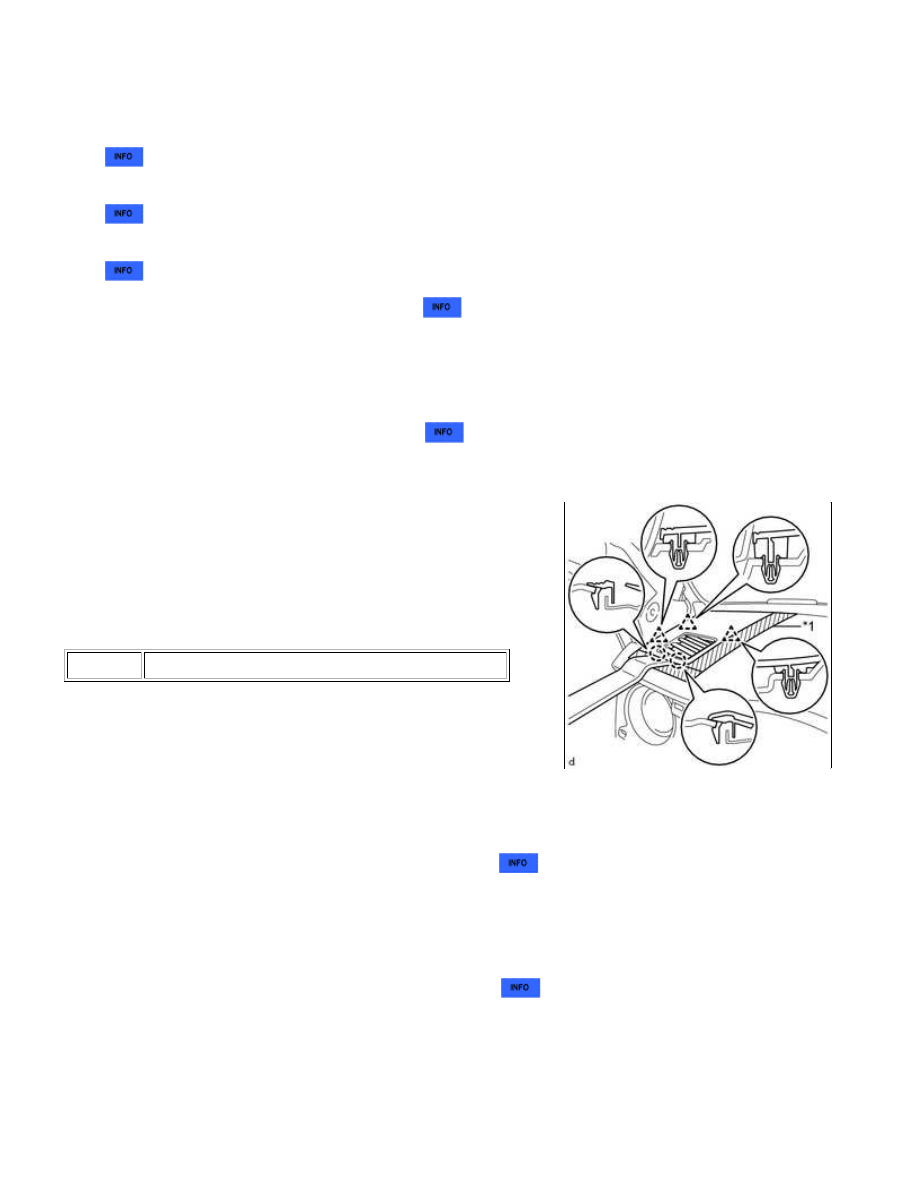
34. REMOVE INSTRUMENT PANEL SPEAKER PANEL SUB-ASSEMBLY
(a) Apply protective tape as shown in the illustration.
Text in Illustration
*1
Protective Tape
(b) Using a moulding remover B, detach the 2 claws, 3 clips and remove the instrument panel speaker panel
sub-assembly.
35. REMOVE FRONT NO. 2 SPEAKER ASSEMBLY LH
36. REMOVE NO. 2 INSTRUMENT PANEL SPEAKER PANEL SUB-ASSEMBLY
HINT:
Use the same procedure described for the instrument panel speaker panel sub-assembly.
37. REMOVE FRONT NO. 2 SPEAKER ASSEMBLY RH
38. REMOVE INSTRUMENT PANEL SUB-ASSEMBLY
(a) Operate the tilt lever to fully extend and lower the steering column.
(b) Disconnect each connector and each wire harness clamp.
INSTRUMENT PANEL: INSTRUMENT PANEL SAFETY PAD (for Col...