Toyota Tundra (2015 year). Manual - part 2160


  Index      Toyota     Toyota Tundra (2015 year) - Service and Repair Manual


Search            copyright infringement  


Content   ..  2158  2159  2160  2161   ..


Toyota Tundra (2015 year). Manual - part 2160


34. CLEAN VEHICLE BODY

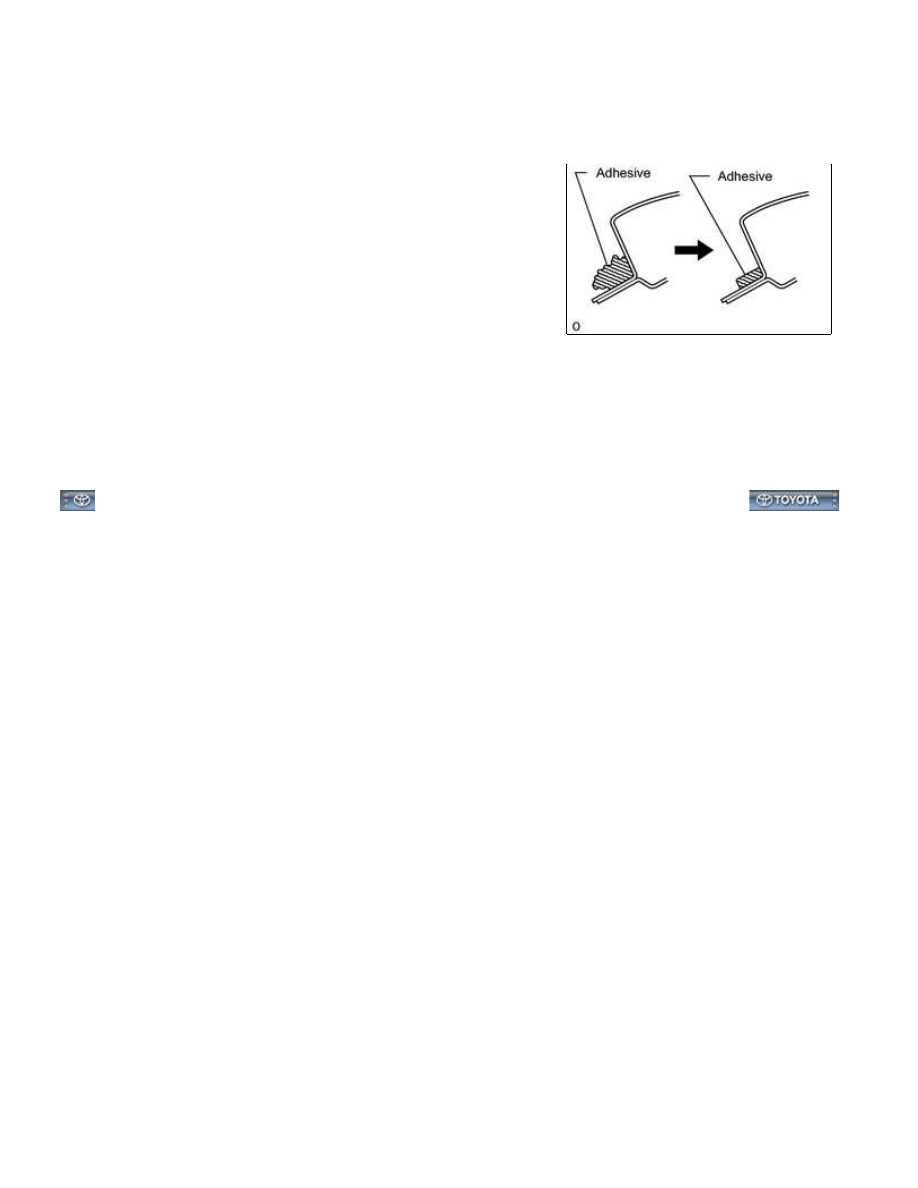
(a) Using a scraper, remove the moulding and adhesive from the

vehicle body.

away excess adhesive as shown in the illustration.

HINT:

Leave as much adhesive on the vehicle body as possible.

NOTICE:

Be careful not to damage the vehicle body.

Even if all the adhesive has been removed, clean the vehicle

body.

35. REMOVE BACK DOOR GLASS CHANNEL

WINDSHIELD / WINDOWGLASS: BACK WINDOW GLASS (for Re...

Last Modified: 9-16-2014

6.6 G

Doc ID: RM0000042WL006X

Model Year: 2015

Model: Tundra

Prod Date Range: [08/2014 -           ]

Title: WINDSHIELD / WINDOWGLASS: BACK WINDOW GLASS (for Regular Cab and Double Cab): INSPECTION;

2015 MY Tundra [08/2014 -        ]

INSPECTION

1. INSPECT POWER WINDOW REGULATOR MOTOR

ASSEMBLY (for Power Slide Type)

(2) Check that the motor gear rotates smoothly as follows.

OK:

MEASUREMENT CONDITION

SPECIFIED CONDITION

Battery positive (+) → 2
Battery negative (-) → 1

Motor gear rotates clockwise

Battery positive (+) → 1
Battery negative (-) → 2

Motor gear rotates counterclockwise

If the result is not as specified, replace the regulator motor.

2. INSPECT NO. 1 BACK POWER WINDOW RELAY (except 3UR-FBE)

(a) Remove the power window relay from the engine room relay block.

(b) Measure the resistance according to the value(s) in the table

below.

Standard resistance:

TESTER

CONNECTION

CONDITION

SPECIFIED

CONDITION

3 - 4

When battery voltage is not

applied between terminals 1 and

2

Below 1 Ω

When battery voltage is applied

between terminals 1 and 2

10 kΩ or higher

3 - 5

When battery voltage is not

applied between terminals 1 and

2

10 kΩ or higher

When battery voltage is applied

between terminals 1 and 2

Below 1 Ω

If the result is not as specified, replace the relay.

WINDSHIELD / WINDOWGLASS: BACK WINDOW GLASS (for Re...

3. INSPECT NO. 2 BACK POWER WINDOW RELAY

(a) Remove the power window relay from the engine room relay block.

(b) Measure the resistance according to the value(s) in the table

below.

Standard resistance:

TESTER

CONNECTION

CONDITION

SPECIFIED

CONDITION

3 - 4

When battery voltage is not

applied between terminals 1 and

2

Below 1 Ω

When battery voltage is applied

between terminals 1 and 2

10 kΩ or higher

3 - 5

When battery voltage is not

applied between terminals 1 and

2

10 kΩ or higher

When battery voltage is applied

between terminals 1 and 2

Below 1 Ω

If the result is not as specified, replace the relay.

4. INSPECT NO. 3 BACK POWER WINDOW RELAY (for 3UR-FBE)

(a) Remove the power window relay from the engine room relay block.

(b) Measure the resistance according to the value(s) in the table

below.

Standard resistance:

TESTER

CONNECTION

CONDITION

SPECIFIED

CONDITION

3 - 4

When battery voltage is not

applied between terminals 1 and

2

Below 1 Ω

When battery voltage is applied

between terminals 1 and 2

10 kΩ or higher

3 - 5

When battery voltage is not

applied between terminals 1 and

2

10 kΩ or higher

When battery voltage is applied

between terminals 1 and 2

Below 1 Ω

If the result is not as specified, replace the relay.

WINDSHIELD / WINDOWGLASS: BACK WINDOW GLASS (for Re...

Last Modified: 9-16-2014

6.6 A

Doc ID: RM00000304G00OX

Model Year: 2015

Model: Tundra

Prod Date Range: [08/2014 -           ]

Title: WINDSHIELD / WINDOWGLASS: BACK WINDOW GLASS (for Regular Cab and Double Cab):

INSTALLATION; 2015 MY Tundra [08/2014 -        ]

INSTALLATION

1. INSTALL NO. 1 BACK WINDOW GLASS SPACER

(a) Install 2 new spacers onto the back window assembly as shown

in the illustration.

2. INSTALL NO. 2 BACK WINDOW GLASS SPACER

(a) Install 2 new spacers onto the back window assembly as shown

in the illustration.

3. INSTALL BACK WINDOW ASSEMBLY

Allow the primer to dry for 3 minutes or more.
Do not apply primer to the adhesive.
Throw away any leftover primer.
Do not apply too much primer.


Content   ..  2158  2159  2160  2161   ..