Toyota Tundra (2015 year). Manual - part 1356


  Index      Toyota     Toyota Tundra (2015 year) - Service and Repair Manual


Search            copyright infringement  


Content   ..  1354  1355  1356  1357   ..


Toyota Tundra (2015 year). Manual - part 1356
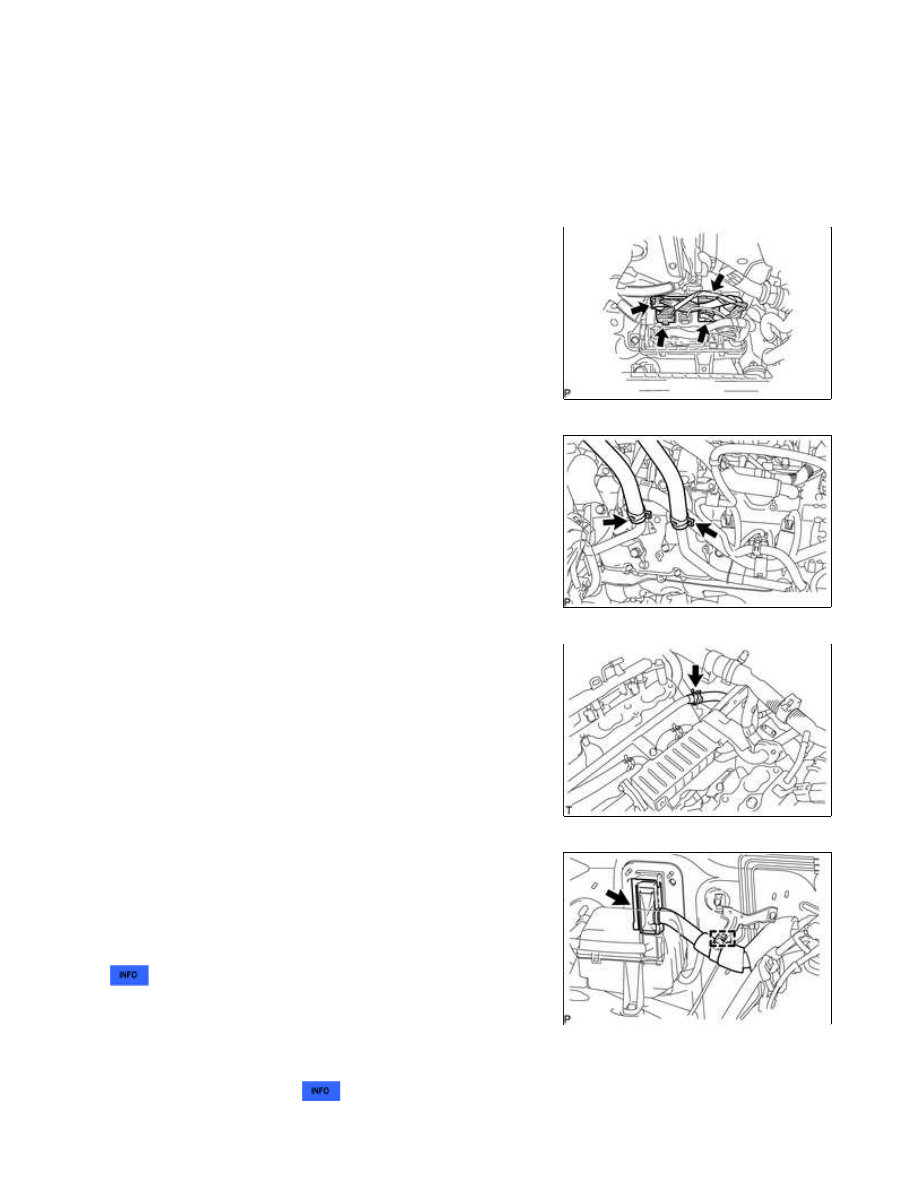


Torque:

6.0 N·m {61 kgf·cm, 53in·lbf}

(i) Connect the 2 clamps and air pump connector.

(j) Connect the clamp and ground wire with the bolt.

Torque:

8.0 N·m {82 kgf·cm, 71in·lbf}

(k) Connect the 4 connectors to the connector holder block.

(l) Connect the 2 heater hoses.

(m) Connect the No. 4 water by-pass hose.

(n) Connect the ECM connector and clamp.

HINT:

Refer to the following procedures to connect the ECM connector


.

23. CONNECT NO. 2 FUEL TUBE SUB-ASSEMBLY

(a) Connect the No. 2 fuel tube 


.

1UR-FE ENGINE MECHANICAL: ENGINE ASSEMBLY: INSTALL...

24. CONNECT NO. 1 FUEL PIPE SUB-ASSEMBLY

(a) Connect the No. 1 fuel pipe 


.

(b) Install the fuel pipe clamp.

25. INSTALL INTAKE MANIFOLD 

26. INSTALL AIR TUBE SUB-ASSEMBLY LH 

27. INSTALL VENTILATION HOSE ASSEMBLY 

28. INSTALL EGR VALVE BRACKET 

29. INSTALL EGR VALVE ASSEMBLY 

30. CONNECT NO. 13 WATER BY-PASS HOSE 

31. CONNECT NO. 12 WATER BY-PASS HOSE 

32. INSTALL RADIATOR ASSEMBLY 

33. INSTALL FAN SHROUD 

34. INSTALL FAN AND GENERATOR V BELT 

35. INSTALL RADIATOR SIDE DEFLECTOR LH 

36. INSTALL RADIATOR SIDE DEFLECTOR RH 

37. INSTALL RADIATOR GRILLE SUB-ASSEMBLY 

38. CONNECT OUTLET RADIATOR HOSE 

39. INSTALL INLET RADIATOR HOSE 

40. INSTALL FRONT FENDER APRON SEAL REAR LH 

41. INSTALL FRONT FENDER APRON SEAL LH 

42. INSTALL FRONT FENDER APRON SEAL REAR RH 

43. INSTALL FRONT FENDER APRON SEAL RH 

44. INSTALL COWL TOP OUTER PANEL SUB-ASSEMBLY 

45. INSTALL AIR CLEANER ASSEMBLY

1UR-FE ENGINE MECHANICAL: ENGINE ASSEMBLY: INSTALL...

(a) Install the air cleaner case with the 2 bolts.

Torque:

5.0 N·m {51 kgf·cm, 44in·lbf}

(b) Install the air cleaner element to the air cleaner case.

(c) Install the air cleaner cap.

(1) for Type A:

Install the air cleaner cap and fasten the 4 hook clamps.

(2) for Type B:

Install the air cleaner cap and fasten the 2 hook clamps.

(3) Connect the MAF meter connector.

(4) Attach the wire harness clamp.

46. INSTALL AIR CLEANER HOSE ASSEMBLY

(a) Install the air cleaner hose with the 2 clamps.

Torque:

4.0 N·m {41 kgf·cm, 35in·lbf}

1UR-FE ENGINE MECHANICAL: ENGINE ASSEMBLY: INSTALL...

(b) Connect the ventilation hose and vacuum sensing hose.

47. ADD ENGINE OIL 

48. ADD ENGINE COOLANT 

49. CONNECT CABLE TO NEGATIVE BATTERY TERMINAL

50. INSPECT FOR OIL LEAK 

51. INSPECT FOR COOLANT LEAK 

52. INSPECT FOR EXHAUST GAS LEAK 

53. INSPECT FOR FUEL LEAK 

54. INSPECT SHIFT LEVER POSITION

(a) for Column Shift:

Refer to the following procedures 


.

(b) for Floor Shift:

Refer to the following procedures 


.

55. INSTALL V-BANK COVER SUB-ASSEMBLY

(a) Attach the 2 V-bank cover hooks to the bracket. Then align the

2 V-bank cover grommets with the 2 pins, and press down on

the V-bank cover to attach the pins.

56. INSTALL HOOD SUB-ASSEMBLY

1UR-FE ENGINE MECHANICAL: ENGINE ASSEMBLY: INSTALL...


Content   ..  1354  1355  1356  1357   ..