SsangYong Korando II (1996-2006 year). Manual - part 442


  Index      SsangYong     SsangYong Korando II - service repair manual 1996-2006 year


Search            


Content   ..  440  441  442  443   ..


SsangYong Korando II (1996-2006 year). Manual - part 442


SSANGYONG  MY2002

9H-8  SEATS

50/50 SPLIT REAR SEAT CUSHION
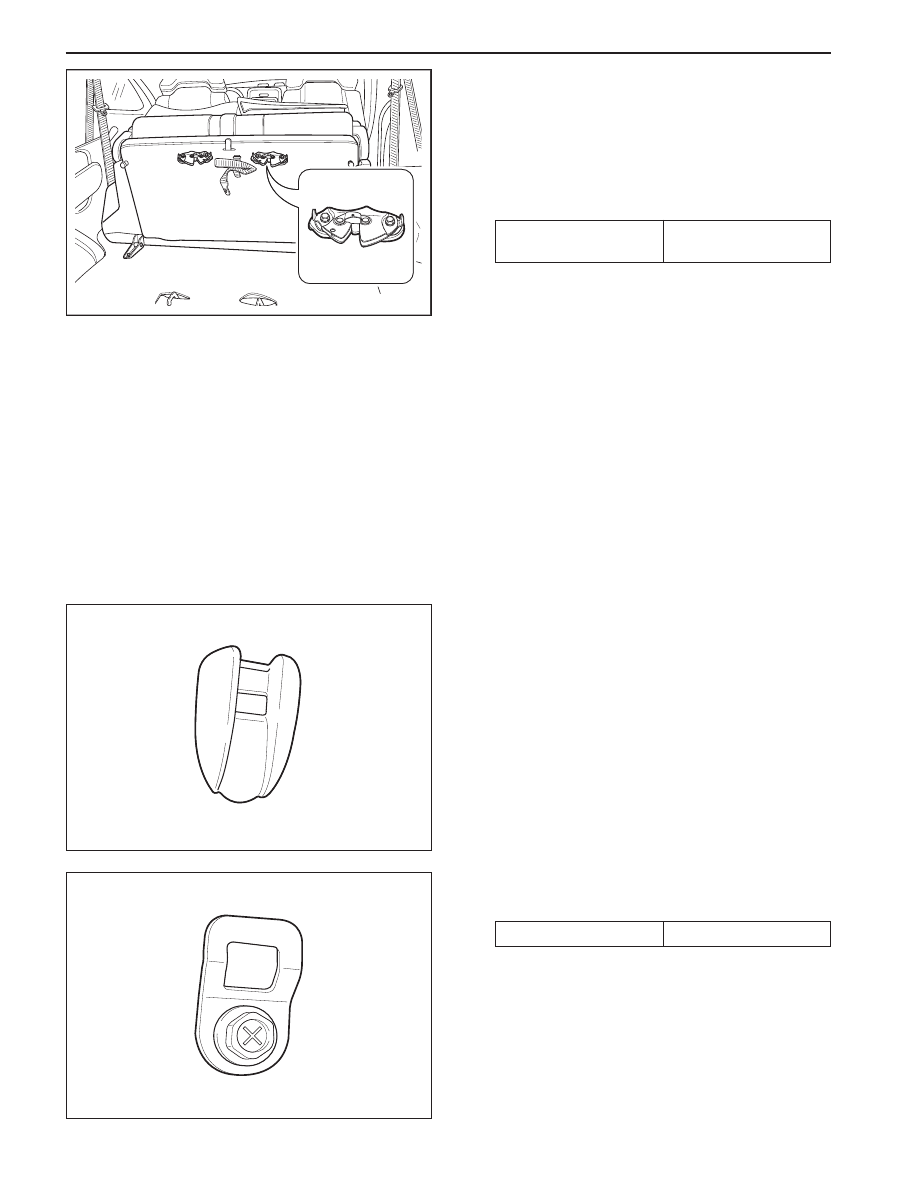
LOCK STRIKER

Removal and Installation Procedure

1. Remove the bolts and rear seat cushion lock

striker.

Installation Notice

Dissimilar metals in direct contact with each
other may corrode rapidly. Make sure to use
the correct fasteners to prevent premature
corrosion.

2. Installation should follow the removal procedure

in the reverse order.

KAA9H200

2. Remove the child seat anchorage bolt.

Installation Notice

Dissimilar metals in direct contact with each
other may corrode rapidly. Make sure to use
the correct fasteners to prevent premature
corrosion.

3. Installation should follow the removal procedure

in the reverse order.

KAA9H190

CHILD SEAT ANCHORAGE

Removal and Installation Procedure

1. Remove the child seat anchorage cover.

Tightening Torque

34.3 - 53.9 N•m

 (25 - 39 lb-ft)

KAA9H170

Tightening Torque

19  N•m (14 lb-ft)

SEATS  9H-9

SSANGYONG  MY2002

-

-

-

-

-

-

-

-

-

-

14

12 - 18

14.5 - 23.2

13 - 18

14.5 - 23.2

14.5 - 23.2

25 - 39

25 - 39

25 - 41

12 - 18

Lb-In

Lb-Ft

SPECIFICATIONS

FASTENER TIGHTENING SPECIFICATIONS

Child Seat Anchorage Bolt

Front Armrest Mounting Bolt

Front Seat Bolts

Guide Rail Bolts

Rear Seat Bolts (Lift Up)

Rear Seat Bolts (Front)

Rear Seat Cushion Hinge Bolts

Rear Seat Cushion Lock Striker Bolts

Seat Back Bolts

Seat Cushion Bolts

Application

N•m

19

16.7 - 25.5

19.6 - 31.4

17.6 - 25.5

19.6 - 31.4

19.6 - 31.4

34.3 - 53.9

34.3 - 53.9

34.3 - 55.9

16.7 - 25.5

SSANGYONG  MY2002

9H-10  SEATS

SCHEMATIC AND ROUTING DIAGRAM

SEAT HEATER

KAA9H210

SECTION 9I

WATERLEAKS

CAUTION: Disconnect the negative battery cable before removing or installing any electrical unit or when a
tool or equipment could easily come in contact with exposed electrical terminals. Disconnecting this cable
will help prevent personal injury and damage to the vehicle. The ignition must also be in LOCK unless
otherwise noted.

TABLE OF CONTENTS

Specifications ........................................................ 9I-2

Recommended Materials for Waterleak Repairs .... 9I-2

Watertest Stand Specifications ............................. 9I-2

Diagnosis ............................................................... 9I-3

Waterleak Diagnosis ............................................. 9I-3

Maintenance and Repair ...................................... 9I-6

On-Vehicle Service .................................................. 9I-6

Waterleak Repair .................................................. 9I-6


Content   ..  440  441  442  443   ..