Content .. 2873 2874 2875 2876 ..
Opel Frontera UBS. Manual - part 2875
8F–94
BODY STRUCTURE
Windshield
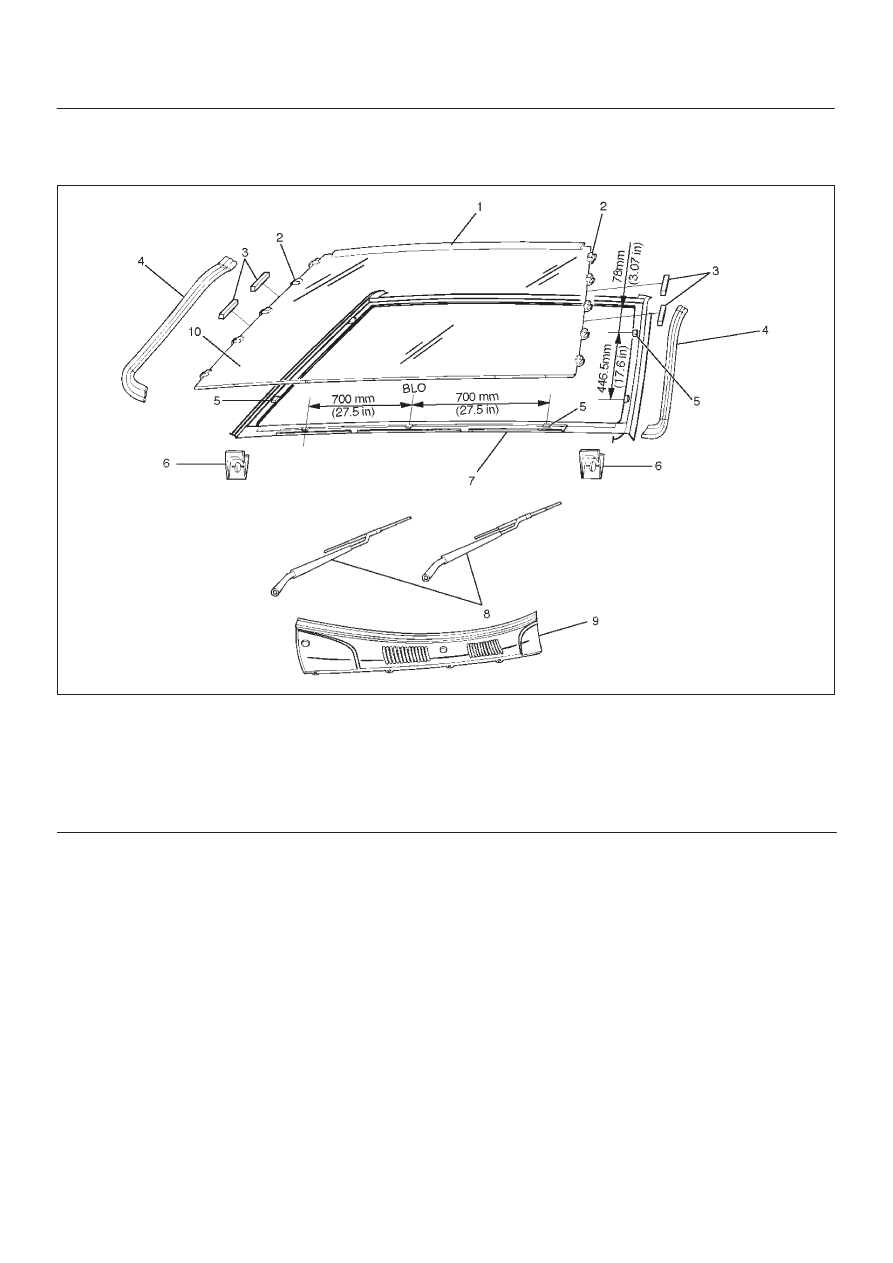
Parts Location
607RW006
Legend
(1) Windshield Upper Moulding
(2) Moulding Clip
(3) Windshield Side Seal
(4) Windshield Side Moulding
(5) Spacer
(6) Windshield Support
(7) Cowl Upper Rail Flange
(8) Windshield Wiper
(9) Front Cowl Cover
(10) Windshield
Removal
1. Disconnect the battery ground cable.
2. Remove windshield wiper.
D
Refer to Windshield Wiper Arm/Blade in
Wiper/Washer System section.
3. Remove front cowl cover.
D
Refer to Cowl Cover in this section.
4. Remove windshield side moulding.
D
Pull the moulding out from the windshield side
moulding clip.
5. Remove windshield support.
6. Remove windshield side seal.
7. Remove windshield (2).
D
Use a knife or pick to make a hole in part of the
adhesive caulking material.