Opel Frontera UE. Manual - part 568


  Index      Opel     Opel Frontera UE - service repair manual 1999-2001 year


Search            


Content   ..  566  567  568  569   ..


Opel Frontera UE. Manual - part 568


8J–8

EXTERIOR/INTERIOR TRIM

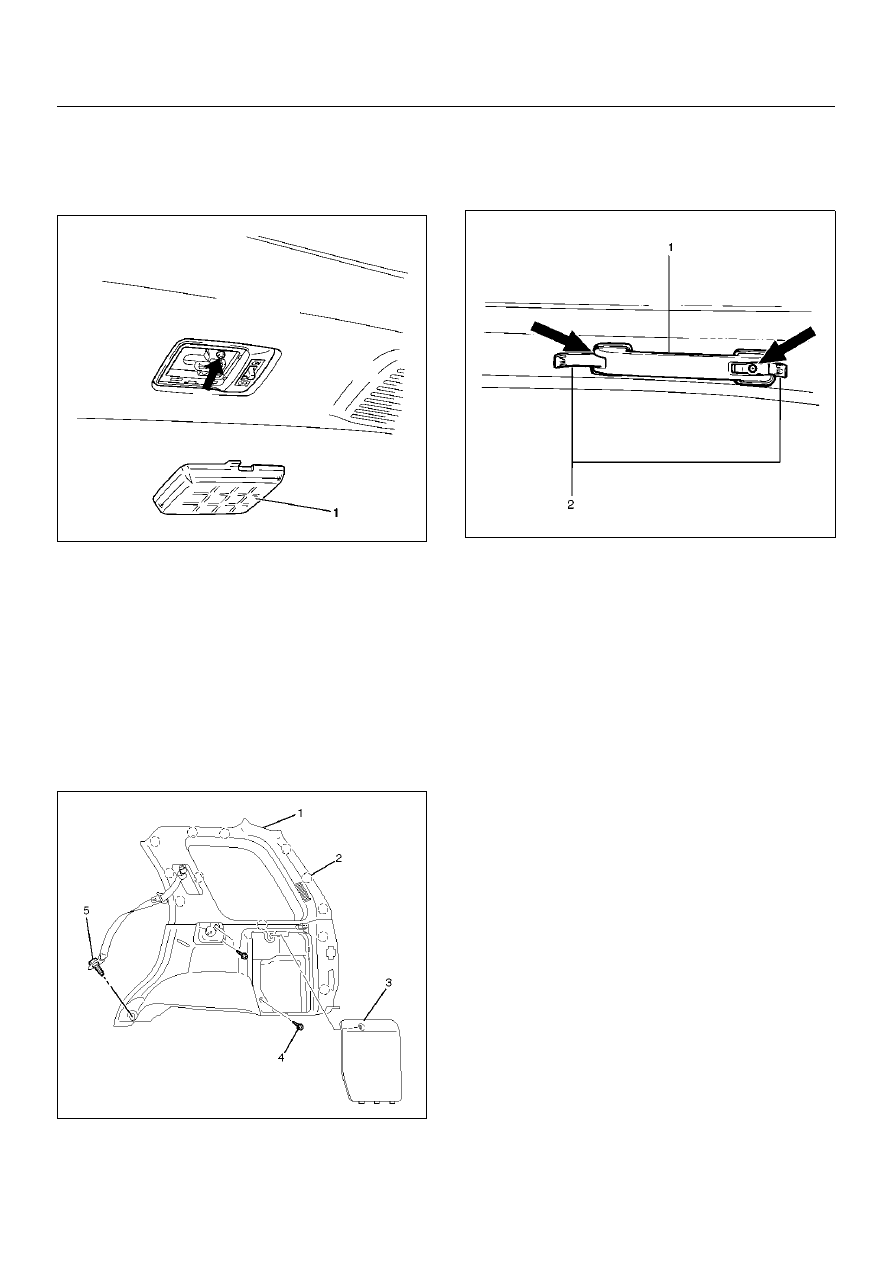
10. Remove the luggage room light.

• Remove the luggage room light lens (1) and the 

fixing screw.

• Disconnect the luggage room light connector.

825RW100

11. Remove the  rear roof trim cover.

• Pry the trim cover clips free from the body panel.

12. Remove the  lower anchor bolt cover and the lower 

anchor bolt (5) from the rear seat belt.

13. Remove the quarter trim cover (1).

• Remove the tool box lid (3) and three fixing 

screws (4).
Pry the quarter trim cover retainers (2) free from 
the body panel.

• Disconnect the accessory socket connector (LH 

side).

643RW001

14. Remove the front pillar assist grip (1) (Front & Rear).

• Open the both sides of the assist grip cover (2) 

and remove the fixing screws and the front pillar 
assist grip.

743RW003

Installation

To install, follow the removal steps in the reverse order, 
noting the following point:

1. Tighten the seat belt anchor bolt to the specified 

torque.

Torque: 39N·m (4.0kg·m/29lbft)

EXTERIOR/INTERIOR TRIM

8J–9

Interior Trim Panels (SWB)

Interior Trim Panels and Associated Parts

643RW010

Legend

EndOFCallout

Removal

1. Disconnect the battery ground cable.

2. Remove the resin top assembly.

• Refer to Resin Top Assembly in Sunroof/

Convertible Top section.

3. Remove the rear seat assembly.

• Refer to Rear Seat Assembly in Seats section.

4. Remove the weather strip.

5. Remove the luggage sid trim cover.

• Refer to Seat Belt Cross Bar Assembly in 

Sunroof/Convertible Top section.

6. Remove the sill plate.

7. Remove the dash side trim cover.

(1) Assist Grip (Front & Rear)
(2) Quarter Upper Trim Cover
(3) Weather Strip
(4) Rear Roof Trim Cover
(5) Rear End Floor Trim Cover

(6) Luggage Side Trim Cover
(7) Quarter Lower Trim Cover
(8) Sill Plate
(9) Door Seal Finisher

(10) Front Pillar Trim Cover

8J–10

EXTERIOR/INTERIOR TRIM

8. Remove the rear speaker assembly.

• Disengage the front portion of the speaker grille 

(1) and pull it forward and off.

• Remove the three fixing screws securing the 

speaker (2) in place and disconnect the 
connector (3).

890RW048-1

9. Remove the front and rear seat belt lower anchor 

bolts.

10. Remove the quarter lower trim cover.

• Disengage the clips from the body panel by 

twisting them free.

11. Remove the assist grips (1) (Front & Rear).

• Open the both sides of the assist grip cover (2) 

and remove the fixing screws.

743RW003

12. Remove the door seal finisher.

13. Remove the dome light.

• Remove the dome light lens (2) and the fixing 

screws.

• Disconnect the dome light connector.

805RX001

14. Remove the rear roof bracket.

15. Remove the rear roof trim cover.

16. Remove the quarter upper trim cover.

17. Remove the front pillar trim cover.

Installation

To install, follow the removal steps in the reverse order, 
noting the following point.

1. Tighten the front and rear seat belt anchor bolts to 

the specified torque.

Torque: 39N·m (4.0kg·m/29lbft)

EXTERIOR/INTERIOR TRIM

8J–11

Headlining (LWB)

Parts Location

666RX003

Legend

EndOFCallout

Removal

1. Disconnect the battery ground cable.

2. Remove the interior trim panels.

• Refer to Interior Trim Panels (LWB) in this section.

3. Remove the dome light.

• Remove the dome light lens and the fixing 

screws.

• Disconnect the dome light connectors.

(1) Interior Trim Panels
(2) Clip
(3) Headlining (Without Sunroof)
(4) Assist Grip
(5) Dome Light

(6) Headlinng (With Sun Roof)
(7) Sunroof Finisher (With Sunroof)
(8) Sunroof Switch (With Sunroof)
(9) Sunvisors

(10) Sunvisor Holder


Content   ..  566  567  568  569   ..