Opel Frontera UE. Manual - part 559
8H–8
SECURITY AND LOCKS
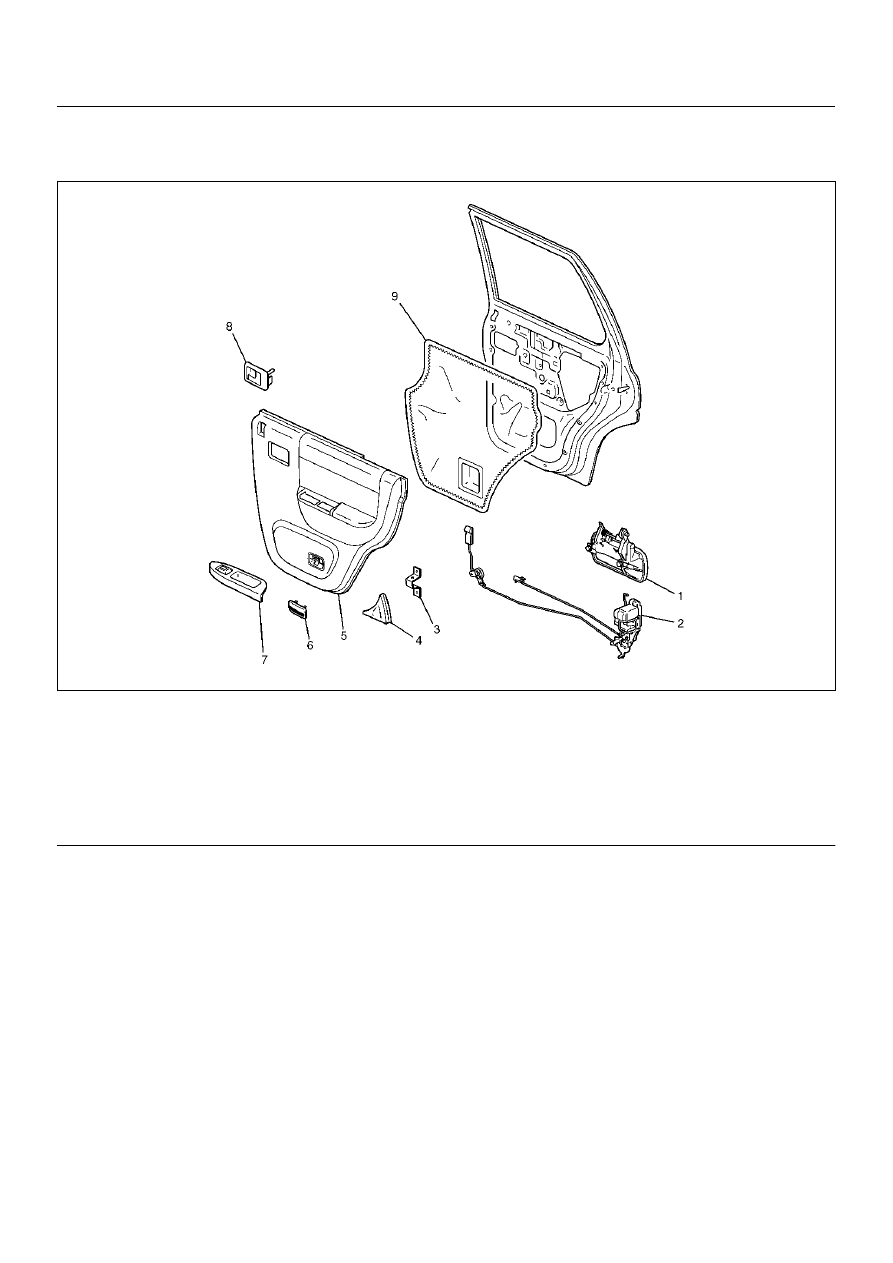
Rear Outside Handle
Rear Outside Handle and Associated Parts
655RW012
Legend
EndOFCallout
Removal
1. Disconnect the battery ground cable.
2. Remove the door trim panel.
• Refer to Rear Door Lock Assembly in this section.
3. Remove the waterproof sheet.
• Taking notice of the door harness, peel the
waterproof sheet off the door panel carefully.
4. Disconnect the locking link and remove fixing bolts
to remove the outside handle.
Installation
To install, follow the removal steps in the reverse order,
noting the following point:
1. Check that the outside handle operates smoothly.
2. Tighten the outside handle fixing bolts to the
specified torque.
Torque 9 N·m (0.9kg·m/78lbin)
(1) Outside Handle
(2) Door Lock Assembly
(3) Bracket
(4) Rear Corner Garnish
(5) Door Trim Panel
(6) Courtesy Light Lens
(7) Power Window Switch
(8) Inside Handle
(9) Waterproof Sheet