Nissan Frontier D40. Manual - part 828


  Index      Nissan     Nissan Frontier D40 (2010 year) - Service and Repair Manual


Search            


Content   ..  826  827  828  829   ..


Nissan Frontier D40. Manual - part 828


ENGINE OIL

LU-23

< ON-VEHICLE MAINTENANCE >

[VQ40DE]

C

D

E

F

G

H

I

J

K

L

M

A

LU

N

P

O

CAUTION:

The refill capacity depends on the oil temperature and drain time. Use the “Refill oil capacity” val-
ues as a reference and check the oil level using the dipstick when filling the engine with oil.

6.

Warm up the engine and check the area around the drain plug and oil filter for any oil leaks.

7.

Stop the engine and wait for more than 10 minutes.

8.

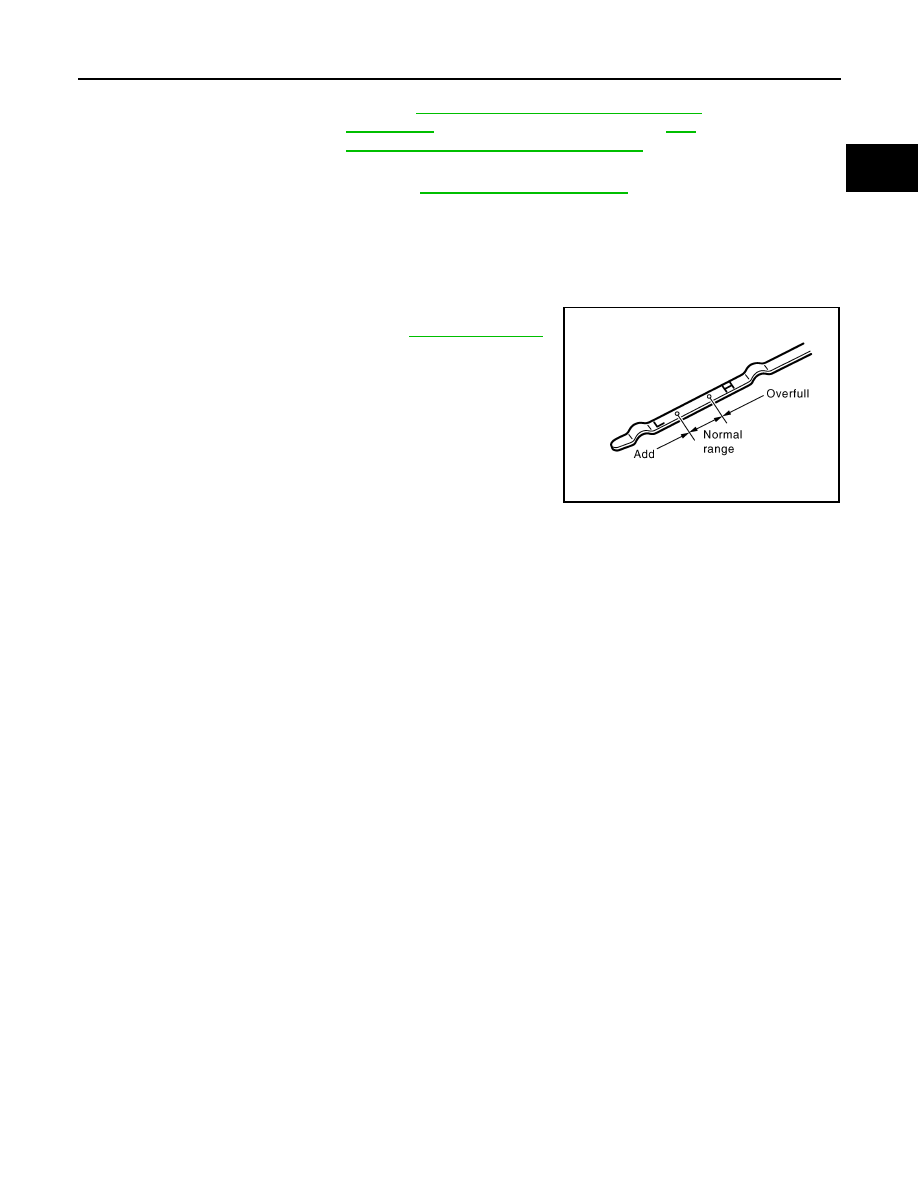
Check the oil level using the dipstick as shown. Add oil as nec-
essary and install the oil filler cap. Refer to 

LU-21, "Inspection"

.

CAUTION:

Do not overfill the engine with oil.

Oil grade and viscosity

: Refer to 

MA-16, "For North America: Fluids and 

Lubricants"

 (United States and Canada) or 

MA-

18, "For Mexico: Fluids and Lubricants"

 (Mexi-

co).

Oil capacity

: Refer to 

LU-30, "Standard and Limit"

.

PBIC2823E

LU-24

< ON-VEHICLE MAINTENANCE >

[VQ40DE]

OIL FILTER

OIL FILTER

Removal and Installation

INFOID:0000000005272531

REMOVAL

1.

Remove the engine front under cover. Refer to 

EXT-13, "Removal and Installation"

.

2.

Drain engine oil. Refer to 

LU-22, "Changing Engine Oil"

.

3.

Remove the oil filter using Tool as shown.

WARNING:

Be careful not to burn yourself, as the engine and engine oil
may be hot.

CAUTION:

• Oil filter is equipped with a pressure relief valve. 
• Use Genuine NISSAN Oil Filter or equivalent.
• When removing, prepare a shop cloth to absorb any

engine oil leaks or spills.

• Do not allow engine oil to adhere to drive belts.
• Completely wipe off any engine oil that adheres to the engine and the vehicle.

INSTALLATION

1.

Remove foreign materials adhering to the oil filter seal mating surface.

2.

Apply clean engine oil to the oil filter seal circumference of the
new oil filter as shown.

3.

Screw on the oil filter manually until it touches the installation
surface, then tighten it by 2/3 turn as shown. Or tighten to speci-
fication.

4.

Refill engine with new engine oil. Refer to 

LU-22, "Changing Engine Oil"

.

5.

Inspect the engine for oil leaks. Refer to 

LU-21, "Inspection"

.

6.

Install the engine front under cover. Refer to 

EXT-13, "Removal and Installation"

.

INSPECTION AFTER INSTALLATION

1.

Check the engine oil level. Refer to 

LU-21, "Inspection"

.

2.

Start the engine and check for engine oil leaks.

3.

Stop the engine and wait for 10 minutes.

4.

Check the engine oil level and add engine oil as required.

Tool number

: KV10115801 (J-38956)

LBIA0425E

SMA010

Oil filter

: 17.7 N·m (1.8 kg-m, 13 ft-lb)

SMA702C

OIL COOLER

LU-25

< ON-VEHICLE REPAIR >

[VQ40DE]

C

D

E

F

G

H

I

J

K

L

M

A

LU

N

P

O

ON-VEHICLE REPAIR

OIL COOLER

Exploded View

INFOID:0000000005272532

Removal and Installation

INFOID:0000000005272533

WARNING:

Be careful not to burn yourself, as the engine oil and engine coolant may be hot.

CAUTION:

• Do not spill engine coolant on the drive belt.
• Do not spill engine oil on rubber parts such as drive belts and engine mounting insulator.

REMOVAL

NOTE:
When removing oil cooler only, step 1 is unnecessary.
1.

Drain engine coolant from radiator and cylinder block. Refer to 

CO-39, "Changing Engine Coolant"

 and

EM-215, "Disassembly and Assembly"

.

NOTE:
Perform this step only when removing water pipes and hoses.

2.

Remove engine front under cover. Refer to 

EXT-13, "Removal and Installation"

.

3.

Disconnect water hoses from oil cooler, pinching hoses near oil cooler to prevent engine coolant from
spilling.

WBIA0572E

1.

Water connector

2.

Water hose

3.

Water pipe

4.

Oil pan (upper) front side

5.

O-ring

6.

Relief valve

7.

Oil cooler

8.

Oil filter

9.

Connector bolt

LU-26

< ON-VEHICLE REPAIR >

[VQ40DE]

OIL COOLER

CAUTION:

Perform this step when engine is cold.

4.

Remove oil filter. Refer to 

LU-24, "Removal and Installation"

.

5.

Remove connector bolt, and remove oil cooler.

INSPECTION AFTER REMOVAL

Oil Cooler

Check oil cooler for cracks. Check oil cooler for clogging by blowing compressed air through engine coolant
inlet. If necessary, replace oil cooler assembly.

Relief Valve

Check relief valve for movement, cracks and breaks by pushing the ball. If replacement is necessary, remove
relief valve by prying it out using a suitable tool. Install a new relief valve in place by tapping it in.

INSTALLATION

Installation is in the reverse order of removal, paying attention to the following.
• Confirm that no foreign objects are adhering to the sealing sur-

faces of the oil cooler and oil pan (upper).

• Tighten connector bolt after aligning cutout on oil cooler with pro-

trusion on oil pan (upper) side.

INSPECTION AFTER INSTALLATION

1.

Check engine oil and engine coolant levels and add engine oil and engine coolant. Refer to  

LU-21,

"Inspection"

 and 

CO-38, "System Inspection"

.

2.

Start the engine, and check for leaks of engine oil or engine coolant.

3.

Stop engine and wait for 10 minutes.

4.

Check the engine oil level and the engine coolant level again. Refer to 

LU-21, "Inspection"

 and 

CO-38,

"System Inspection"

.

PBIC2825E


Content   ..  826  827  828  829   ..