Nissan Frontier D40. Manual - part 714
GW-24
< ON-VEHICLE REPAIR >
SIDE WINDOW GLASS
SIDE WINDOW GLASS
Removal and Installation
INFOID:0000000005274597
REMOVAL
1.
Remove the rear door finisher. Refer to
INT-14, "Removal and Installation"
.
• Remove glass using piano wire or power cutting tool and an
inflatable pump bag.
• If the window glass is to be reused, mark the body and the
glass with mating marks.
WARNING:
When cutting the glass from the vehicle, always wear safety
glasses and heavy gloves to help prevent glass splinters from
entering your eyes or cutting your hands.
CAUTION:
• When the side window glass is to be reused, do not use a cut-
ting knife or power cutting tool.
• Be careful not to scratch the glass when removing.
• Do not set or stand the glass on its edge. Small chips may develop into cracks.
INSTALLATION
Installation is in the reverse order of removal.
• Use a genuine NISSAN Urethane Adhesive Kit (if available) or equivalent and follow the instructions fur-
nished with it.
• While the urethane adhesive is curing, open a door window. This will prevent the glass from being forced out
by passenger compartment air pressure when a door is closed.
• Check gap along bottom to confirm that glass does not contact sheet metal.
• Inform the customer that the vehicle should remain stationary until the urethane adhesive has completely
cured (preferably 24 hours). Curing time varies with temperature and humidity.
WARNING:
• Keep heat and open flames away as primers and adhesive are flammable.
• The materials contained in the kit are harmful if swallowed, and may irritate skin and eyes. Avoid
contact with the skin and eyes.
• Use in an open, well ventilated location. Avoid breathing the vapors. They can be harmful if inhaled.
If affected by vapor inhalation, immediately move to an area with fresh air.
• Driving the vehicle before the urethane adhesive has completely cured may affect the performance
of the glass in case of an accident.
CAUTION:
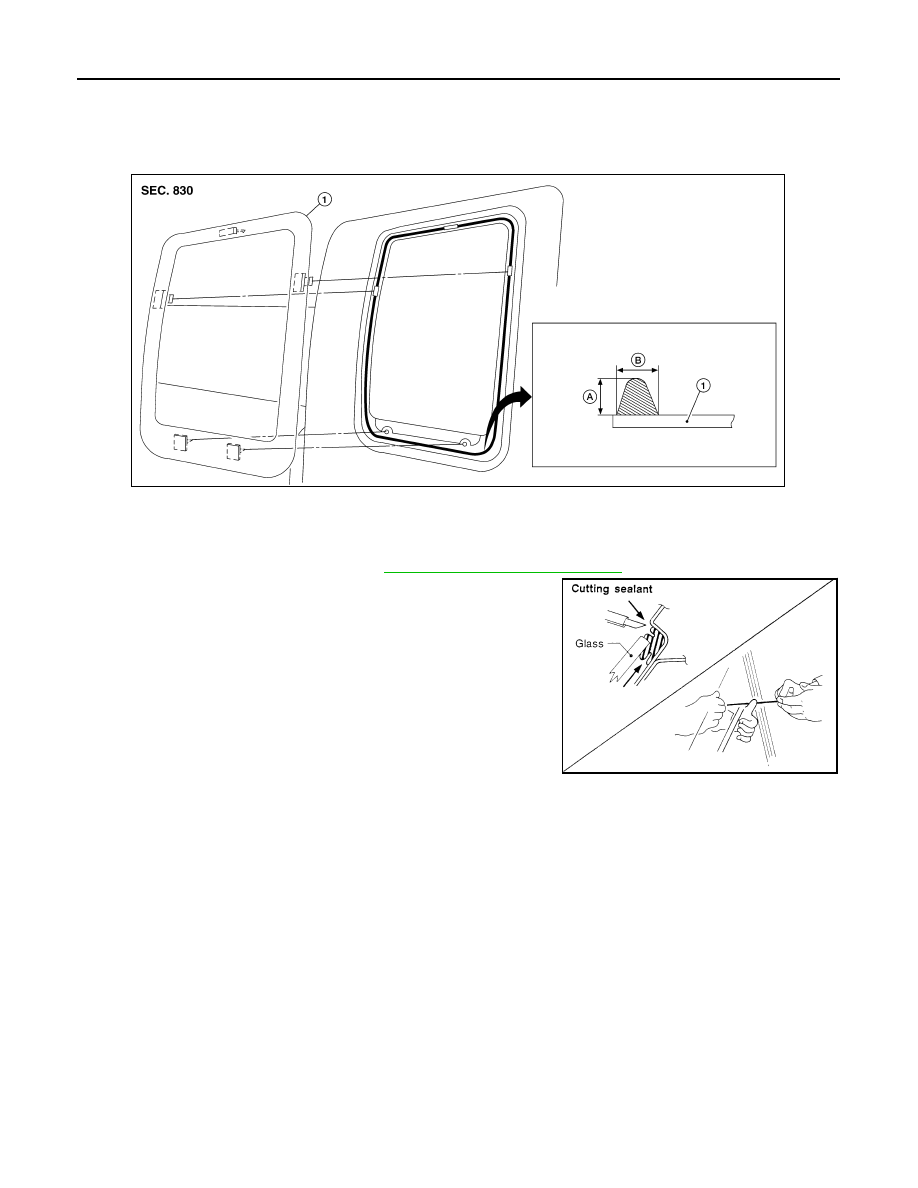
1.
Side window glass
A.
12.0 mm (0.47 in)
B.
7.0 mm (0.28 in)
WIIA0943E
SBF034B