Nissan Frontier D40. Manual - part 242
DOOR
DLK-131
< ON-VEHICLE REPAIR >
C
D
E
F
G
H
I
J
L
M
A
B
DLK
N
O
P
CREW CAB
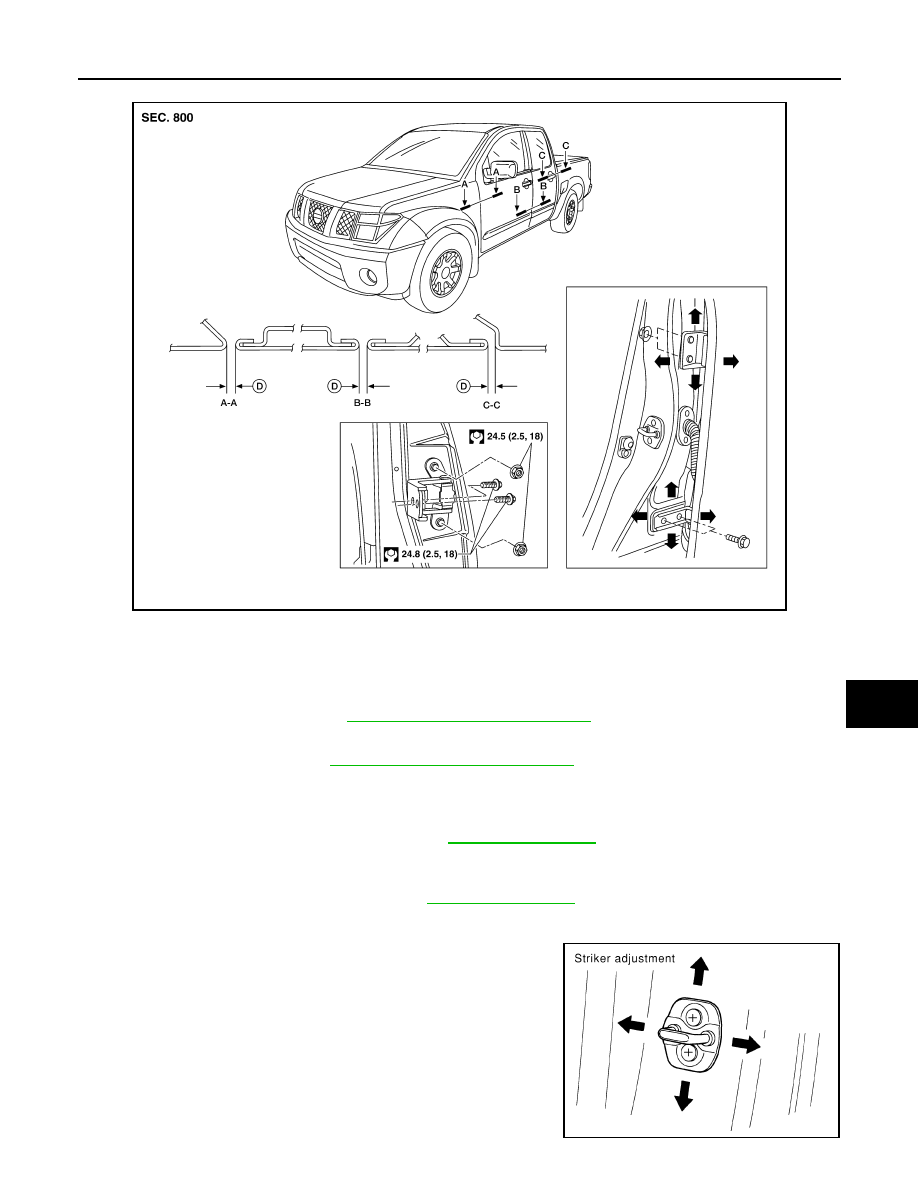
FRONT DOOR
Longitudinal clearance and surface height adjustment at front end
1.
Remove the front fender. Refer to
EXT-20, "Removal and Installation"
.
2.
Loosen the hinge bolts. Raise the front door at rear end to adjust.
3.
Install the front fender. Refer to
EXT-20, "Removal and Installation"
REAR DOOR
Longitudinal clearance and surface height adjustment at front end
1.
Remove the center pillar upper finisher. Refer to
2.
Accessing from inside the vehicle, loosen the nuts. Open the rear door, and raise the rear door at rear end
to adjust.
3.
Install the center pillar lower finisher. Refer to
.
STRIKER ADJUSTMENT
1.
Adjust the striker so that it becomes parallel with the lock inser-
tion direction.
AWKIA0545ZZ
D.
4.5 mm
±
1.0 mm (0.177 in
±
0.039 in)
Striker bolts
: 16.6 N·m (1.7 kg–m, 12 ft–lb)
LIIA1621E