Nissan Titan. Manual - part 451
LU-6
< SYSTEM DESCRIPTION >
LUBRICATION SYSTEM
SYSTEM DESCRIPTION
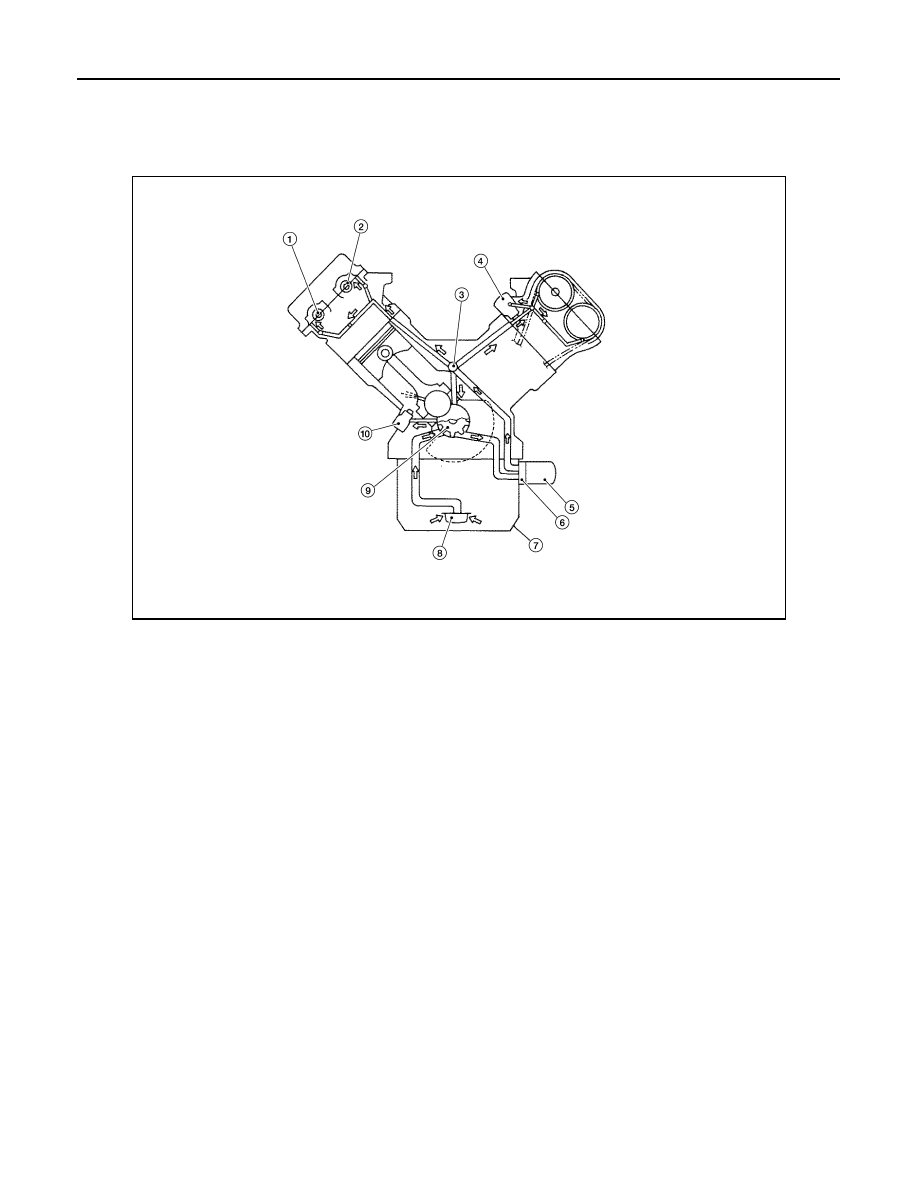
LUBRICATION SYSTEM
Lubrication Circuit
INFOID:0000000009886454
WBIA0399E
1.
Exhaust camshaft
2.
Intake camshaft
3.
Main oil galley
4.
Chain tensioner (Left bank)
5.
Oil filter
6.
Oil cooler
7.
Oil pan
8.
Oil strainer
9.
Oil pump
10. Chain tensioner (Right bank)