Nissan Titan. Manual - part 337
EXT-18
< REMOVAL AND INSTALLATION >
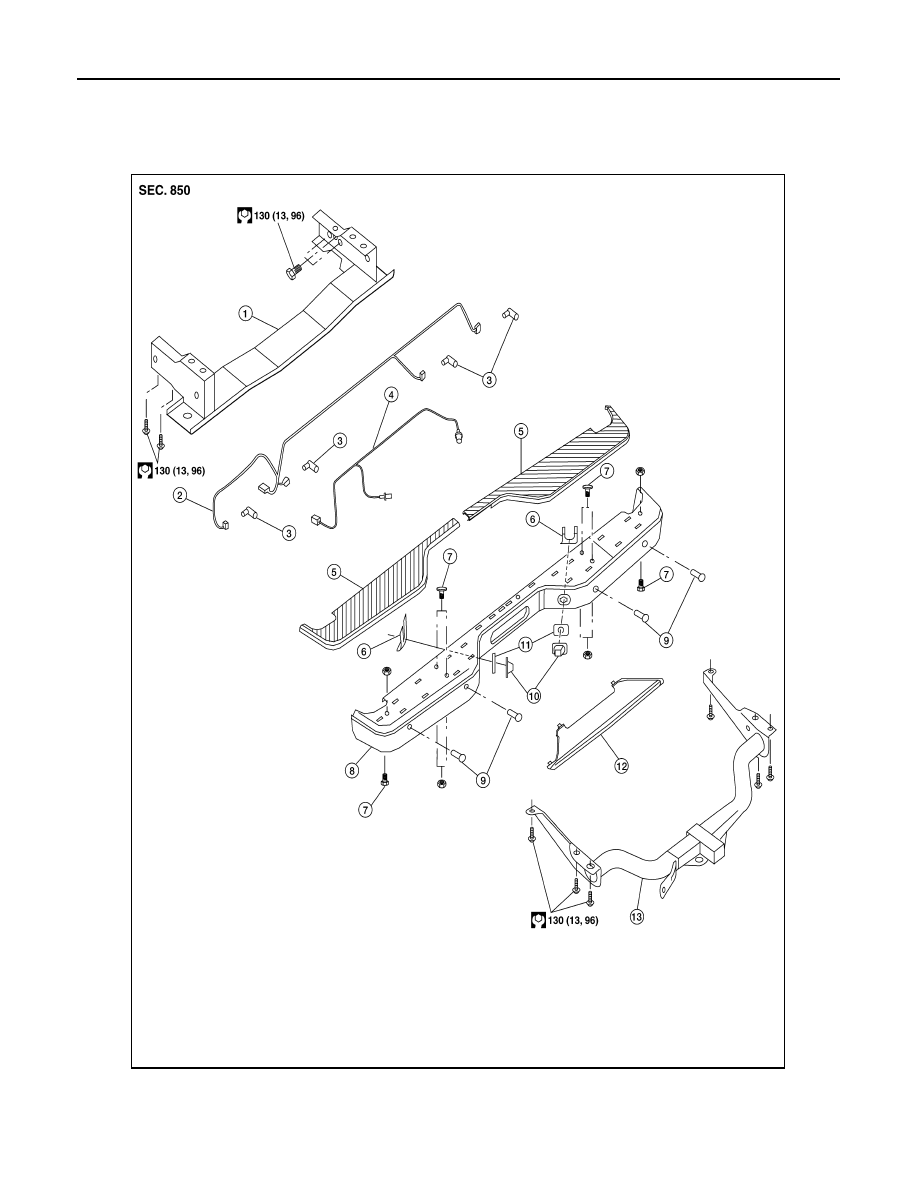
REAR BUMPER
REAR BUMPER
Removal and Installation
INFOID:0000000009879095
1.
Rear bumper reinforcement
2.
Sonar sensor harness (if equipped)
3.
Sonar sensor (if equipped)
4.
License lamp harness
5.
Upper step pad
6.
License lamp clip
7.
Carriage bolt
8.
Rear bumper
9.
Sonar sensor retainer (if equipped)
AWKIA1535GB