Nissan Titan. Manual - part 147


  Index      Nissan     Nissan Titan (2014 year) - Service and Repair Manual


Search            


Content   ..  145  146  147  148   ..


Nissan Titan. Manual - part 147


DLN-160

< PREPARATION >

[FRONT FINAL DRIVE: M205]

PREPARATION

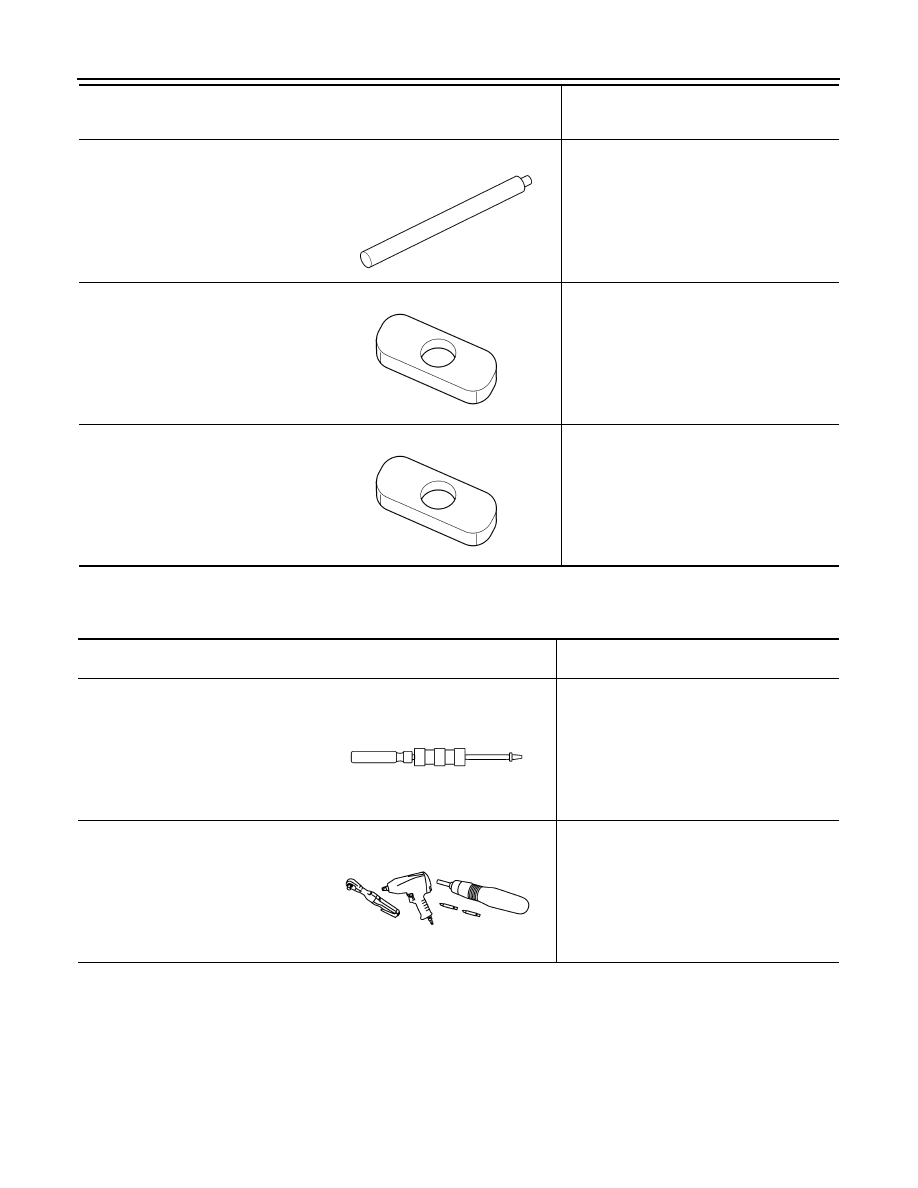
Commercial Service Tool

INFOID:0000000009886072

(C-4171)
Handle

• Removing drive pinion front bearing outer 

race

• Removing drive pinion rear bearing outer 

race

(D-103)
Remover

Removing drive pinion front bearing outer 
race

(C-4307)
Remover

Removing drive pinion rear bearing outer 
race

Tool number
(Kent-Moore No.)
Tool name

Description

LDIA0134E

LDIA0135E

LDIA0135E

(Kent-Moore No.)
Tool name

Description

(SP8P)
Slide hammer

• Removing front oil seal
• Removing side oil seal

Power tool

Loosening nuts, screws and bolts

LDIA0133E

PIIB1407E

NOISE, VIBRATION AND HARSHNESS (NVH) TROUBLESHOOTING

DLN-161

< SYMPTOM DIAGNOSIS >

[FRONT FINAL DRIVE: M205]

C

E

F

G

H

I

J

K

L

M

A

B

DLN

N

O

P

SYMPTOM DIAGNOSIS

NOISE, VIBRATION AND HARSHNESS (NVH) TROUBLESHOOTING

NVH Troubleshooting Chart

INFOID:0000000009886073

Use the chart below to help you find the cause of the symptom. If necessary, repair or replace these parts.

×: Applicable

Reference page

DL

N-16

9,

 "Di

sa

sse

mb

ly

 an

d Ass

e

m

b

ly"

DL

N-16

9,

 "Di

sa

sse

mb

ly

 an

d Ass

e

m

b

ly"

DL

N-16

9,

 "Di

sa

sse

mb

ly

 an

d Ass

e

m

b

ly"

DL

N-16

9,

 "Di

sa

sse

mb

ly

 an

d Ass

e

m

b

ly"

DL

N-16

9,

 "Di

sa

sse

mb

ly

 an

d Ass

e

m

b

ly"

DL

N-16

2, "Che

ck

in

Di

ffere

nti

al Ge

ar Oi

l"

DL

N-12

8, 

"NVH T

rou

bl

es

ho

ot

ing

 Cha

rt"

FAX-4

, "

N

V

H

 T

rou

bl

es

ho

oti

ng

 Cha

rt"

FSU-4

, "NVH T

roub

le

sh

oo

tin

g Ch

art

"

WT

-4

4,

 "NVH T

rou

bl

es

ho

ot

in

C

h

ar

t"

WT

-4

4,

 "NVH T

rou

bl

es

ho

ot

in

C

h

ar

t"

FSU-4

, "NVH T

roub

le

sh

oo

tin

g Ch

art

"

BR-5,

 "NVH T

rou

bl

es

ho

ot

in

g Cha

rt"

ST

-5

, "NV

H

 T

rou

ble

shoo

ting Cha

rt"

Possible cause and SUSPECTED PARTS

G

ea

r to

ot

h ro

ug

h

Ge

ar co

nt

act

 im

pro

p

er

To

o

th su

rfac

es

 wo

rn

Inc

o

rre

ct ba

ck

la

sh

Com

pani

on

 fl

an

ge

 ex

ce

ss

iv

run

ou

t

Ge

ar oi

l im

pro

p

er

PROPELLER S

H

AFT

FRONT A

XLE

FRONT S

U

S

PENSION

TI

RE

S

ROAD WHEE

L

DRIVE SHAFT

BRAKE

S

STE

E

RING

Symptom

Noise

×

×

×

×

×

×

×

×

×

×

×

×

×

×

DLN-162

< PERIODIC MAINTENANCE >

[FRONT FINAL DRIVE: M205]

DIFFERENTIAL GEAR OIL

PERIODIC MAINTENANCE

DIFFERENTIAL GEAR OIL

Changing Differential Gear Oil

INFOID:0000000009886074

DRAINING

1. Stop the engine.
2. Remove the drain plug from the front final drive assembly to drain the differential gear oil.
3. Install the drain plug with sealant applied on the threads to the front final drive assembly. Tighten drain

plug to the specified torque. Refer to 

DLN-169, "Disassembly and Assembly"

.

• Use High Performance Thread Sealant or equivalent. Refer to 

GI-21, "Recommended Chemical Prod-

ucts and Sealants"

.

FILLING

1. Remove the filler plug from the front final drive assembly.
2. Fill the front final drive assembly with new differential gear oil

until the level reaches the specified level near the filler plug hole.

3. Install the filler plug with sealant applied on the threads to the

front final drive assembly. Tighten filler plug to the specified torque. Refer to 

DLN-169, "Disassembly and

Assembly"

.

• Use High Performance Thread Sealant or equivalent. Refer to 

GI-21, "Recommended Chemical Prod-

ucts and Sealants"

.

Checking Differential Gear Oil

INFOID:0000000009886075

DIFFERENTIAL GEAR OIL LEAKAGE AND LEVEL

1. Make sure that differential gear oil is not leaking from the front final drive assembly or around it.
2. Check the differential gear oil level from the filler plug hole as

shown.

CAUTION:

Do not start engine while checking differential gear oil level.

3. Install the filler plug with sealant applied on the threads to the

front final drive assembly. Tighten filler plug to the specified

torque. Refer to 

DLN-169, "Disassembly and Assembly"

.

• Use High Performance Thread Sealant or equivalent. Refer to

GI-21, "Recommended Chemical Products and Sealants"

.

Differential gear oil 
grade and capacity

: Refer to 

MA-15, "FOR 

NORTH AMERICA : Fluids 
and Lubricants"

 (United 

States and Canada) 

MA-16, 

"FOR MEXICO : Fluids and 
Lubricants"

 (Mexico).

LDIA0176E

LDIA0176E

SIDE OIL SEAL

DLN-163

< REMOVAL AND INSTALLATION >

[FRONT FINAL DRIVE: M205]

C

E

F

G

H

I

J

K

L

M

A

B

DLN

N

O

P

REMOVAL AND INSTALLATION

SIDE OIL SEAL

Removal and Installation

INFOID:0000000009886076

REMOVAL

1. Remove the front final drive assembly. Refer to 

DLN-167, "Removal and Installation"

.

2. Remove the differential side shaft and differential side flange

using suitable tool.

3. Place a small hole in the side oil seal case using suitable tool.

4. Remove the side oil seal using suitable tool as shown.

INSTALLATION

1. Apply multi-purpose grease to the lips of the new side oil seal. Then drive the new side oil seal in evenly to

the gear carrier using suitable tool.

CAUTION:

• Do not reuse side oil seal.

• Do not incline the new side oil seal when installing.

• Apply multi-purpose grease to the lips of the new side oil seal.

2. Installation of the remaining components is in the reverse order of removal.

CAUTION:

Check the differential gear oil level after installation. Refer to 

DLN-162

.

BDIA0006E

LDIA0129E

LDIA0130E


Content   ..  145  146  147  148   ..