Nissan Titan A60. Manual - part 528
EXT-18
< REMOVAL AND INSTALLATION >
REAR BUMPER
REAR BUMPER
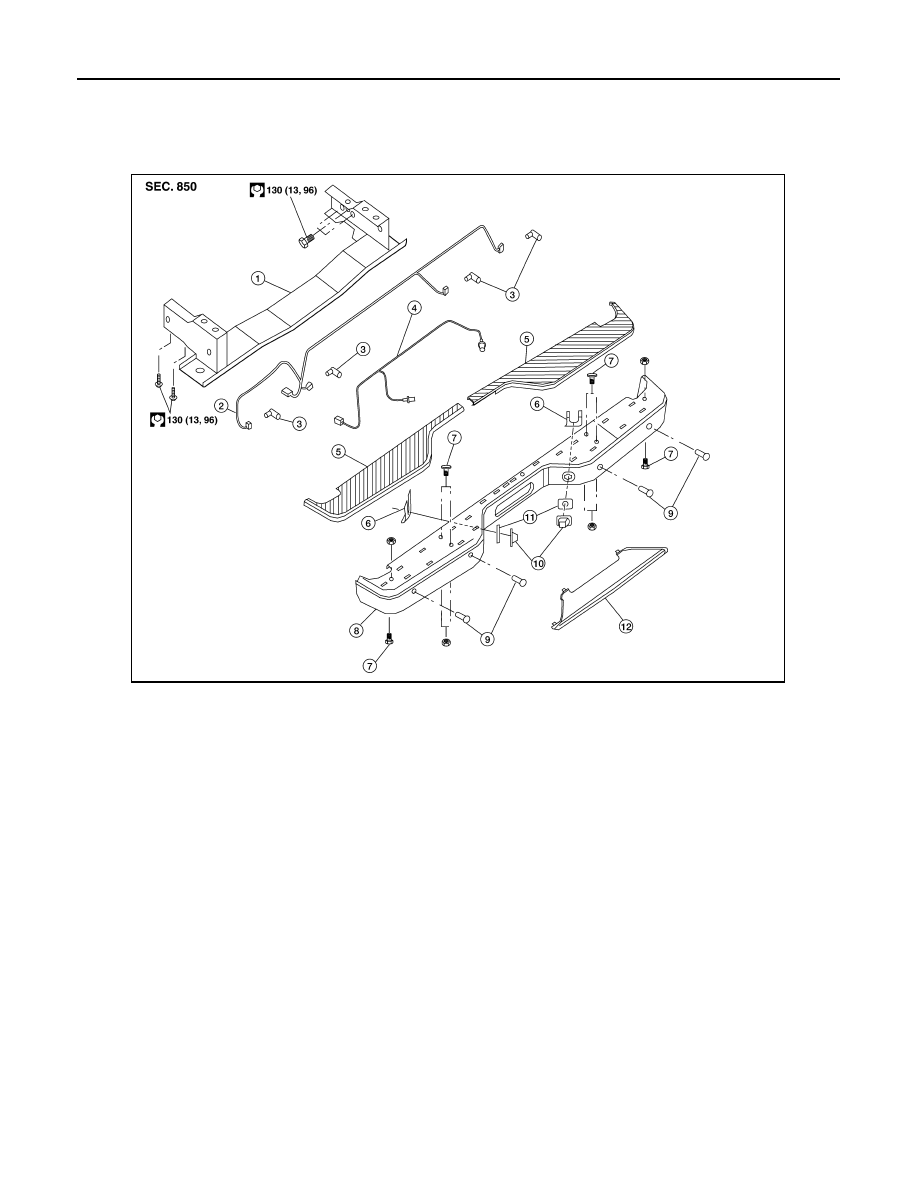
Removal and Installation
INFOID:0000000006163336
REMOVAL
1. Disconnect the sonar sensor harness connector, if equipped.
• Disconnect the sonar sensors from retainers.
2. Disconnect the license lamp harness.
3. Remove the clips from the license lamps and remove lamps.
4. Release the clips and remove the upper step pads.
5. Remove the rear bumper reinforcement bolts and remove the rear bumper.
6. Disconnect the harness clips from the black steel bumper.
7. Remove the sonar sensor retainers from the rear bumper, if equipped.
8. Remove the sonar sensors and harness from the rear bumper, if equipped.
• Disconnect the sonar sensors from harness.
9. Remove the license lamp harness from the rear bumper.
INSTALLATION
Installation is in the reverse order of removal.
• Apply sealant to clips securing upper step pad during installation.
1.
Rear bumper reinforcement
2.
Sonar sensor harness (if equipped)
3.
Sonar sensor (if equipped)
4.
License lamp harness
5.
Upper step pad
6.
License lamp clip
7.
Carriage bolt
8.
Rear bumper
9.
Sonar sensor retainer (if equipped)
10. License lamp
11. License lamp washer
12. Lower step pad
AWKIA1596GB