Nissan Quest E52. Manual - part 811
LUGGAGE FLOOR TRIM
INT-43
< REMOVAL AND INSTALLATION >
C
D
E
F
G
H
I
K
L
M
A
B
INT
N
O
P
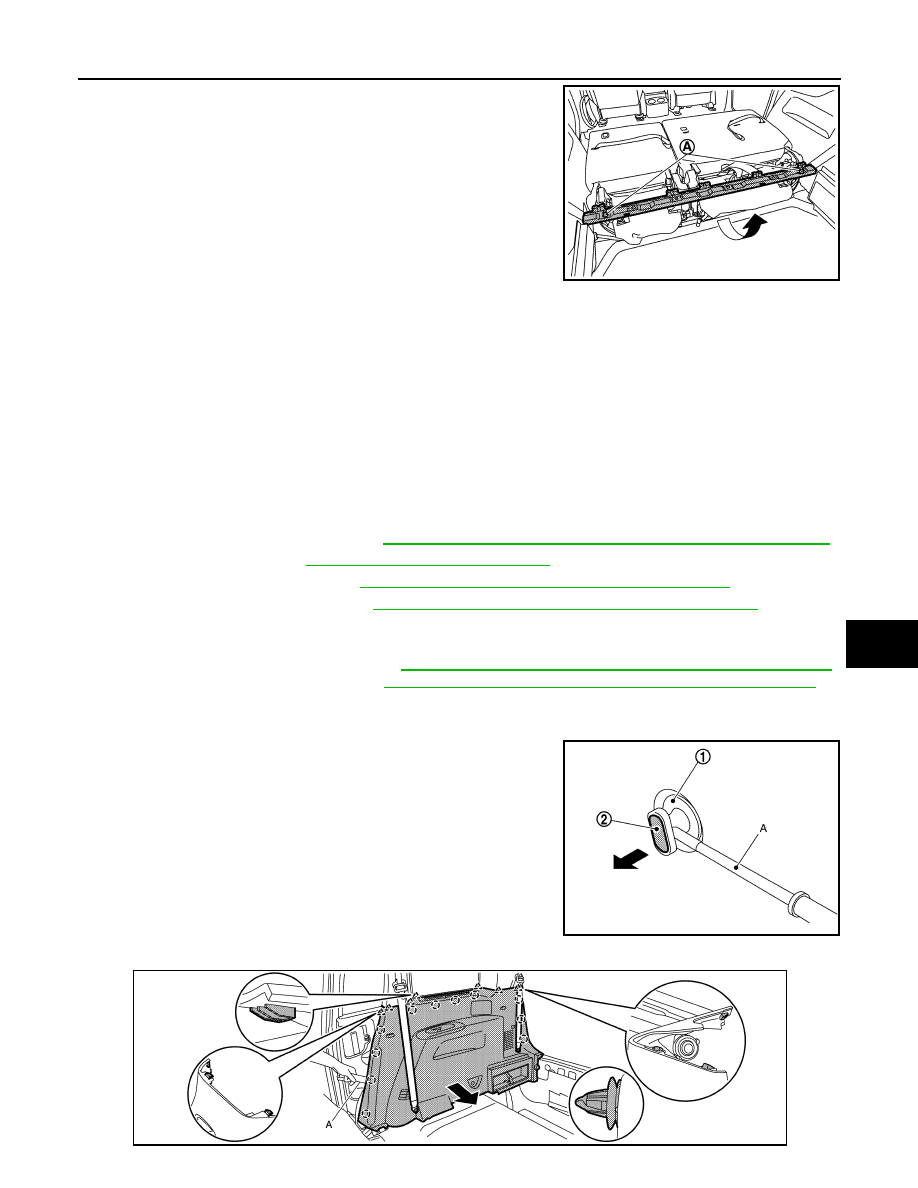
2.
Remove luggage floor front bracket fixing bolts (A), and then
remove luggage floor front bracket.
INSTALLATION
Install in the reverse order of removal.
LUGGAGE SIDE LOWER FINISHER
LUGGAGE SIDE LOWER FINISHER : Removal and Installation
INFOID:0000000009650302
CAUTION:
• When removing, always use a remover tool that is made of plastic to prevent damage to the parts.
• Never damage the body.
• Be careful not to damage when removing or installing, because opening portion of third roll sun-
shade is fragile and clips are damaged easily.
REMOVAL
1.
Remove tailgate kicking plate. Refer to
INT-40, "TAILGATE KICKING PLATE : Removal and Installation"
.
2.
Remove third seat. Refer to
SE-125, "Removal and Installation"
.
3.
Remove rear kicking plate. Refer to
INT-22, "KICKING PLATE : Removal and Installation"
4.
Remove rear body side welt. Refer to
INT-23, "BODY SIDE WELT : Removal and Installation"
5.
Slide second seat to the fully forward position. Tilt seatback forward.
6.
Remove second seat belt and third seat belt outer anchor.
• Second seat belt outer anchor: Refer to
SB-11, "SEAT BELT RETRACTOR : Removal and Installation"
.
• Third seat belt outer anchor: Refer to
SB-16, "SEAT BELT RETRACTOR : Removal and Installation"
.
7.
Remove luggage side lid and remove tool.
8.
Remove net hook.
a.
Insert a remover tool (A) into opening of net hook (1), and then
push out hook pin (2).
b.
Remove net hook.
9.
Disengage luggage side lower finisher fixing clips and pawls using a remover tool (A).
JMJIA6236ZZ
JMJIA4965ZZ
JMJIA6237ZZ