Nissan Quest E52. Manual - part 660
REAR BUMPER
EXT-15
< REMOVAL AND INSTALLATION >
C
D
E
F
G
H
I
J
L
M
A
B
EXT
N
O
P
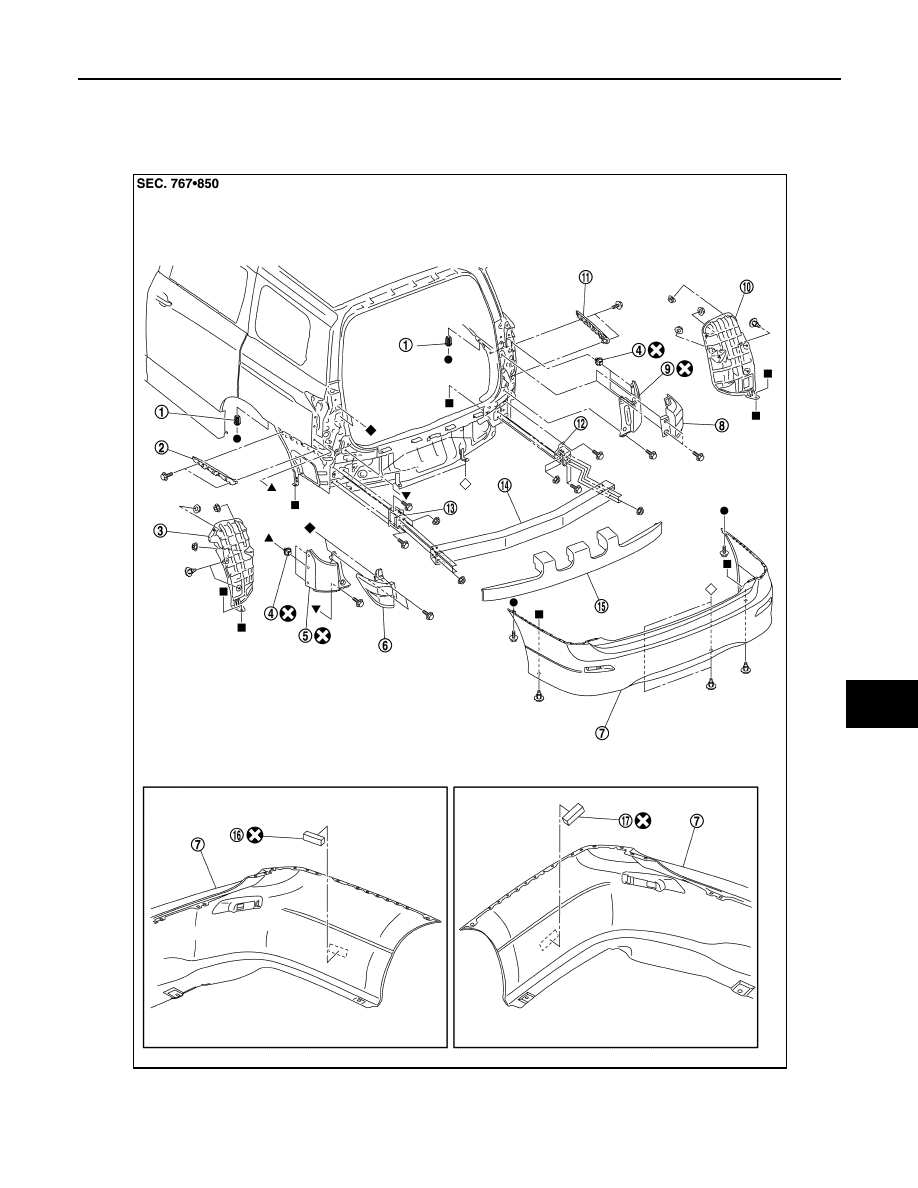
REAR BUMPER
Exploded View
INFOID:0000000009650488
1.
Screw grommet
2.
Bumper side bracket LH
3.
Rear bumper closing LH
4.
Clip
5.
Sight shield assembly LH
6.
Rear combination lamp assembly LH
7.
Bumper fascia assembly
8.
Rear combination lamp assembly RH 9.
Sight shield assembly RH
JMKIA8245ZZ