Nissan Rogue. Manual - part 381
DLK-366
< REMOVAL AND INSTALLATION >
[WITHOUT INTELLIGENT KEY SYSTEM]
FRONT FENDER
FRONT FENDER
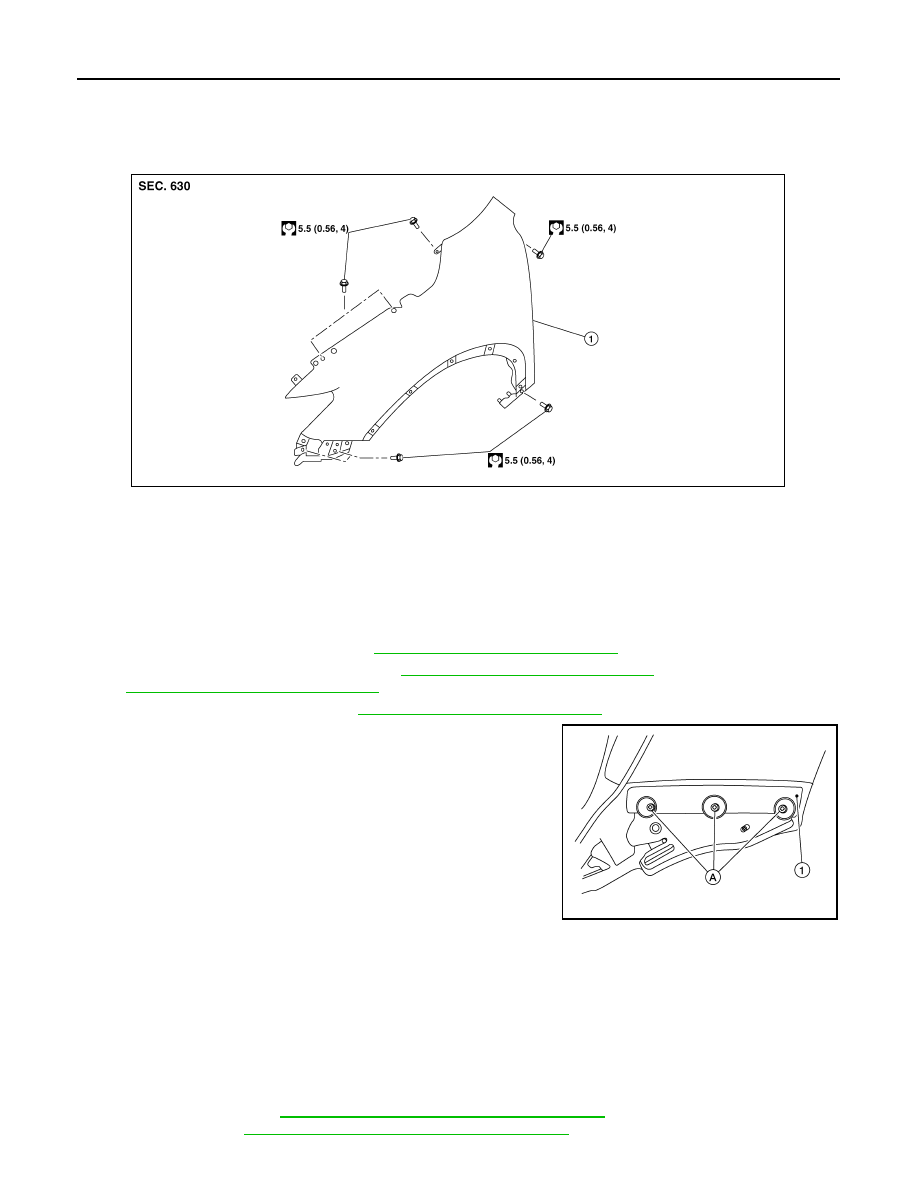
Exploded View
INFOID:0000000011279141
Removal and Installation
INFOID:0000000011279142
CAUTION:
Use a shop cloths to protect the body from being damaged during removal and installation.
REMOVAL
1. Remove front bumper fascia. Refer to
EXT-17, "Removal and Installation"
.
2. Remove front combination lamp. Refer to
EXL-119, "Removal and Installation"
(HALOGEN HEADLAMP)
EXL-266, "Removal and Installation"
. (LED HEADLAMP).
3. Remove center mudguard. Refer to
EXT-43, "Removal and Installation"
.
4. Remove screws (A) and front fender bracket (1).
5. Remove bolts and front fender.
CAUTION:
Use care when removing the front fender. The front fender baffle foam adheres the front fender to
the body side outer. Carefully release the baffle foam or damage to the front fender may occur.
INSTALLATION
Installation is in the reverse order of removal.
CAUTION:
• After installation apply touch up paint (body color) to the head of front fender bolts.
• After installation, adjust the following components as necessary:
- Hood assembly: Refer to
DLK-362, "HOOD ASSEMBLY : Adjustment"
.
- Front door: Refer to
DLK-369, "DOOR ASSEMBLY : Adjustment"
1.
Front fender
AWKIA2926ZZ
ALKIA3354ZZ
2015 Rogue NAM