Content .. 1108 1109 1110 1111 ..
Nissan Rogue. Manual - part 1110
SIDE AIR BAG (SATELLITE) SENSOR
SR-23
< REMOVAL AND INSTALLATION >
C
D
E
F
G
I
J
K
L
M
A
B
SR
N
O
P
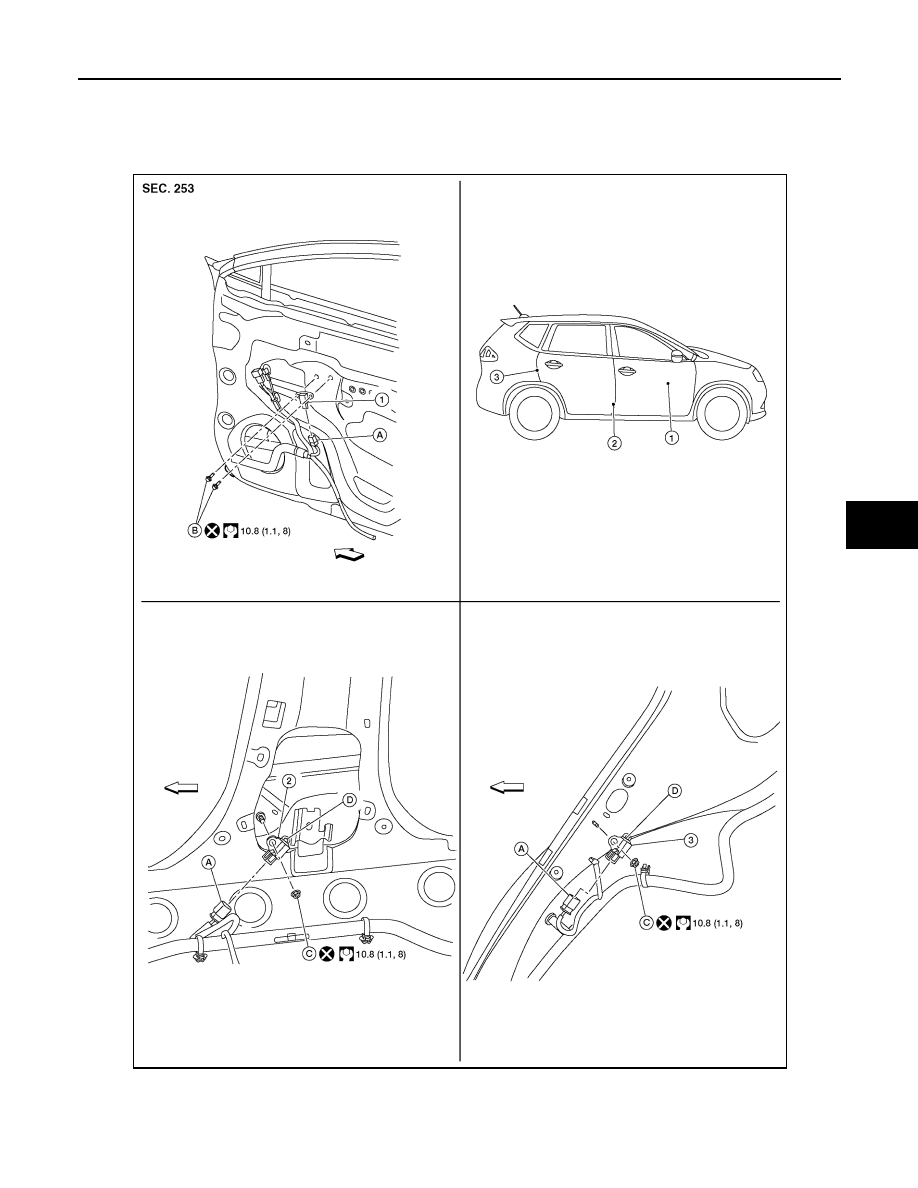
SIDE AIR BAG (SATELLITE) SENSOR
Exploded View
INFOID:0000000011279765
1.
Front door satellite sensor
2.
Front side air bag satellite sensor 3.
Rear side satellite sensor
ALHIA0349ZZ