Nissan Rogue. Manual - part 52
AV-200
< REMOVAL AND INSTALLATION >
[NAVIGATION WITHOUT BOSE]
AV CONTROL UNIT
REMOVAL AND INSTALLATION
AV CONTROL UNIT
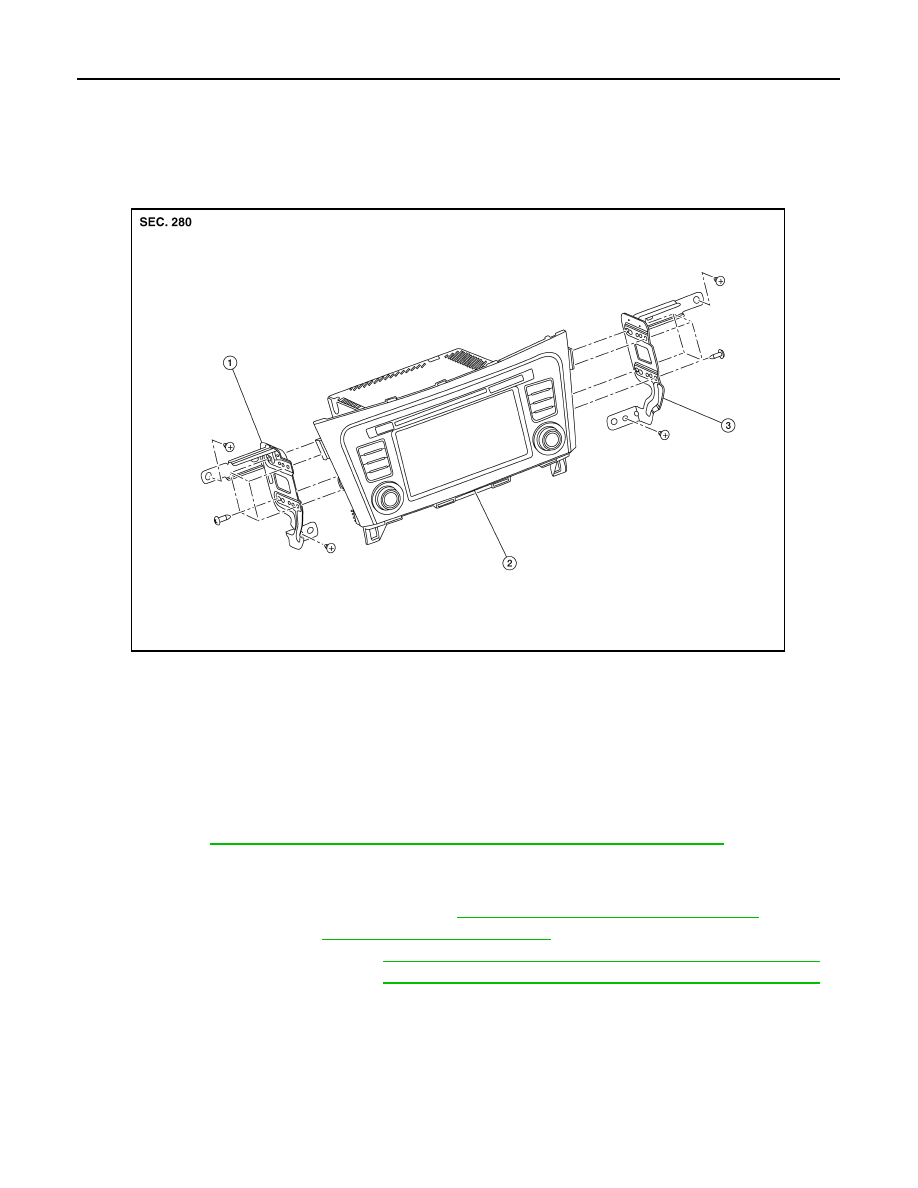
Exploded View
INFOID:0000000011276882
Removal and Installation
INFOID:0000000011276883
REMOVAL
CAUTION:
• Before disconnecting the AV control unit and battery terminals, turn the ignition switch OFF and wait
at least 30 seconds.
• Before replacing AV control unit, perform “READ CONFIGURATION” to save current vehicle specifi-
cation. Refer to
AV-132, "CONFIGURATION (AV CONTROL UNIT) : Configuration List"
NOTE:
After the ignition switch is turned OFF, the AV control unit continues operating for approximately 30 seconds.
Therefore, data corruption may occur if battery voltage is cut off within 30 seconds.
1. Disconnect the negative battery terminal. Refer to
PG-78, "Removal and Installation (Battery)"
2. Remove cluster lid C. Refer to
IP-22, "Removal and Installation"
3. Remove instrument finisher B. Refer to
IP-16, "INSTRUMENT FINISHER B : Removal and Installation"
.
4. Remove instrument finisher E. Refer to
IP-16, "INSTRUMENT FINISHER E : Removal and Installation"
.
5. Remove the AV control unit screws, then pull out the AV control unit.
6. Disconnect the harness connectors from the AV control unit and remove.
7. Remove the AV control unit bracket (LH/RH) screws and the AV control unit brackets (LH/RH) (if neces-
sary).
INSTALLATION
Installation is in the reverse order of removal.
CAUTION:
1.
AV control unit bracket (LH)
2.
AV control unit
3.
AV control unit bracket (RH)
AWNIA3339ZZ