Nissan Sentra. Manual - part 629
ENGINE MAINTENANCE
MA-19
< PERIODIC MAINTENANCE >
C
D
E
F
G
H
I
J
K
L
M
B
MA
N
O
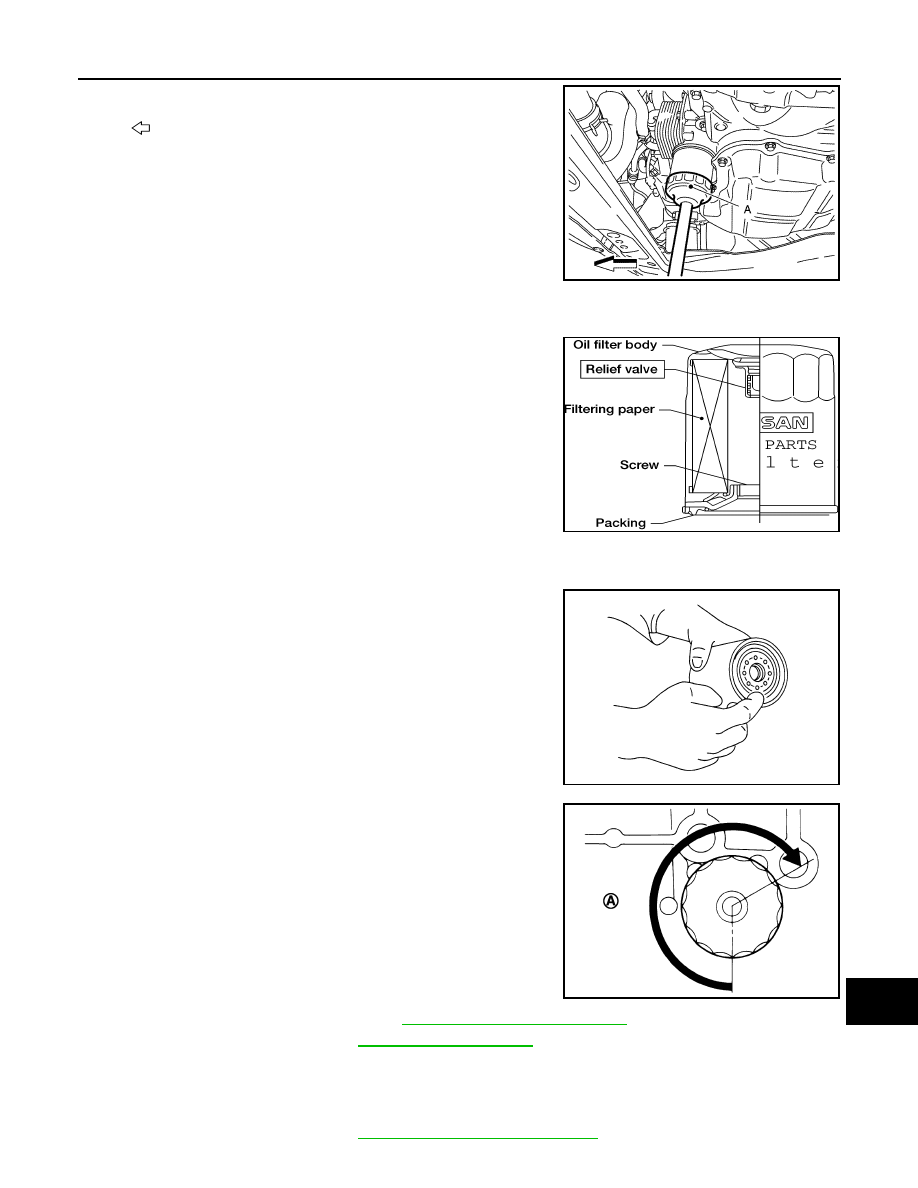
A
3. Remove the oil filter using Tool (A) as shown.
WARNING:
Be careful not to burn yourself, as the engine oil may be
hot.
CAUTION:
• When removing, prepare a shop cloth to absorb any oil
leaks or spills.
• Do not allow engine oil to adhere to the drive belts.
• Completely wipe off any oil that adheres to the engine and the vehicle.
• The oil filter is provided with a relief valve. Use a Genuine
NISSAN oil filter or equivalent.
INSTALLATION
1. Remove foreign materials adhering to the oil filter installation surface.
2. Apply new engine oil to the oil seal contact surface of new oil fil-
ter.
3. Screw oil filter manually until it touches the installation surface,
then tighten it by 2/3 turn (A), or tighten to specification.
4. Refill engine with new engine oil. Refer to
MA-18, "ENGINE OIL : Refilling"
.
5. Install engine under cover. Refer to
.
OIL FILTER : Inspection
INFOID:0000000009756190
INSPECTION AFTER INSTALLATION
1. Check the engine oil level. Refer to
MA-17, "ENGINE OIL : Inspection"
.
: Front
Tool number
: KV10115801 (J-38956)
JPBIA4450ZZ
ALC094
SMA010
Oil filter
: 18.0 N·m (1.8 kg-m, 13 ft-lb)
Tool number
: KV10115801 (J-38956)
JPBIA0077ZZ