Nissan Sentra. Manual - part 534
HA-30
< REMOVAL AND INSTALLATION >
COMPRESSOR
REMOVAL AND INSTALLATION
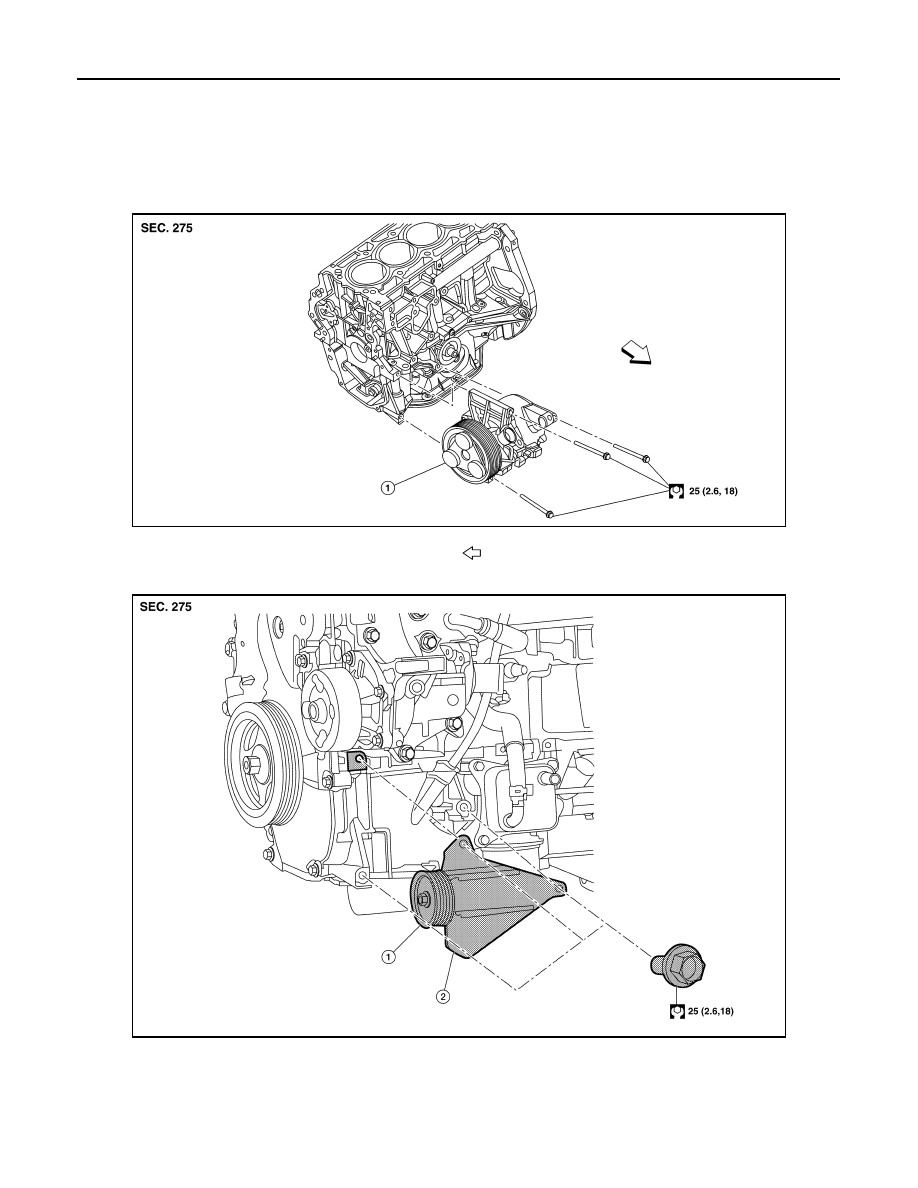
COMPRESSOR
Exploded View
INFOID:0000000009756307
WITH AIR CONDITIONING
WITHOUT AIR CONDITIONING
COMPRESSOR
AWBIA1913ZZ
1.
Compressor
Front
ALIIA0701ZZ
1.
A/C idler pulley
2.
A/C idler pulley bracket