Nissan Sentra. Manual - part 491
EXT-32
< REMOVAL AND INSTALLATION >
ROOF SIDE MOLDING
ROOF SIDE MOLDING
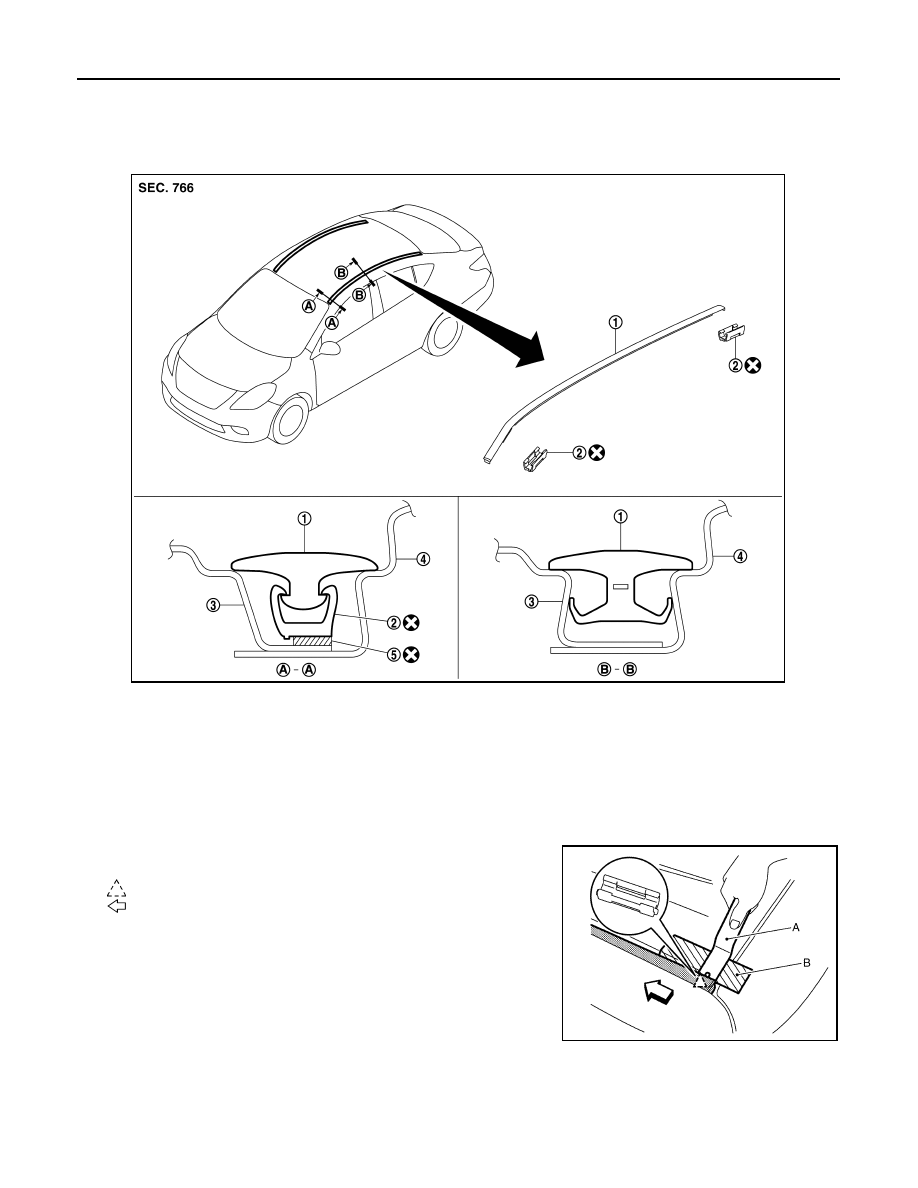
Exploded View
INFOID:0000000009758049
Removal and Installation
INFOID:0000000009758050
REMOVAL
ROOF SIDE MOLDING
1. Release roof side molding rear side clip, using a suitable tool
(A).
: Clip
: Front
CAUTION:
Apply protective tape (B) on body to protect the painted
surface from damage.
1. Roof side molding
2. Roof side molding clip
3. Roof panel
4. Body side outer panel
5. Adhesive tape
JMKIB0368ZZ
AWKIA2121ZZ