Nissan Sentra. Manual - part 482
FRONT COMBINATION LAMP
EXL-131
< UNIT DISASSEMBLY AND ASSEMBLY >
C
D
E
F
G
H
I
J
K
M
A
B
EXL
N
O
P
UNIT DISASSEMBLY AND ASSEMBLY
FRONT COMBINATION LAMP
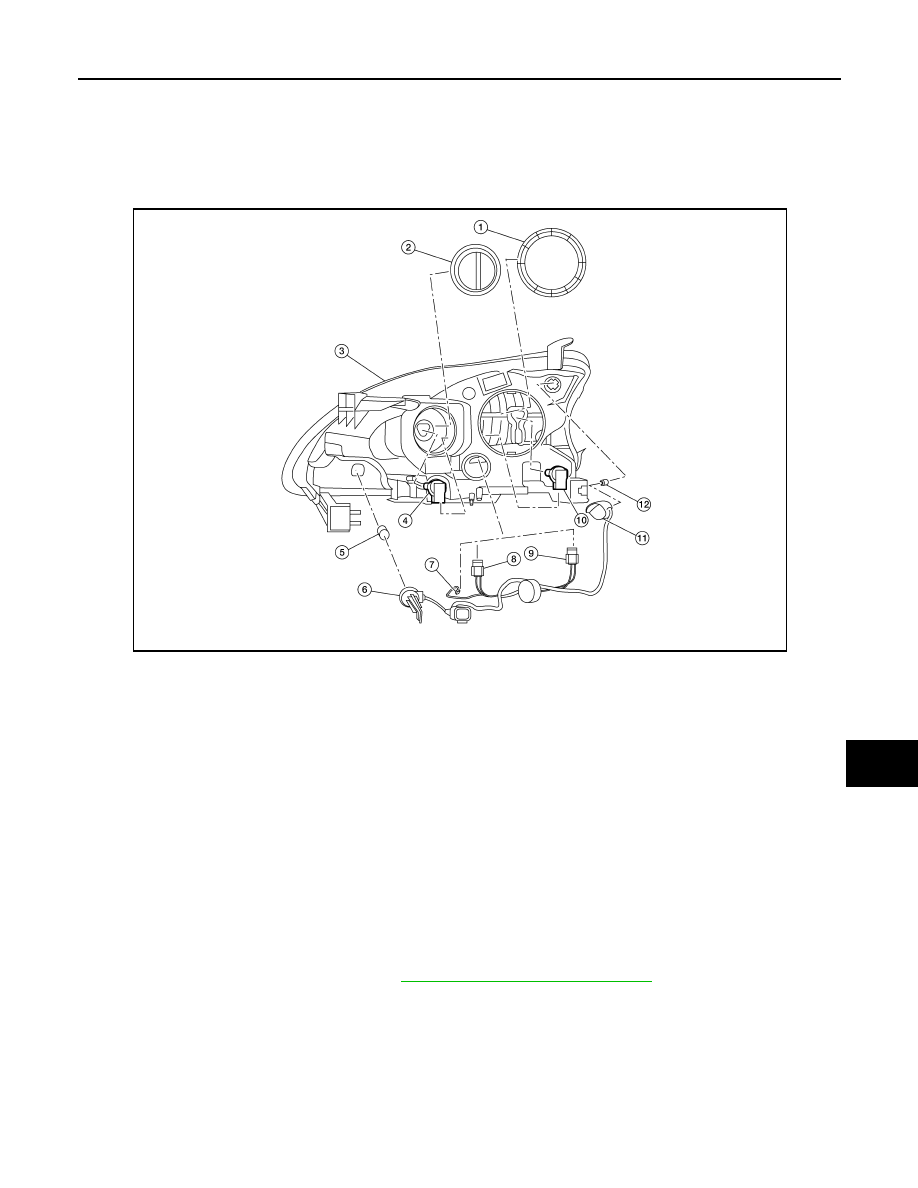
Exploded View
INFOID:0000000009757560
Disassembly and Assembly
INFOID:0000000009757561
DISSASSEMBLY
WARNING:
Do not touch bulb while it is lit or right after being turned off. Burning may result.
CAUTION:
• Do not touch glass surface of the bulb with bare hands or allow oil or grease to get on it to prevent
damage to bulb.
• Do not leave the bulb out of the lamp reflector for a long time because dust, moisture, smoke, etc.
may affect the performance of the lamp.
1. Remove front combination lamp. Refer to
EXL-119, "Removal and Installation"
.
2. Rotate the covers counterclockwise and remove.
3. Rotate the halogen lamp bulb (low beam) counterclockwise and remove.
4. Disconnect the harness connector from the halogen lamp bulb (low beam) and remove.
5. Rotate the halogen lamp bulb (high beam) counterclockwise and remove.
6. Disconnect the harness connector from the halogen lamp bulb (high beam) and remove.
7. Rotate the side marker bulb socket counterclockwise and remove.
8. Remove the side marker bulb from the side marker bulb socket.
1.
Large cover (not serviceable)
2. Small cover (not serviceable)
3.
Front combination lamp
4.
Halogen lamp bulb (high beam)
5. Turn signal lamp bulb
6.
Turn signal lamp bulb socket
7.
LED harness connector
8. Halogen lamp bulb (high beam)
harness connector
9.
Halogen lamp bulb (low beam)
harness connector
10. Halogen lamp bulb (low beam)
11. Side marker lamp bulb socket
12. Side marker lamp bulb
ALLIA1203ZZ