Nissan Sentra. Manual - part 479
FRONT COMBINATION LAMP
EXL-119
< REMOVAL AND INSTALLATION >
C
D
E
F
G
H
I
J
K
M
A
B
EXL
N
O
P
REMOVAL AND INSTALLATION
FRONT COMBINATION LAMP
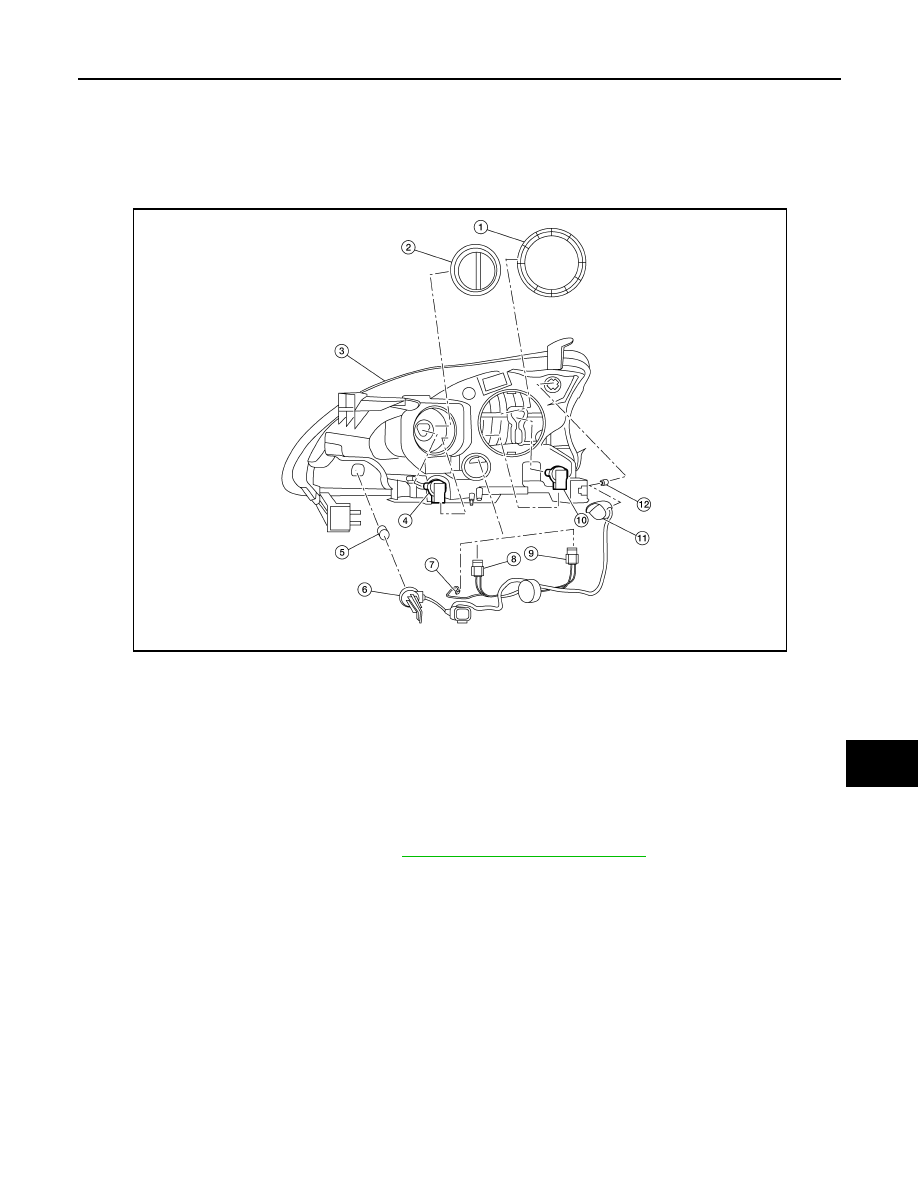
Exploded View
INFOID:0000000009757544
Removal and Installation
INFOID:0000000009757545
REMOVAL
1. Remove the front bumper fascia. Refer to
EXT-17, "Removal and Installation"
.
1.
Large cover (not serviceable)
2. Small cover (not serviceable)
3.
Front combination lamp
4.
Halogen lamp bulb (high beam)
5. Turn signal lamp bulb
6.
Turn signal lamp bulb socket
7.
LED harness connector
8. Halogen lamp bulb (high beam)
harness connector
9.
Halogen lamp bulb (low beam)
harness connector
10. Halogen lamp bulb (low beam)
11. Side marker lamp bulb socket
12. Side marker lamp bulb
ALLIA1203ZZ