Nissan Frontier D22. Manual - part 696
TIMING BELT
EM-91
[VG33E and VG33ER]
C
D
E
F
G
H
I
J
K
L
M
A
EM
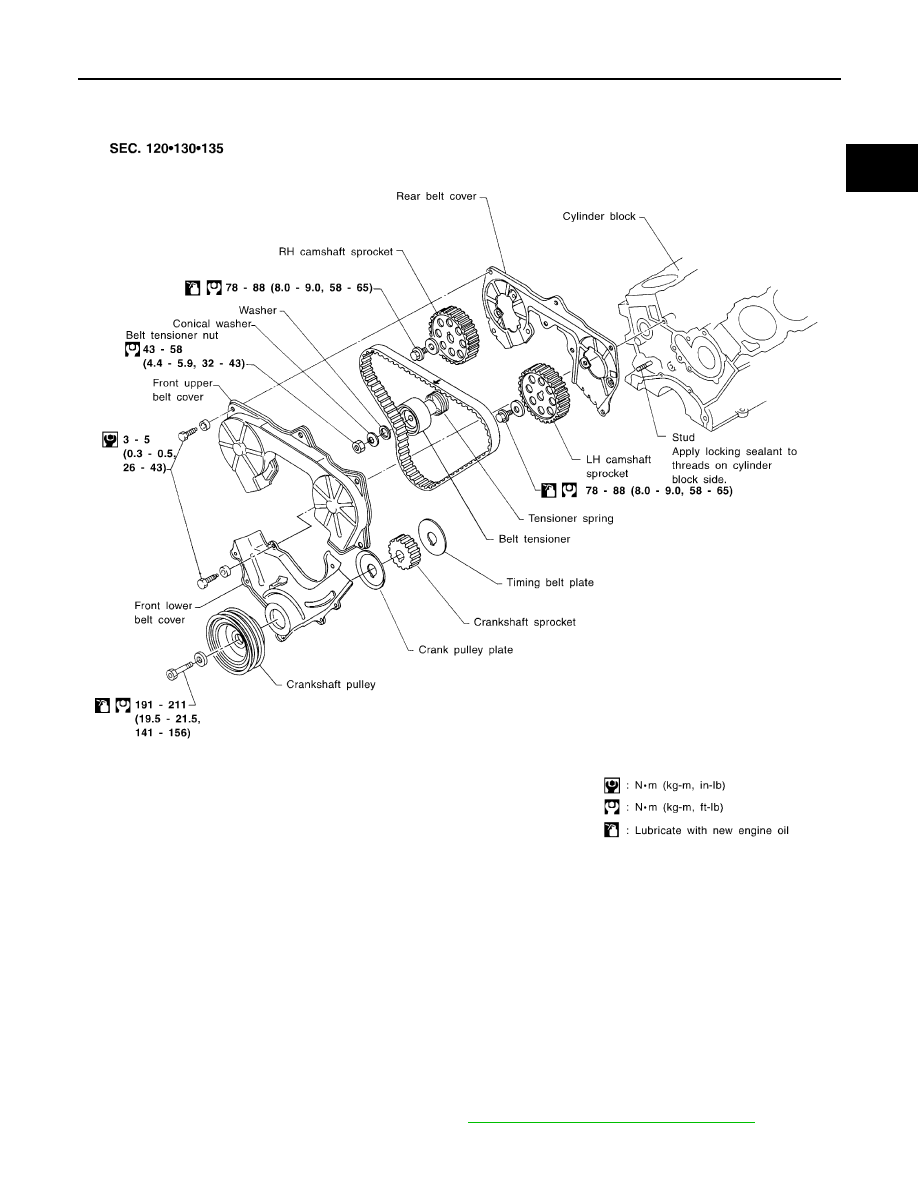
TIMING BELT
PFP:13028
Components
EBS00GTE
CAUTION:
●
Do not bend or twist timing belt.
●
After removing timing belt, do not turn crankshaft and camshaft separately because valves will
strike piston heads.
●
Make sure that timing belt, camshaft sprocket, crankshaft sprocket and belt tensioner are clean
and free from oil and water.
●
Installation should be carried out when engine is cold.
Removal
EBS00GTF
1.
Remove the engine under cover.
2.
Drain the engine coolant from the radiator. Refer to
MA-26, "DRAINING ENGINE COOLANT"
WBIA0101E