Nissan Frontier D22. Manual - part 678
TIMING CHAIN
EM-19
[KA24DE]
C
D
E
F
G
H
I
J
K
L
M
A
EM
TIMING CHAIN
PFP:13028
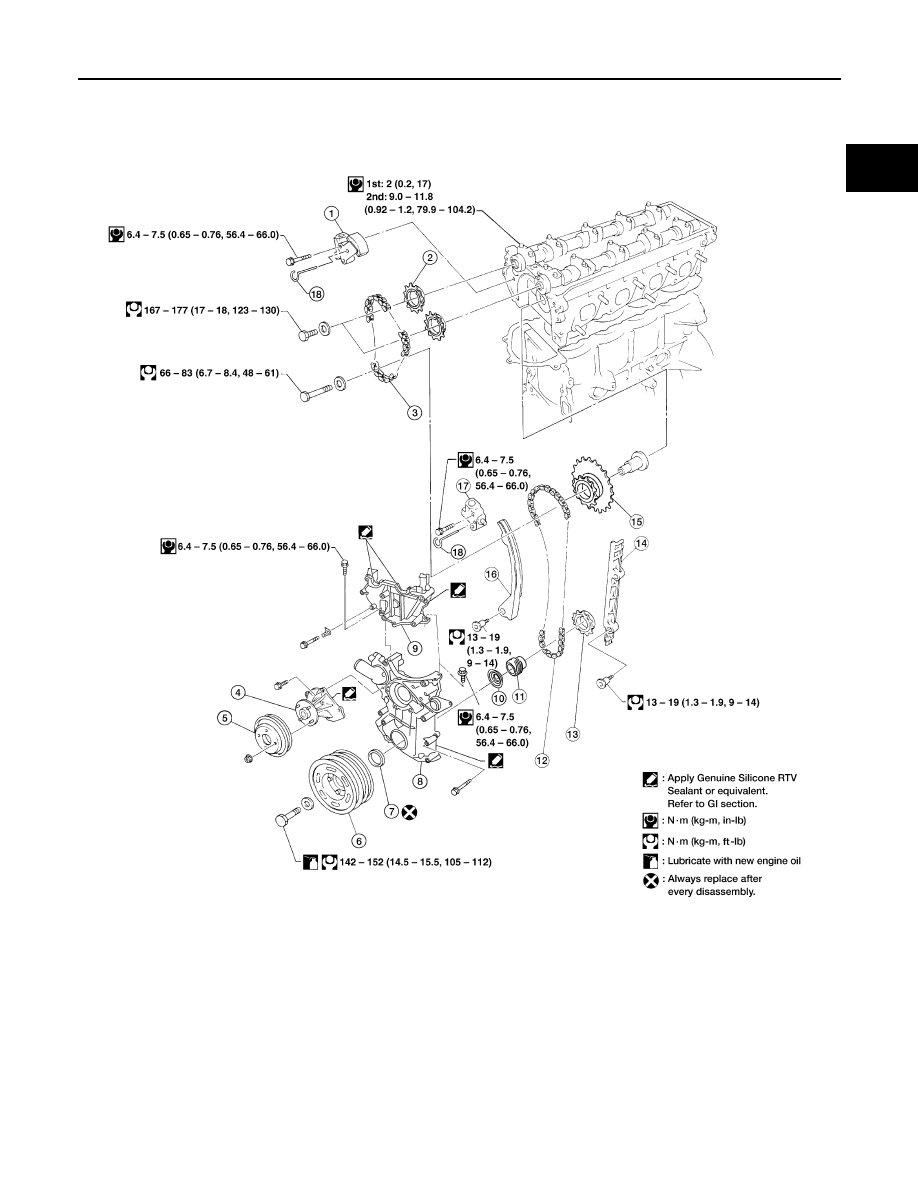
Components
EBS00GSA
1.
Timing chain tensioner (upper)
2.
Cam sprocket
3.
Timing chain (upper)
4.
Water pump
5.
Water pump pulley
6.
Crankshaft pulley
7.
Front oil seal
8.
Front cover
9.
Camshaft sprocket cover
10.
Oil slinger
11.
Oil pump drive gear
12.
Timing chain (lower)
13.
Crankshaft sprocket
14.
Chain guide
15.
Idler sprocket
16.
Chain tension arm
17.
Timing chain tensioner (lower)
18.
Suitable pin
WBIA0214E