Nissan March K13. Manual - part 422
LUGGAGE FLOOR TRIM
INT-31
< REMOVAL AND INSTALLATION >
C
D
E
F
G
H
I
K
L
M
A
B
INT
N
O
P
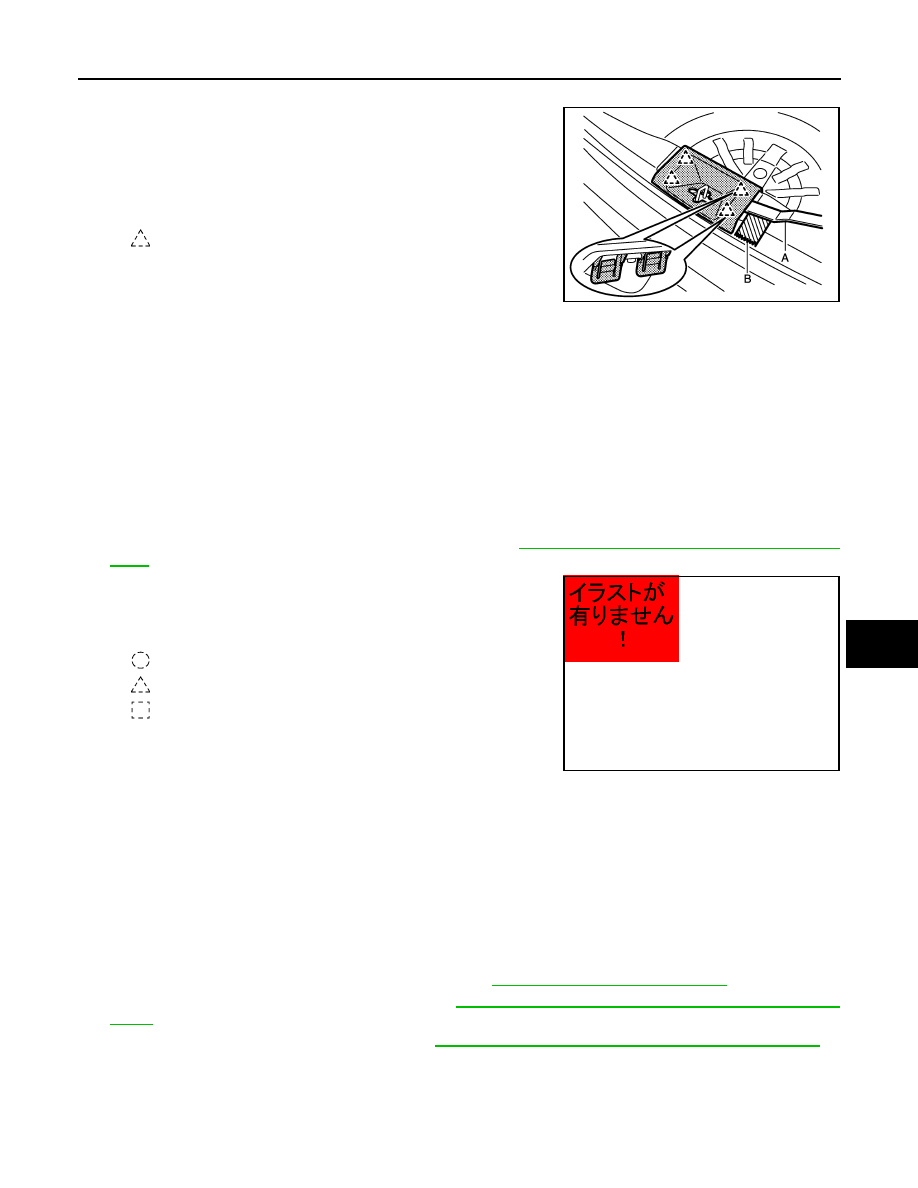
1.
Fully open back door.
2.
Insert a remover tool (A) between luggage rear plate and back
door panel to disengage fixing pawls, and then remove luggage
rear plate.
CAUTION:
Apply protective tape (B) to the back door panel to protect
from damage.
INSTALLATION
Note the following item, and install in the reverse order of removal.
CAUTION:
When installing, check that pawls are securely fitted into panel holes on body, and then press them in.
LUGGAGE SIDE UPPER FINISHER
LUGGAGE SIDE UPPER FINISHER : Removal and Installation
INFOID:0000000006059089
REMOVAL
1.
Remove rear parcel shelf finisher.
2.
Remove back door weather-strip.
3.
Remove rear seat belt outer anchor bolt (LH/RH). Refer to
SB-11, "SEAT BELT RETRACTOR : Exploded
.
4.
Insert a remover tool between luggage side upper finisher and
body panel to disengage clips, pawls and metal clips and then
remove luggage side upper finisher.
INSTALLATION
Note the following item, and install in the reverse order of removal.
CAUTION:
When installing, check that clips, pawls and metal clips are securely fitted into panel holes on body,
and then press them in.
LUGGAGE SIDE LOWER FRONT FINISHER
LUGGAGE SIDE LOWER FRONT FINISHER : Removal and Installation
INFOID:0000000006059090
REMOVAL
1.
Remove rear seat cushion and rear seatback. Refer to
SE-19, "Removal and Installation"
.
2.
Remove rear kicking plate inner (LH/RH). Refer to
INT-22, "KICKING PLATE INNER : Removal and Instal-
.
3.
Remove rear body side welt (LH/RH). Refer to
INT-23, "BODY SIDE WELT : Removal and Installation"
: Pawl
JMJIA4085ZZ
: Clip
: Pawl
: Metal clip
JMJIA4099ZZ