Almera Tino V10 (2003 year). Manual - part 138


  Index      Manuals     Almera Tino V10 (2003 year) - Service and Repair Manual


Search            copyright infringement  


Content      ..     136      137      138      139     ..


Almera Tino V10 (2003 year). Manual - part 138


GLOW CONTROL SYSTEM

EC-1227

[YD (WITH EURO-OBD)]

C

D

E

F

G

H

I

J

K

L

M

A

EC

GLOW CONTROL SYSTEM

PFP:25230

Description

EBS013HP

SYSTEM DESCRIPTION

When engine coolant temperature is more than approximately 80

°

C (176

°

F), the glow relay turns off.

When coolant temperature is lower than approximately 80

°

C (176

°

F):

Ignition switch ON
After ignition switch has turned to ON, the glow relay turns ON for a certain period of time in relation to
engine coolant temperature, allowing current to flow through glow plug.

Cranking
The glow relay turns ON, allowing current to flow through glow plug.

Starting
After engine has started, current continues to flow through glow plug (after-glow mode) for a certain period
in relation to engine coolant temperature.

The glow indicator lamp turns ON for a certain period of time in relation to engine coolant temperature at the
time glow relay is turned ON.

COMPONENT DESCRIPTION
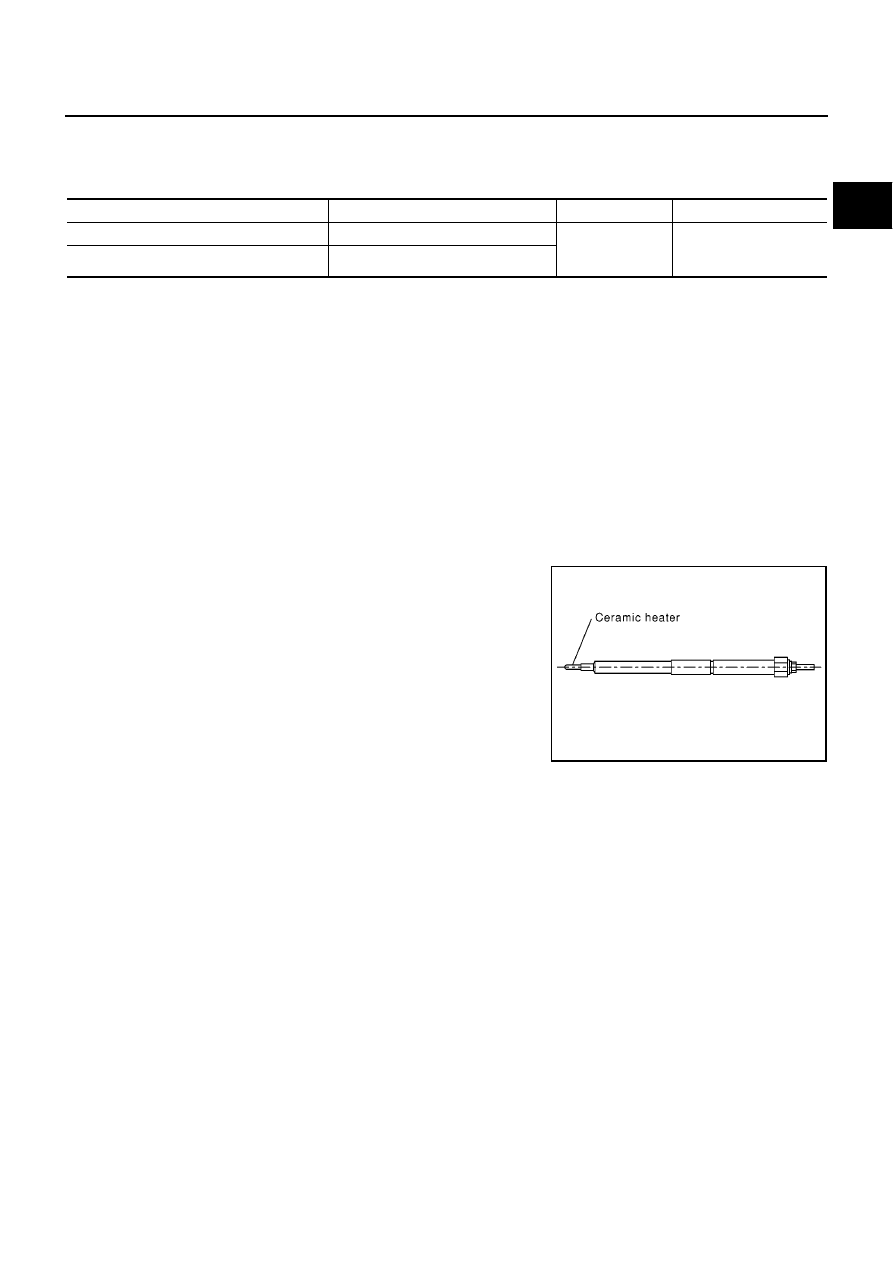
Glow Plug

The glow plug is provided with a ceramic heating element to obtain a
high-temperature resistance. It glows in response to a signal sent
from the ECM, allowing current to flow through the glow plug via the
glow relay.

Sensor

Input Signal to ECM

ECM Function

Actuator

Crankshaft position sensor

Engine speed

Glow control

Glow lamp
Glow relay
Glow plugs

Engine coolant temperature sensor

Engine coolant temperature

SEF376Y

EC-1228

[YD (WITH EURO-OBD)]

GLOW CONTROL SYSTEM

Wiring Diagram

EBS013HQ

YEC519A

GLOW CONTROL SYSTEM

EC-1229

[YD (WITH EURO-OBD)]

C

D

E

F

G

H

I

J

K

L

M

A

EC

Diagnostic Procedure

EBS013HR

1.

INSPECTION START

Check fuel level, fuel supplying system, starter motor, etc.
OK or NG

OK

>> GO TO 2.

NG

>> Correct.

2.

CHECK INSTALLATION

Check that glow plug nut and all glow plug connecting plate nuts are
installed properly.
OK or NG

OK

>> GO TO 3.

NG

>> Install properly.

3.

CHECK GLOW INDICATOR LAMP OPERATION

With CONSULT-II

1.

Turn ignition switch ON.

2.

Select “COOLAN TEMP/S” in “DATA MONITOR” mode with
CONSULT-II.

3.

Confirm that “COOLAN TEMP/S” indicates below 80

°

C (176

°

F).

If it indicates above 80

°

C (176

°

F), cool down engine.

4.

Turn ignition switch OFF, wait at least 10 seconds and then turn
ON.

5.

Make sure that glow indicator lamp is turned ON for 1.5 seconds
or more after turning ignition switch ON, and then glow indicator
lamp turned OFF.

Without CONSULT-II

1.

Turn ignition switch ON.

2.

Confirm that the voltage between ECM terminal 51 (engine cool-
ant temperature sensor signal) and ground is above 1.53V.
If it is below 1.53V, cool down engine.

3.

Turn ignition switch OFF, wait at least 10 seconds and then turn
ON.

4.

Make sure that glow indicator lamp is turned ON for 1.5 seconds
or more after turning ignition switch ON, and then glow indicator
lamp turned OFF.

OK or NG

OK

>> GO TO 4.

NG

>> GO TO 5.

MBIB0633E

SEF013Y

SEF006P

EC-1230

[YD (WITH EURO-OBD)]

GLOW CONTROL SYSTEM

4.

CHECK GLOW CONTROL SYSTEM OVERALL FUNCTION

With CONSULT-II

1.

Select “COOLAN TEMP/S” in “DATA MONITOR” mode with
CONSULT-II.

2.

Confirm that “COOLAN TEMP/S” indicates approximately 25

°

C

(77

°

F). If NG, cool down engine.

3.

Turn ignition switch OFF.

4.

Set voltmeter probe between glow plug and engine body.

5.

Turn ignition switch ON.

6.

Check the voltage between glow plug and engine body under
the following conditions.

Without CONSULT-II

1.

Confirm that the voltage between ECM terminal 51 (engine cool-
ant temperature sensor signal) and ground is above 3.62V.
If it is below 3.62V, cool down engine.

2.

Turn ignition switch OFF.

3.

Set voltmeter probe between glow plug and engine body.

4.

Turn ignition switch ON.

5.

Check the voltage between glow plug and engine body under
the following conditions.

OK or NG

OK

>> INSPECTION END

NG

>> GO TO 7.

5.

CHECK DTC

Check that DTC U1000 is not displayed.

Yes or No

Yes

>> Perform trouble diagnoses for DTC U1000, refer to

EC-1011, "DTC U1000 CAN COMMUNICA-

TION LINE"

.

No

>> GO TO 6.

SEF013Y

Conditions

Voltage

For 20 seconds after turning ignition switch ON

Battery voltage

More than 20 seconds after turning ignition switch ON

Approx. 0V

MBIB0632E

Conditions

Voltage

For 20 seconds after turning ignition switch ON

Battery voltage

More than 20 seconds after turning ignition switch ON

Approx. 0V

SEF006P

GLOW CONTROL SYSTEM

EC-1231

[YD (WITH EURO-OBD)]

C

D

E

F

G

H

I

J

K

L

M

A

EC

6.

CHECK COMBINATON METER OPERATION

Does combination meter operate normally?

Yes or No

Yes

>> GO TO 14.

No

>> Check warning lamps circuit. Refer to EL-115, “WARNING LAMPS”.

7.

CHECK GLOW RELAY POWER SUPPLY CIRCUIT

1.

Turn ignition switch OFF.

2.

Disconnect glow relay.

3.

Check voltage between glow relay terminals 1, 3 and ground
with CONSULT-II or tester.

OK or NG

OK

>> GO TO 9.

NG

>> GO TO 8.

8.

DETECT MALFUNCTIONING PART

Check the following.

60A fusible link

Harness for open or short between glow relay and battery

>> Repair harness or connectors.

9.

CHECK GLOW RELAY OUTPUT SIGNAL CIRCUIT FOR OPEN AND SHORT

1.

Disconnect ECM harness connector.

2.

Check harness continuity between ECM terminal 37 and glow relay terminal 2.
Refer to Wiring Diagram.

3.

Also check harness for short to ground and short to power.

OK or NG

OK

>> GO TO 11.

NG

>> GO TO 10.

MBIB0916E

Voltage: Battery voltage

PBIB1413E

Continuity should exist.

EC-1232

[YD (WITH EURO-OBD)]

GLOW CONTROL SYSTEM

10.

DETECT MALFUNCTIONING PART

Check the following.

Harness connectors F45, M71

Harness connectors E125, M82 (LHD models)

Harness connectors E145, M80 (RHD models)

Harness for open or short between glow relay and ECM

>> Repair open circuit or short to ground or short to power in harness or connectors.

11.

CHECK HARNESS CONTINUITY BETWEEN GLOW RELAY AND GLOW PLUG FOR OPEN AND

SHORT

1.

Disconnect glow plug harness connector.

2.

Check harness continuity between glow relay terminal 5 and glow plug harness connector.
Refer to Wiring Diagram.

3.

Also check harness for short to ground and short to power.

OK or NG

OK

>> GO TO 12.

NG

>> Repair open circuit or short to ground or short to power in harness or connectors.

12.

CHECK GLOW RELAY

Refer to

EC-1233, "Component Inspection"

.

OK or NG

OK

>> GO TO 13.

NG

>> Replace glow relay.

13.

CHECK GLOW PLUG

Refer to

EC-1233, "Component Inspection"

.

OK or NG

OK

>> GO TO 14.

NG

>> Replace glow plug.

14.

CHECK INTERMITTENT INCIDENT

Refer to

EC-1002, "TROUBLE DIAGNOSIS FOR INTERMITTENT INCIDENT"

.

>> INSPECTION END

Continuity should exist.

GLOW CONTROL SYSTEM

EC-1233

[YD (WITH EURO-OBD)]

C

D

E

F

G

H

I

J

K

L

M

A

EC

Component Inspection

EBS013HS

GLOW RELAY

Check continuity between glow relay terminals 3 and 5 under the fol-
lowing conditions.

Operation takes less than 1 second.

GLOW PLUG

1.

Remove glow plug connecting plate.

2.

Check glow plug resistance.

NOTE:

Do not bump glow plug heating element. If it is bumped,
replace glow plug with a new one.

If glow plug is dropped from a height of 10 cm (3.94 in) or
higher, replace with a new one.

If glow plug installation hole is contaminated with car-
bon, remove it with a reamer or suitable tool.

Hand-tighten glow plug by turning it two or three times,
then tighten using a tool to specified torque.

Removal and Installation

EBS013HT

GLOW PLUG

Refer to

EM-142, "GLOW PLUG"

.

Conditions

Continuity

12V direct current supply between ter-
minals 1 and 2

Yes

No current supply

No

PBIB0428E

Resistance: Approximately 0.8

[at 25

°

C (77

°

F)]

: 20.1 N-m (2.1 kg-m, 15 ft-lb)

PBIB0429E

EC-1234

[YD (WITH EURO-OBD)]

BRAKE SWITCH

BRAKE SWITCH

PFP:25230

Description

EBS013HU

The stop lamp switch is installed to brake pedal bracket. The switch
senses brake pedal position and sends an ON-OFF signal to the
ECM. The ECM uses the signal to control the fuel injection control
system.

CONSULT-II Reference Value in Data Monitor Mode

EBS013HV

Specification data are reference values.

ECM Terminals and Reference Value

EBS013HW

Specification data are reference values and are measured between each terminal and ground.

CAUTION:

Do not use ECM ground terminals when measuring input/output voltage. Doing so may result in dam-
age to the ECM's transistor. Use a ground other than ECM terminals, such as the ground.

MBIB0903E

MONITOR ITEM

CONDITION

SPECIFICATION

BRAKE SW

Ignition switch: ON

Brake pedal: Fully released

OFF

Brake pedal: Slightly depressed

ON

TERMI-

NAL

NO.

WIRE

COLOR

ITEM

CONDITION

DATA

(DC Voltage)

100

R/G

Stop lamp switch

[Ignition switch ON]

Brake pedal: Fully released

Approximately 0V

[Ignition switch ON]

Brake pedal: Depressed

BATTERY VOLTAGE
(11 - 14V)

BRAKE SWITCH

EC-1235

[YD (WITH EURO-OBD)]

C

D

E

F

G

H

I

J

K

L

M

A

EC

Wiring Diagram

EBS013HX

YEC514A

EC-1236

[YD (WITH EURO-OBD)]

BRAKE SWITCH

Diagnostic Procedure

EBS013HY

1.

CHECK OVERALL FUNCTION

With CONSULT-II

1.

Turn ignition switch ON.

2.

Select “BRAKE SW” in “DATA MONITOR” mode with CON-
SULT-II.

3.

Check “BRAKE SW” signal under the following conditions.

Without CONSULT-II

Check voltage between ECM terminal 100 and ground under the fol-
lowing conditions.

OK or NG

OK

>> INSPECTION END

NG

>> GO TO 2.

2.

CHECK STOP LAMP SWITCH POWER SUPPLY CIRCUIT

1.

Turn ignition switch OFF.

2.

Disconnect stop lamp switch harness connector.

3.

Check voltage between stop lamp switch terminal 1 and ground
with CONSULT-II or tester.

OK or NG

OK

>> GO TO 4.

NG

>> GO TO 3.

Conditions

BRAKE SW

Brake pedal released

OFF

Brake pedal slightly depressed

ON

PBIB0472E

Condition

Voltage

Brake pedal released

Approximately 0V

Brake pedal slightly depressed

Battery voltage

MBIB1097E

MBIB0903E

Voltage: Battery voltage

PBIB0117E

BRAKE SWITCH

EC-1237

[YD (WITH EURO-OBD)]

C

D

E

F

G

H

I

J

K

L

M

A

EC

3.

DETECT MALFUNCTIONING PART

Check the following.

10A fuse

Fuse block (J/B) connector M2

Harness for open and short between stop lamp switch and battery

>> Repair open circuit or short to ground or short to power in harness or connectors.

4.

CHECK STOP LAMP SWITCH INPUT SIGNAL CIRCUIT FOR OPEN AND SHORT

1.

Disconnect ECM harness connector.

2.

Check harness continuity between ECM terminal 100 and stop lamp switch terminal 2. Refer to Wiring
Diagram.

3.

Also check harness for short to ground and short to power.

OK or NG

OK

>> GO TO 5.

NG

>> Repair open circuit or short to ground or short to power in harness or connectors.

5.

CHECK STOP LAMP SWITCH

Refer to

EC-1237, "Component Inspection"

.

OK or NG

OK

>> GO TO 6.

NG

>> Replace stop lamp switch.

6.

CHECK INTERMITTENT INCIDENT

Refer to

EC-1002, "TROUBLE DIAGNOSIS FOR INTERMITTENT INCIDENT"

.

>> INSPECTION END

Component Inspection

EBS013HZ

STOP LAMP SWITCH

1.

Disconnect stop lamp switch harness connector.

Continuity should exist.

MBIB0903E

EC-1238

[YD (WITH EURO-OBD)]

BRAKE SWITCH

2.

Check continuity between stop lamp switch terminals 1 and 2
under the following conditions.

If NG, adjust brake pedal installation, refer to BR-14, “BRAKE
PEDAL AND BRACKET”, and perform step 2 again.

Conditions

Continuity

Brake pedal fully released

Should not exist.

Brake pedal depressed

Should exist.

PBIB0118E

PNP SWITCH

EC-1239

[YD (WITH EURO-OBD)]

C

D

E

F

G

H

I

J

K

L

M

A

EC

PNP SWITCH

PFP:32006

Description

EBS013I0

When the gear position is in Neutral, park/neutral position is ON. ECM detects the position because the conti-
nuity of the line (the “ON” signal) exists.

CONSULT-II Reference Value in Data Monitor Mode

EBS013I1

Specification data are reference values.

ECM Terminals and Reference Value

EBS013I2

Specification data are reference values and are measured between each terminal and ground.

CAUTION:

Do not use ECM ground terminals when measuring input/output voltage. Doing so may result in dam-
age to the ECM's transistor. Use a ground other than ECM terminals, such as the ground.

MONITOR ITEM

CONDITION

SPECIFICATION

P/N POSI SW

Ignition switch: ON

Shift lever: Neutral position

ON

Except above

OFF

TERMI-

NAL

NO.

WIRE

COLOR

ITEM

CONDITION

DATA

(DC Voltage)

110

G/OR

Park/Neutral position
switch

[Ignition switch ON]

Gear position is Neutral

Approximately 0V

[Ignition switch ON]

Except the above gear position

BATTERY VOLTAGE
(11 - 14V)

EC-1240

[YD (WITH EURO-OBD)]

PNP SWITCH

Wiring Diagram

EBS013I3

YEC515A

PNP SWITCH

EC-1241

[YD (WITH EURO-OBD)]

C

D

E

F

G

H

I

J

K

L

M

A

EC

Diagnostic Procedure

EBS013I4

1.

CHECK OVERALL FUNCTION

With CONSULT-II

1.

Turn ignition switch ON.

2.

Select “P/N POSI SW” in “DATA MONITOR” mode with CON-
SULT-II.

3.

Check “P/N POSI SW” signal under the following conditions.

Without CONSULT-II

1.

Turn ignition switch ON.

2.

Check voltage between ECM terminal 110 and ground under the
following conditions.

OK or NG

OK

>> INSPECTION END

NG

>> GO TO 2.

2.

CHECK PNP SWITCH GROUND CIRCUIT FOR OPEN AND SHORT

1.

Turn ignition switch OFF.

2.

Disconnect park/neutral position (PNP) switch harness connec-
tor.

3.

Check harness continuity between PNP switch terminal 4
(YD22DDT engine models), 2 (YD22DDTi engine models) and
ground.
Refer to Wiring Diagram.

4.

Also check harness for short to power.

OK or NG

OK

>> GO TO 3.

NG

>> Repair open circuit or short to power in harness or connectors.

Shift lever position

P/N POSI SW

Neutral position

ON

Except the above position

OFF

SEF212Y

Shift lever position

Voltage

Neutral position

Approximately 0V

Except the above position

Battery voltage

PBIB1947E

Continuity should exist.

MBIB0873E

EC-1242

[YD (WITH EURO-OBD)]

PNP SWITCH

3.

CHECK PNP SWITCH INPUT SIGNAL CIRCUIT FOR OPEN AND SHORT

1.

Disconnect ECM harness connector.

2.

Check harness continuity between ECM terminal 110 and PNP switch terminal 2 (YD22DDT engine mod-
els), 1 (YD22DDTi engine models).
Refer to Wiring Diagram.

3.

Also check harness for short to ground and short to power.

OK or NG

OK

>> GO TO 5.

NG

>> GO TO 4.

4.

DETECT MALFUNCTIONING PART

Check the following.

Harness connectors M71, F45

Harness for open or short between PNP switch and ECM

>> Repair open circuit or short to ground or short to power in harness or connectors.

5.

CHECK PARK/NEUTRAL POSITION SWITCH

Refer to

MT-12, "POSITION SWITCH"

.

OK or NG

OK

>> GO TO 6.

NG

>> Replace park/neutral position switch.

6.

CHECK INTERMITTENT INCIDENT

Refer to

EC-1002, "TROUBLE DIAGNOSIS FOR INTERMITTENT INCIDENT"

.

>> INSPECTION END

Continuity should exist.


Content      ..     136      137      138      139     ..